Two Drawer End Tables Construction
Building in 3D 🔗
I make a lot of things. Most commonly code. I blog (maybe you’re aware, given you’re here). I build conference talks. Sometimes manifestos. Most of these live on the computer. Sometimes I need to step away and not look at a screen.
On occasion, I’ll build some piece of furniture we need in the house. Or some small accessory out of wood that I’ll use on my desk. This is one such time, and I decided to document it.
Similar to my recent posts on music I’m listening to, this isn’t directly related to software development. If you want to bail because of that, no judgement.
The Problem 🔗
There wasn’t really so much a problem. I recently built an end table for my office. I had extra drawer slides. I had some leftover wood. And I wanted to keep building. So I decided to build some similar tables. These would each have two drawers. That will give me more practice with drawers, given my past issues successfully making working drawers.
The Design 🔗
This design borrows heavily from the other table. It’s meant to be cohesive. The dimensions are a bit different. These tables are smaller. And they won’t have a shelf on the bottom. Instead, there’s the second drawer.
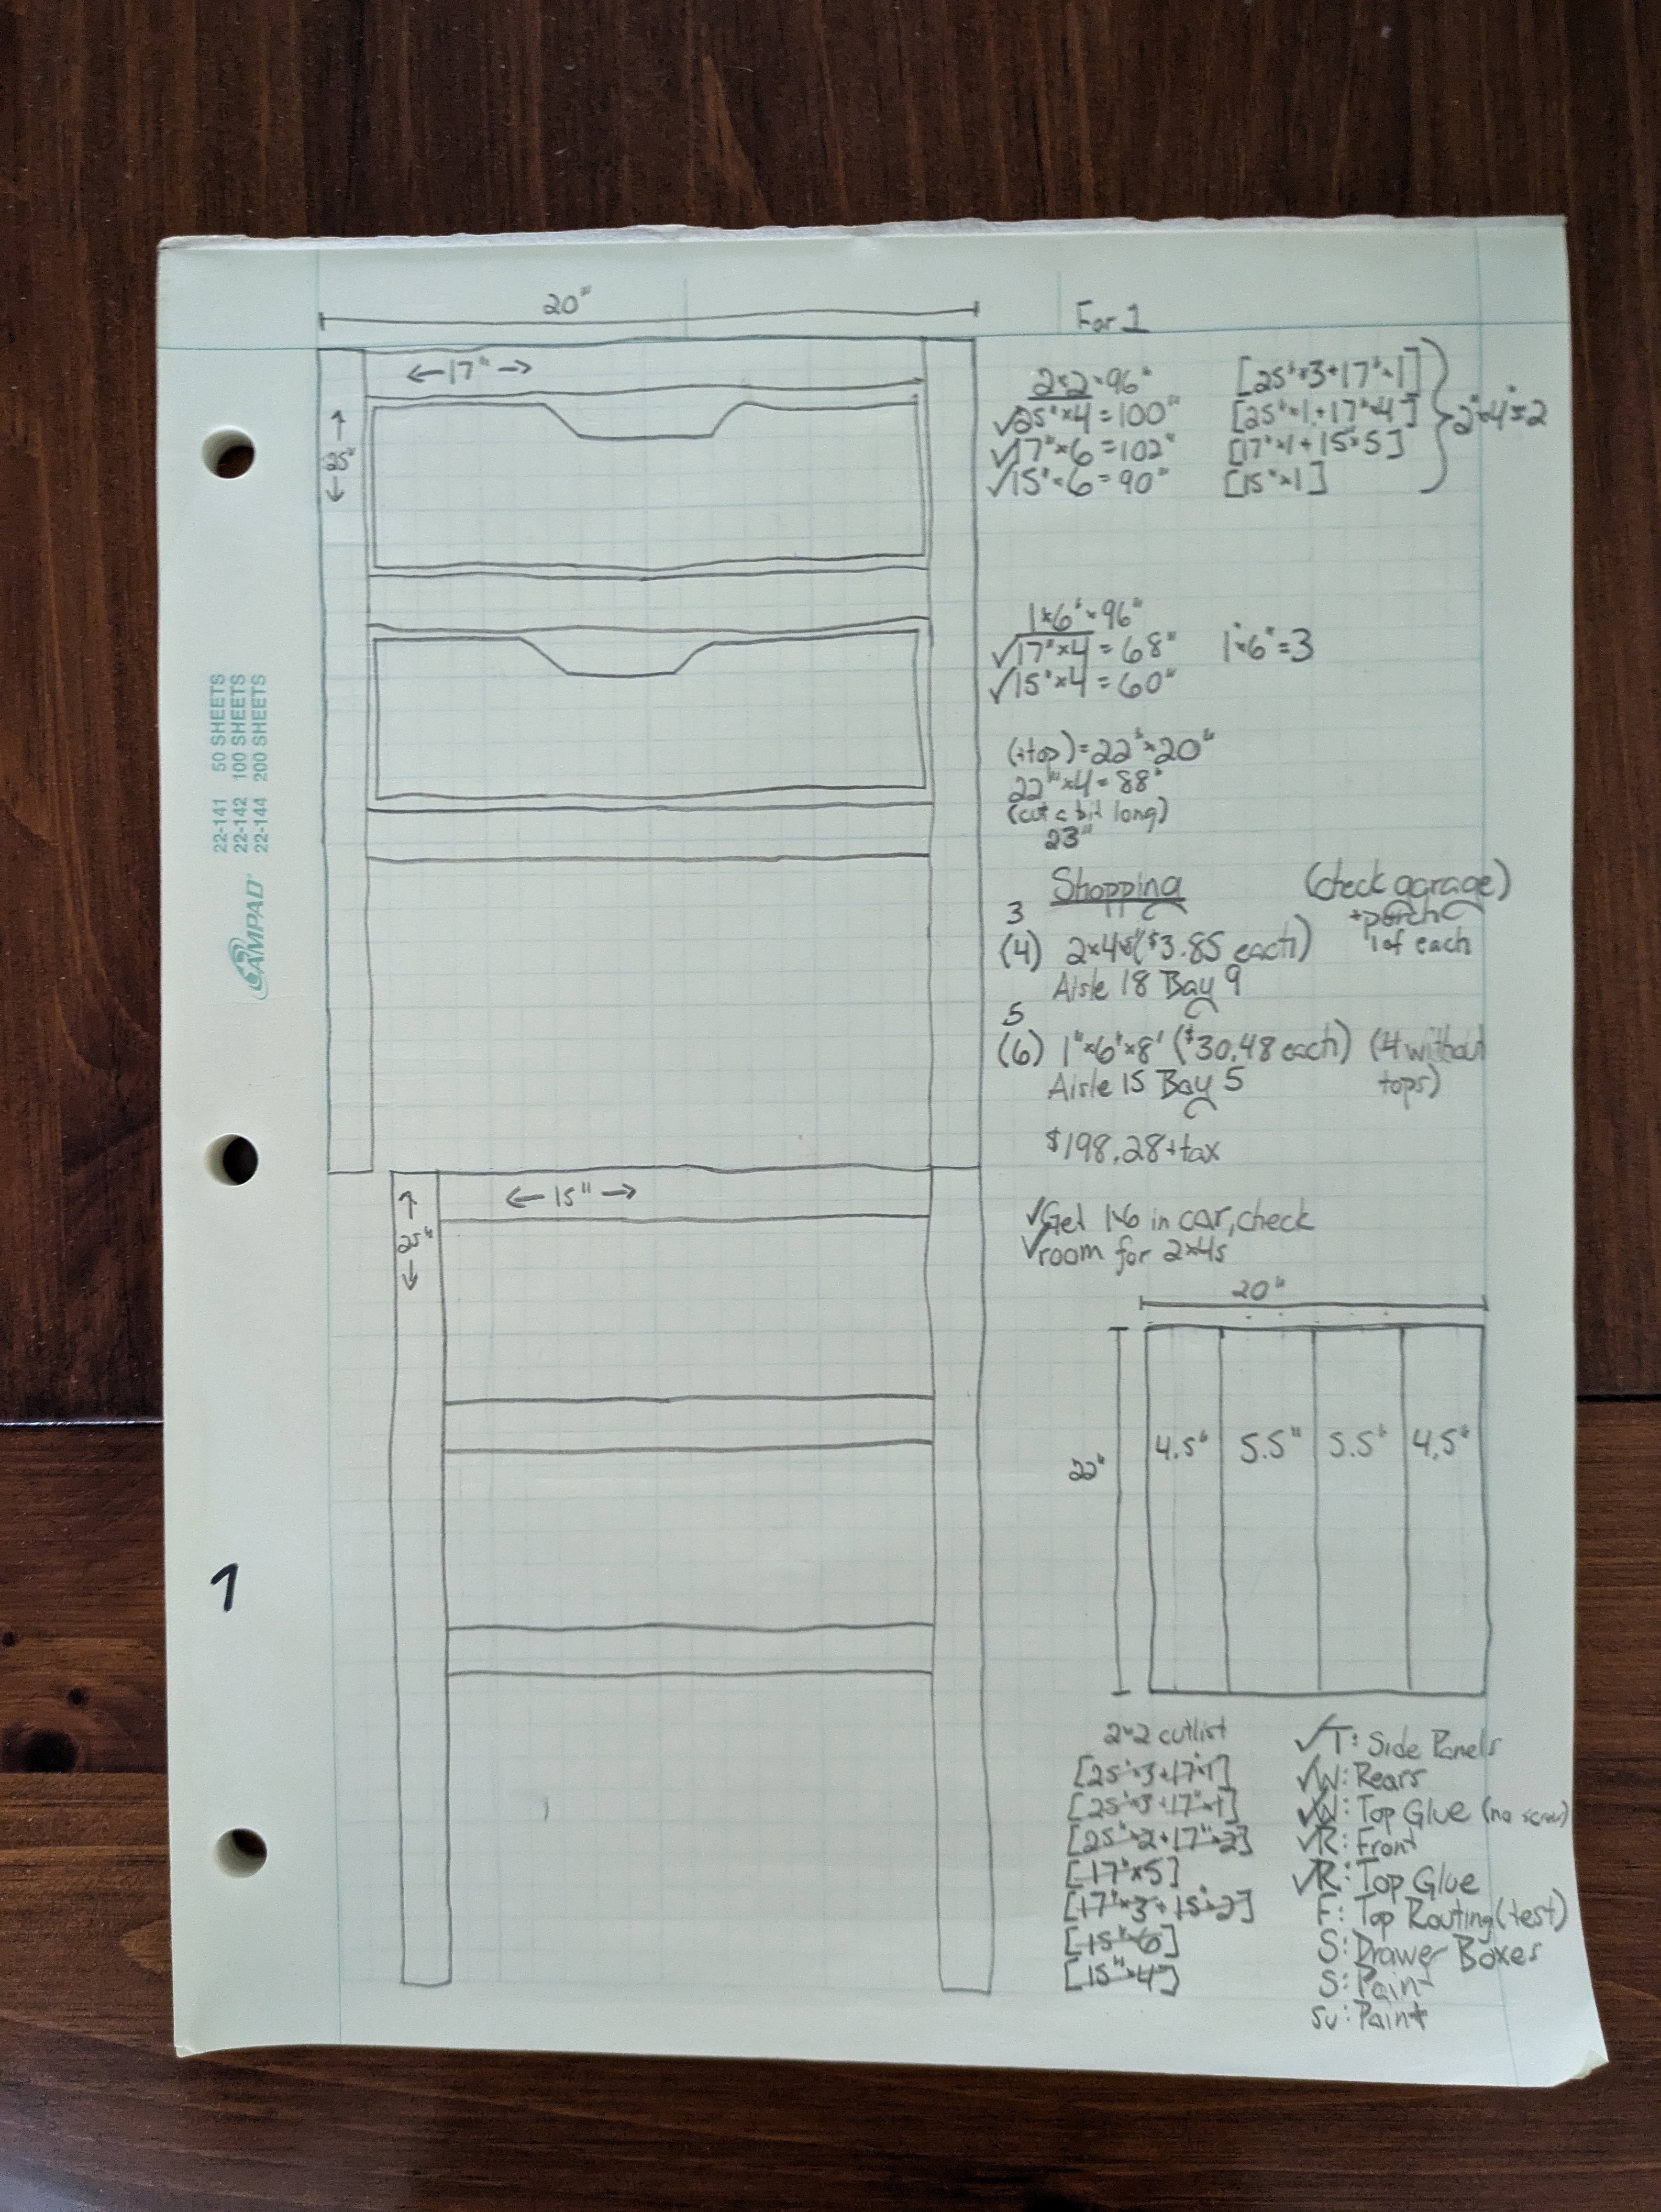
The Materials 🔗
This is all the same as the past build.
This requires 1"x6" and 2"x2" lumber. For the 1x6s, I’m using poplar. It’s (relatively) cheap and (I think) a step up from soft pine. Some people don’t like the look of poplar. I totally get that, but the majority of this will be painted anyway.
For the 2x2s, I’m not actually going to purchase 2x2s. Instead, I’ll grab the straightest 2x4 wall studs I can possibly find. I dig through the giant pallet of 2x4s at the big box store. It’s more economical for me to do that.
The drawer box will use 3/4" plywood for the sides and 1/4" plywood for the bottom.
I’m using pocket screws again. It’s quick. It’s effective. I don’t care if people think it’s beneath them. It’s a tool, and one that works well in this application.
Construction 🔗
This won’t go in-depth into the steps I took to build these. That’s for a few reasons. First, it’d be really repetitive. If you’re interested, check out the last build. The dimensions are different, but I followed the same steps. Also, I didn’t take in-progress pictures. I felt they’d be redundant, and I was focused on building.
One thing I did differently was when constructing the tabletops, I didn’t use pocket screws. I only used glue. This required more attention, and some additional clamping and helper wood, to try to keep everything level.
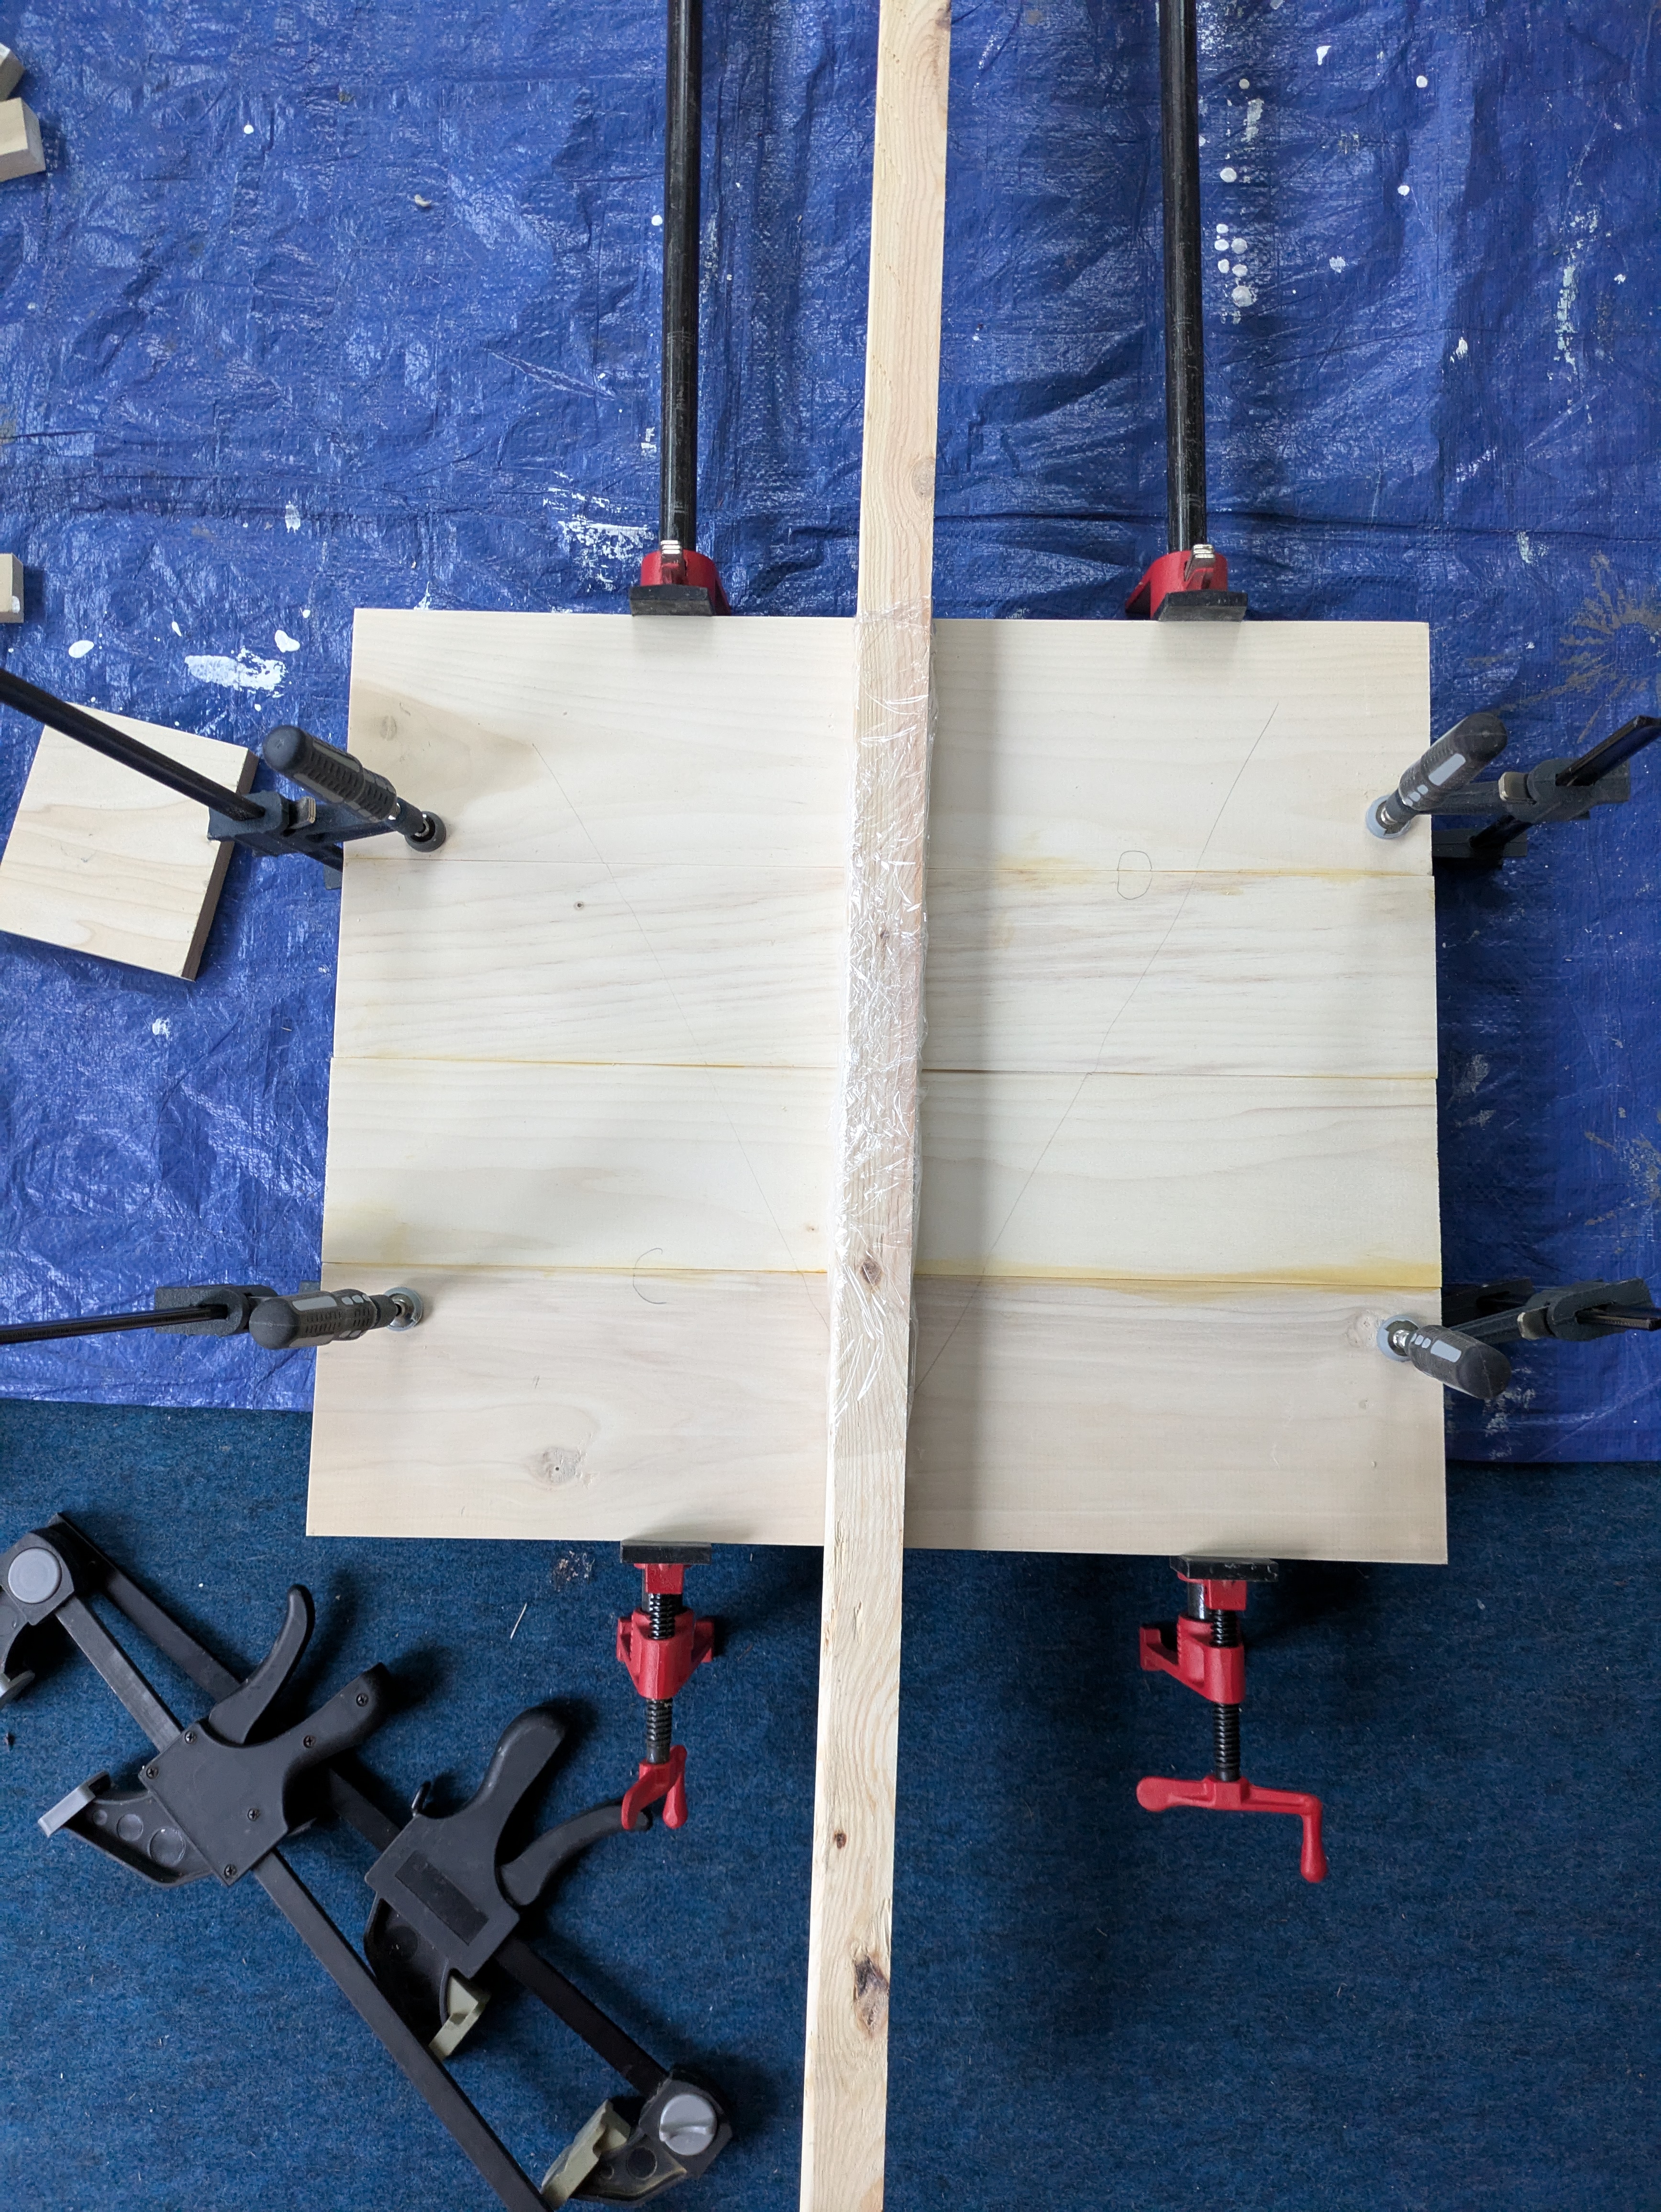
It worked out mostly ok, I guess? I think the result ended up better with the pocket screws of the other table (in terms of things being aligned). However, this was a better use of materials (fewer screws), was closer to how I feel it “should” be built (whatever that means), and was a challenge I wanted to try. Overall, it worked out.
Detail Change 🔗
One other thing I did was to be extra fancy with the profile of the table. I got out my fearful friend the router and used a roman ogee bit to give the top some definition and flair. It’s…fine?

Deployment 🔗
These are currently in my enclosed porch, on the ends of some outdoor furniture we have.
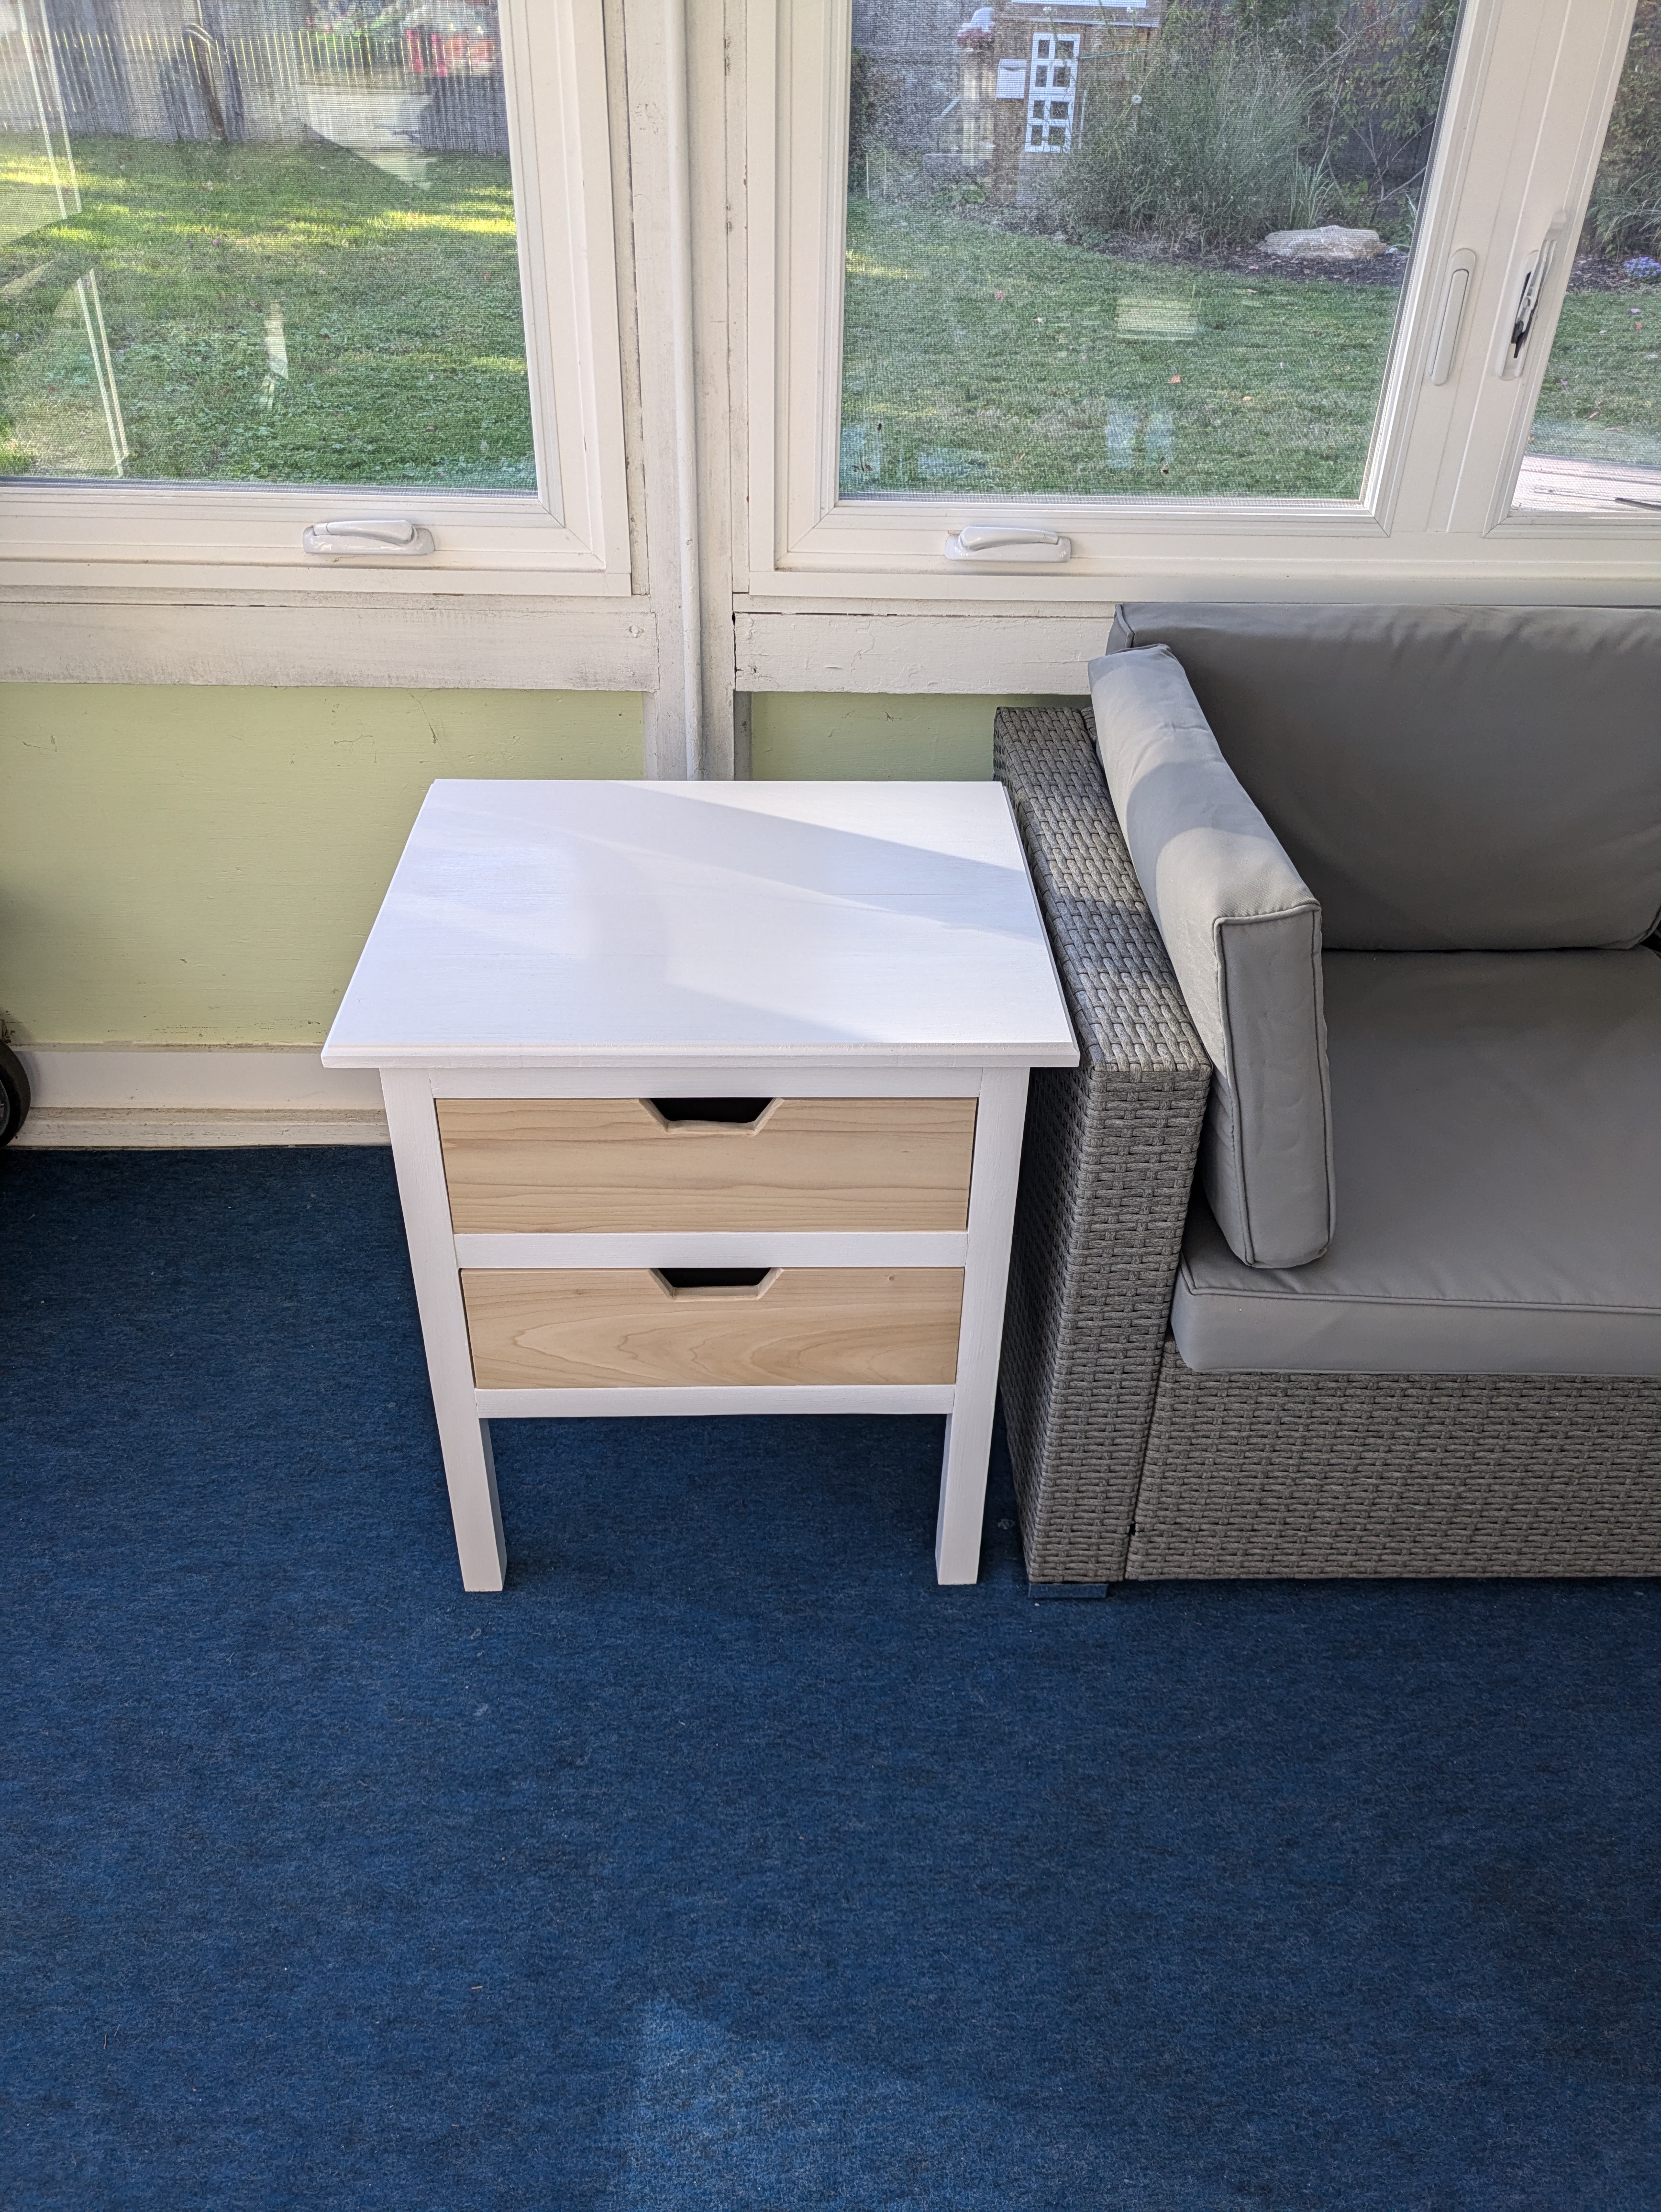
And because I’m sure you’re very concerned, yes the drawers open and close.

What would you use these tables for?