Tilt-back Amp Stand
Current Setup 🔗
I have a Boss Katana-50 MkII combo guitar amp. This is far from unique, but it serves my needs. It more than serves my needs, given I pretty much use it as a pedal platform.
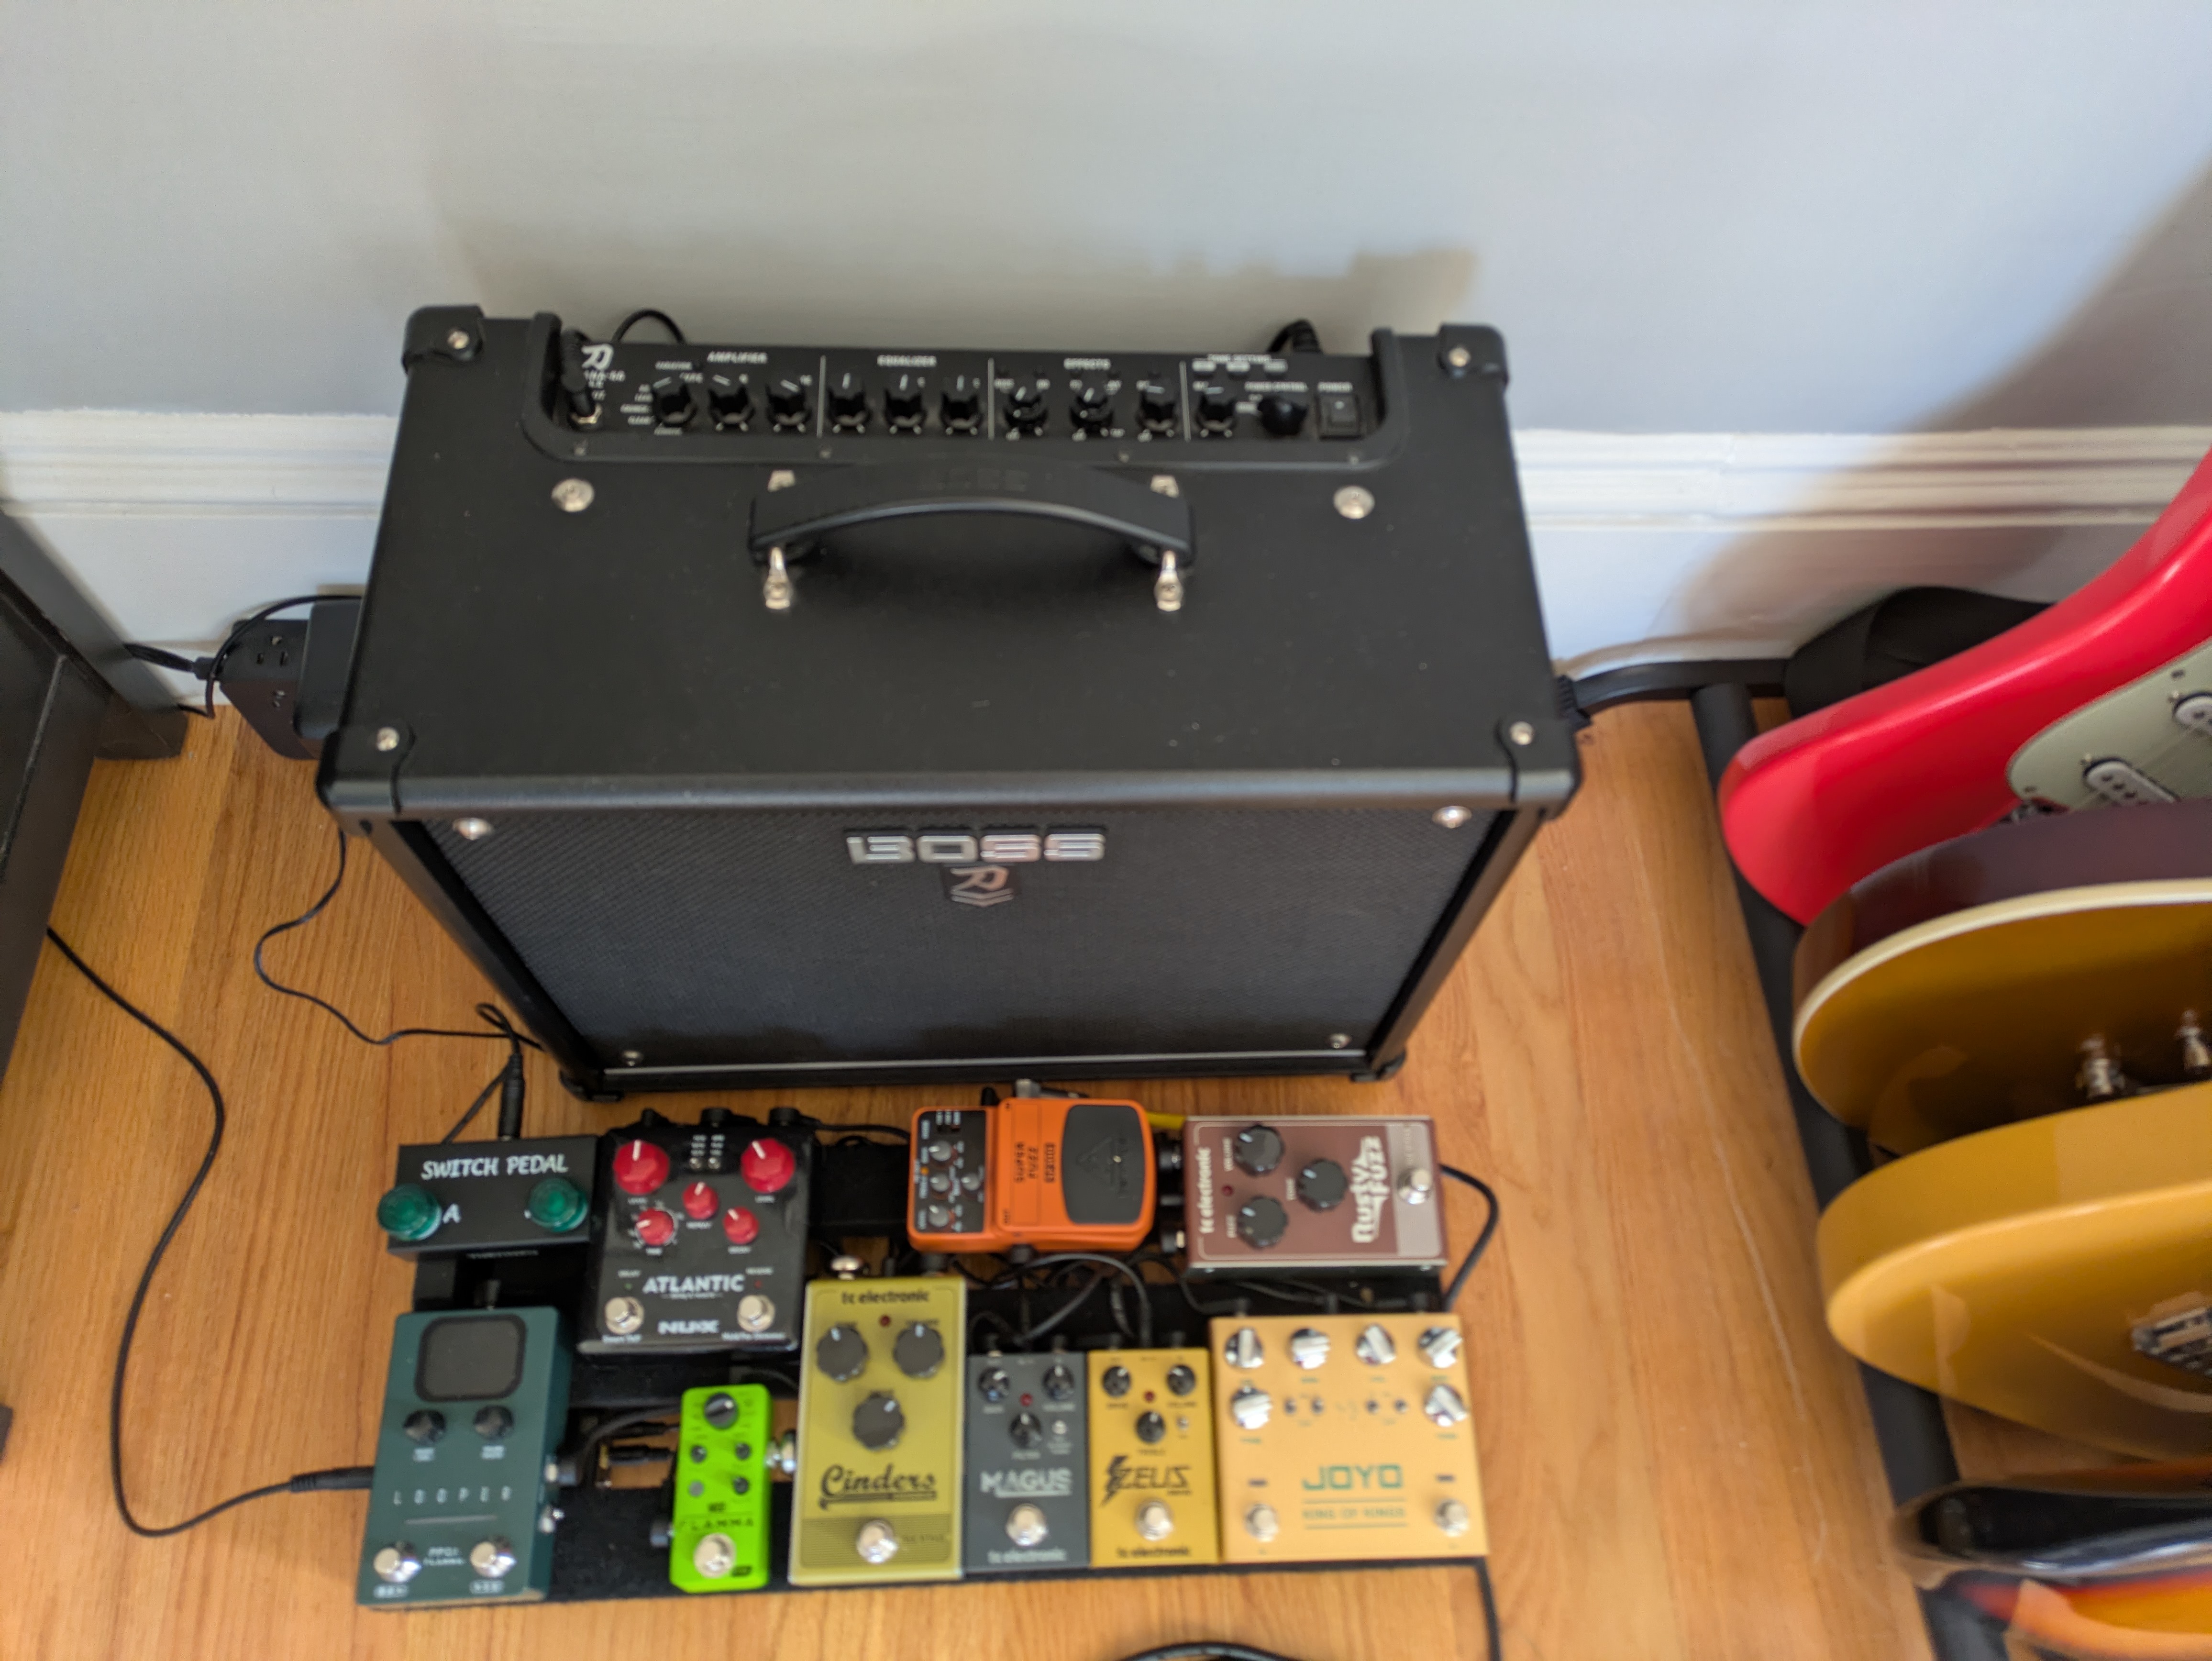
You could argue that this is redundant given the built-in features of the Katana, and you wouldn’t be wrong. But it’s more fun for me to tweak knobs and dials that I can more easily see than play with presets. Or, even worse, have to connect it to my computer. I’m trying to get away from the computer!
Anyway, it works great for my use case, with one minor problem. I’m guessing it might sound a little…more like it’s supposed to…if the speaker wasn’t pointed at my feet.
I had an opportunity to reunite with my tools for a bit, and I wanted to use that chance to build a stand for the amp. Something that would allow it to tilt so the speaker is pointing towards my ears.
Design 🔗
I didn’t plan this out in as much detail as I normally do. That was because of another important constraint I had: I didn’t want to spend any money. I wanted to use all scraps and hardware I had available. But I also wasn’t around my scrap wood when I was designing, so I need to be pretty flexible.
Pretty much, I took a bunch of pictures of my setup and made a bunch of measurements. I particularly focused on what angle I want the amp to be at. I didn’t have a protractor, so instead I measured how high of a rise I wanted from the front to back (somewhere between 4"-5"; I told you, I wasn’t being detailed), and thought I’d figure it out later.
Then I searched around for some YouTube inspiration, such as this or this.
I liked how minimal the first stand is, especially given I wasn’t sure how much wood I had to work with. However, I liked the rear support that the second provided. The first stand is for a smaller amp, and I was concerned the Katana 50 would be too top-heavy. Especially for the angle I wanted it to be at.
I became particularly enamored with a third option. It’s really basic, had a rear support, and had a hinge so it could be put away easily. I knew I had a door hinge at the shop I could use for it.
With all that in mind, and amp in the back seat of the car, I headed over to my shop/tools/scrap pile.
Rummaging 🔗
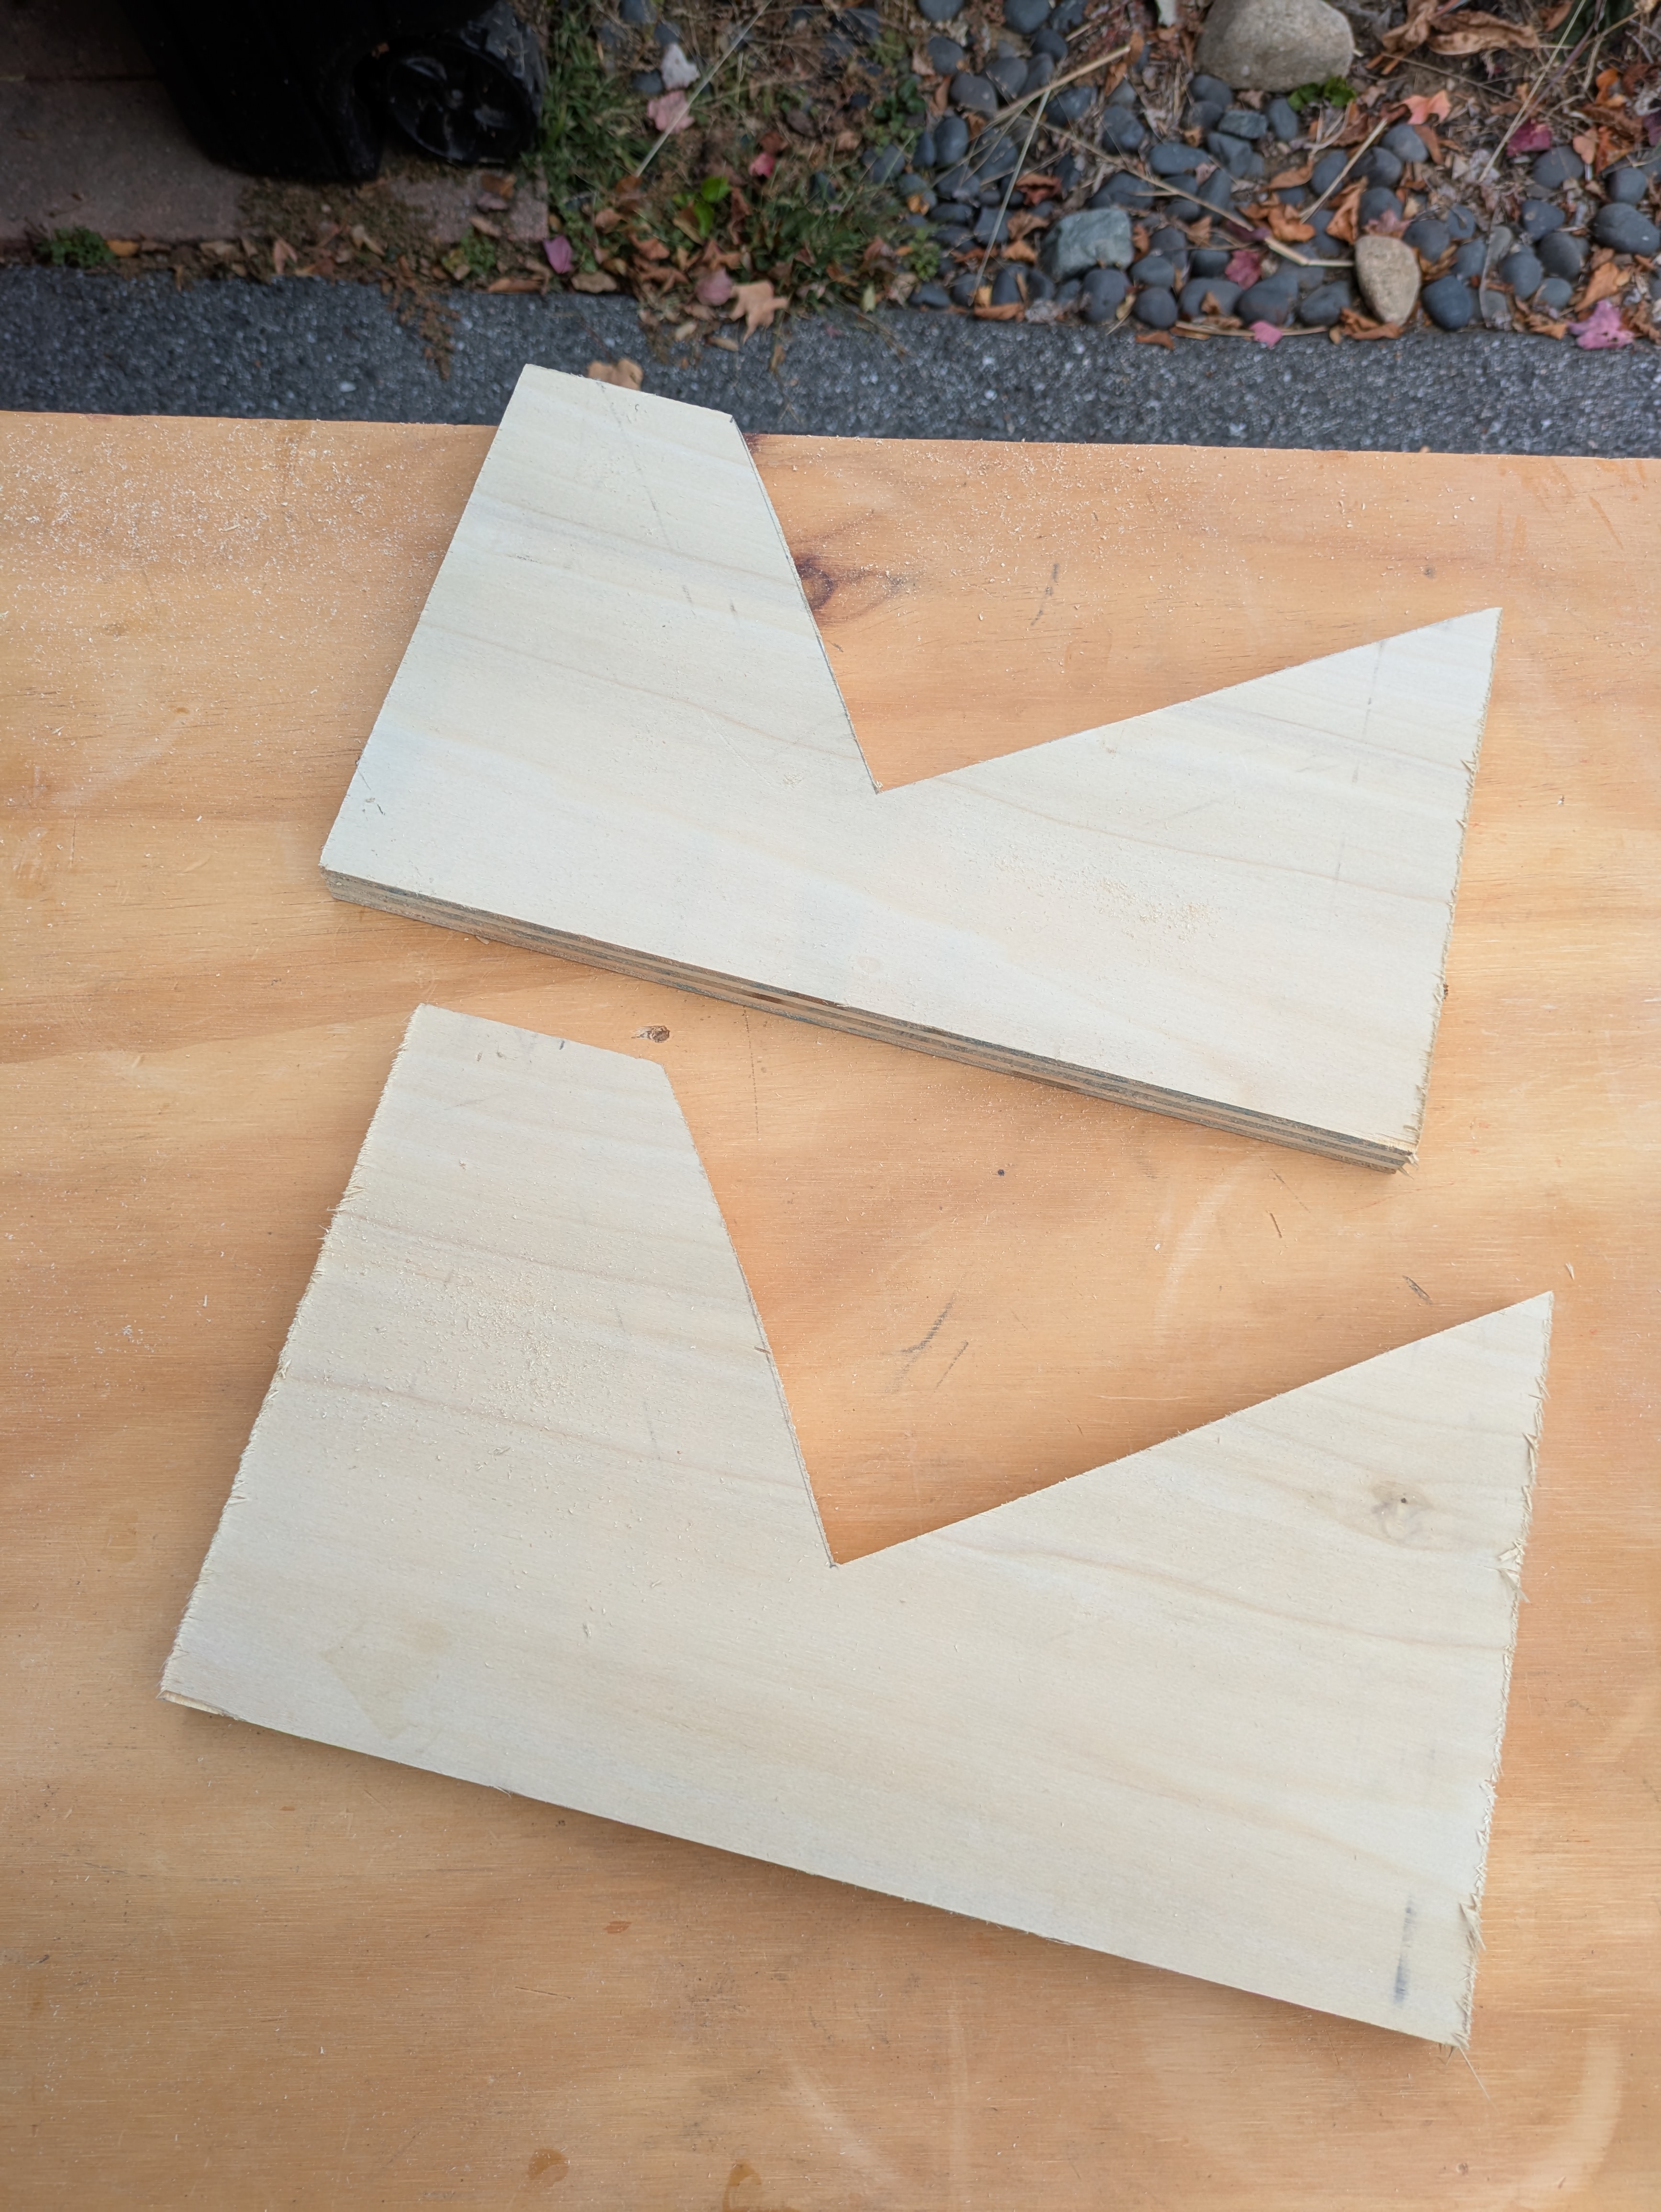
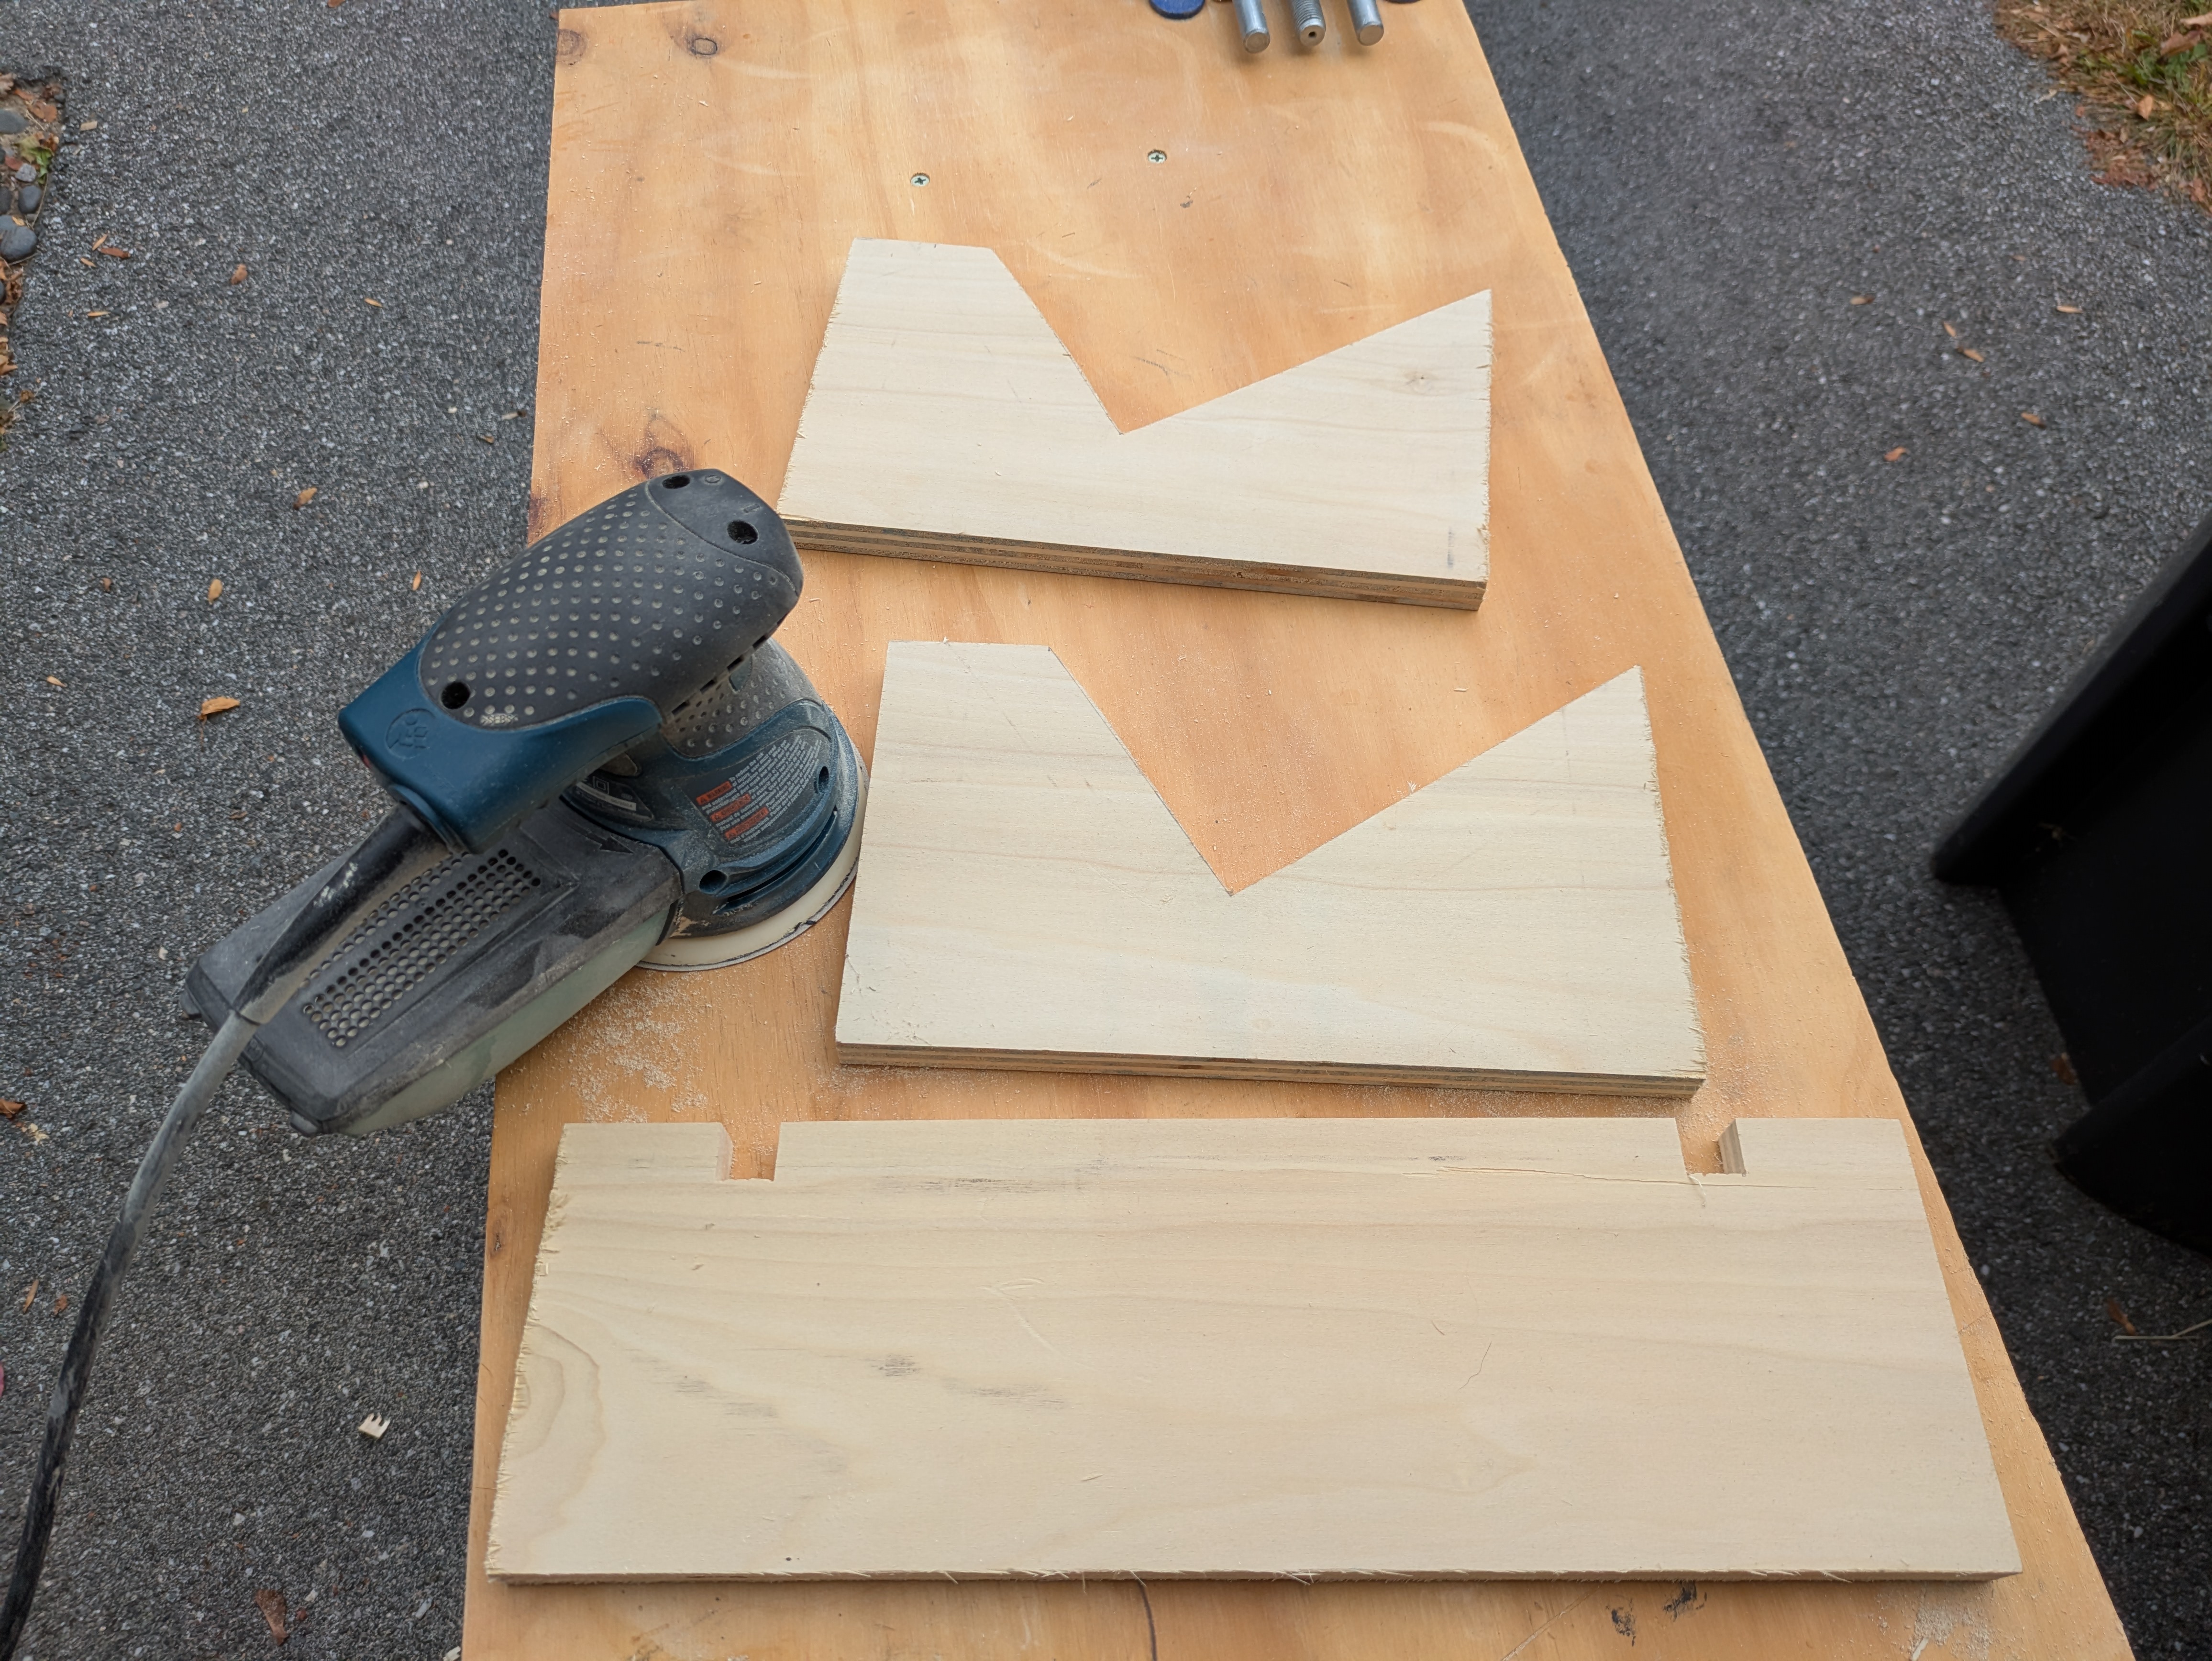
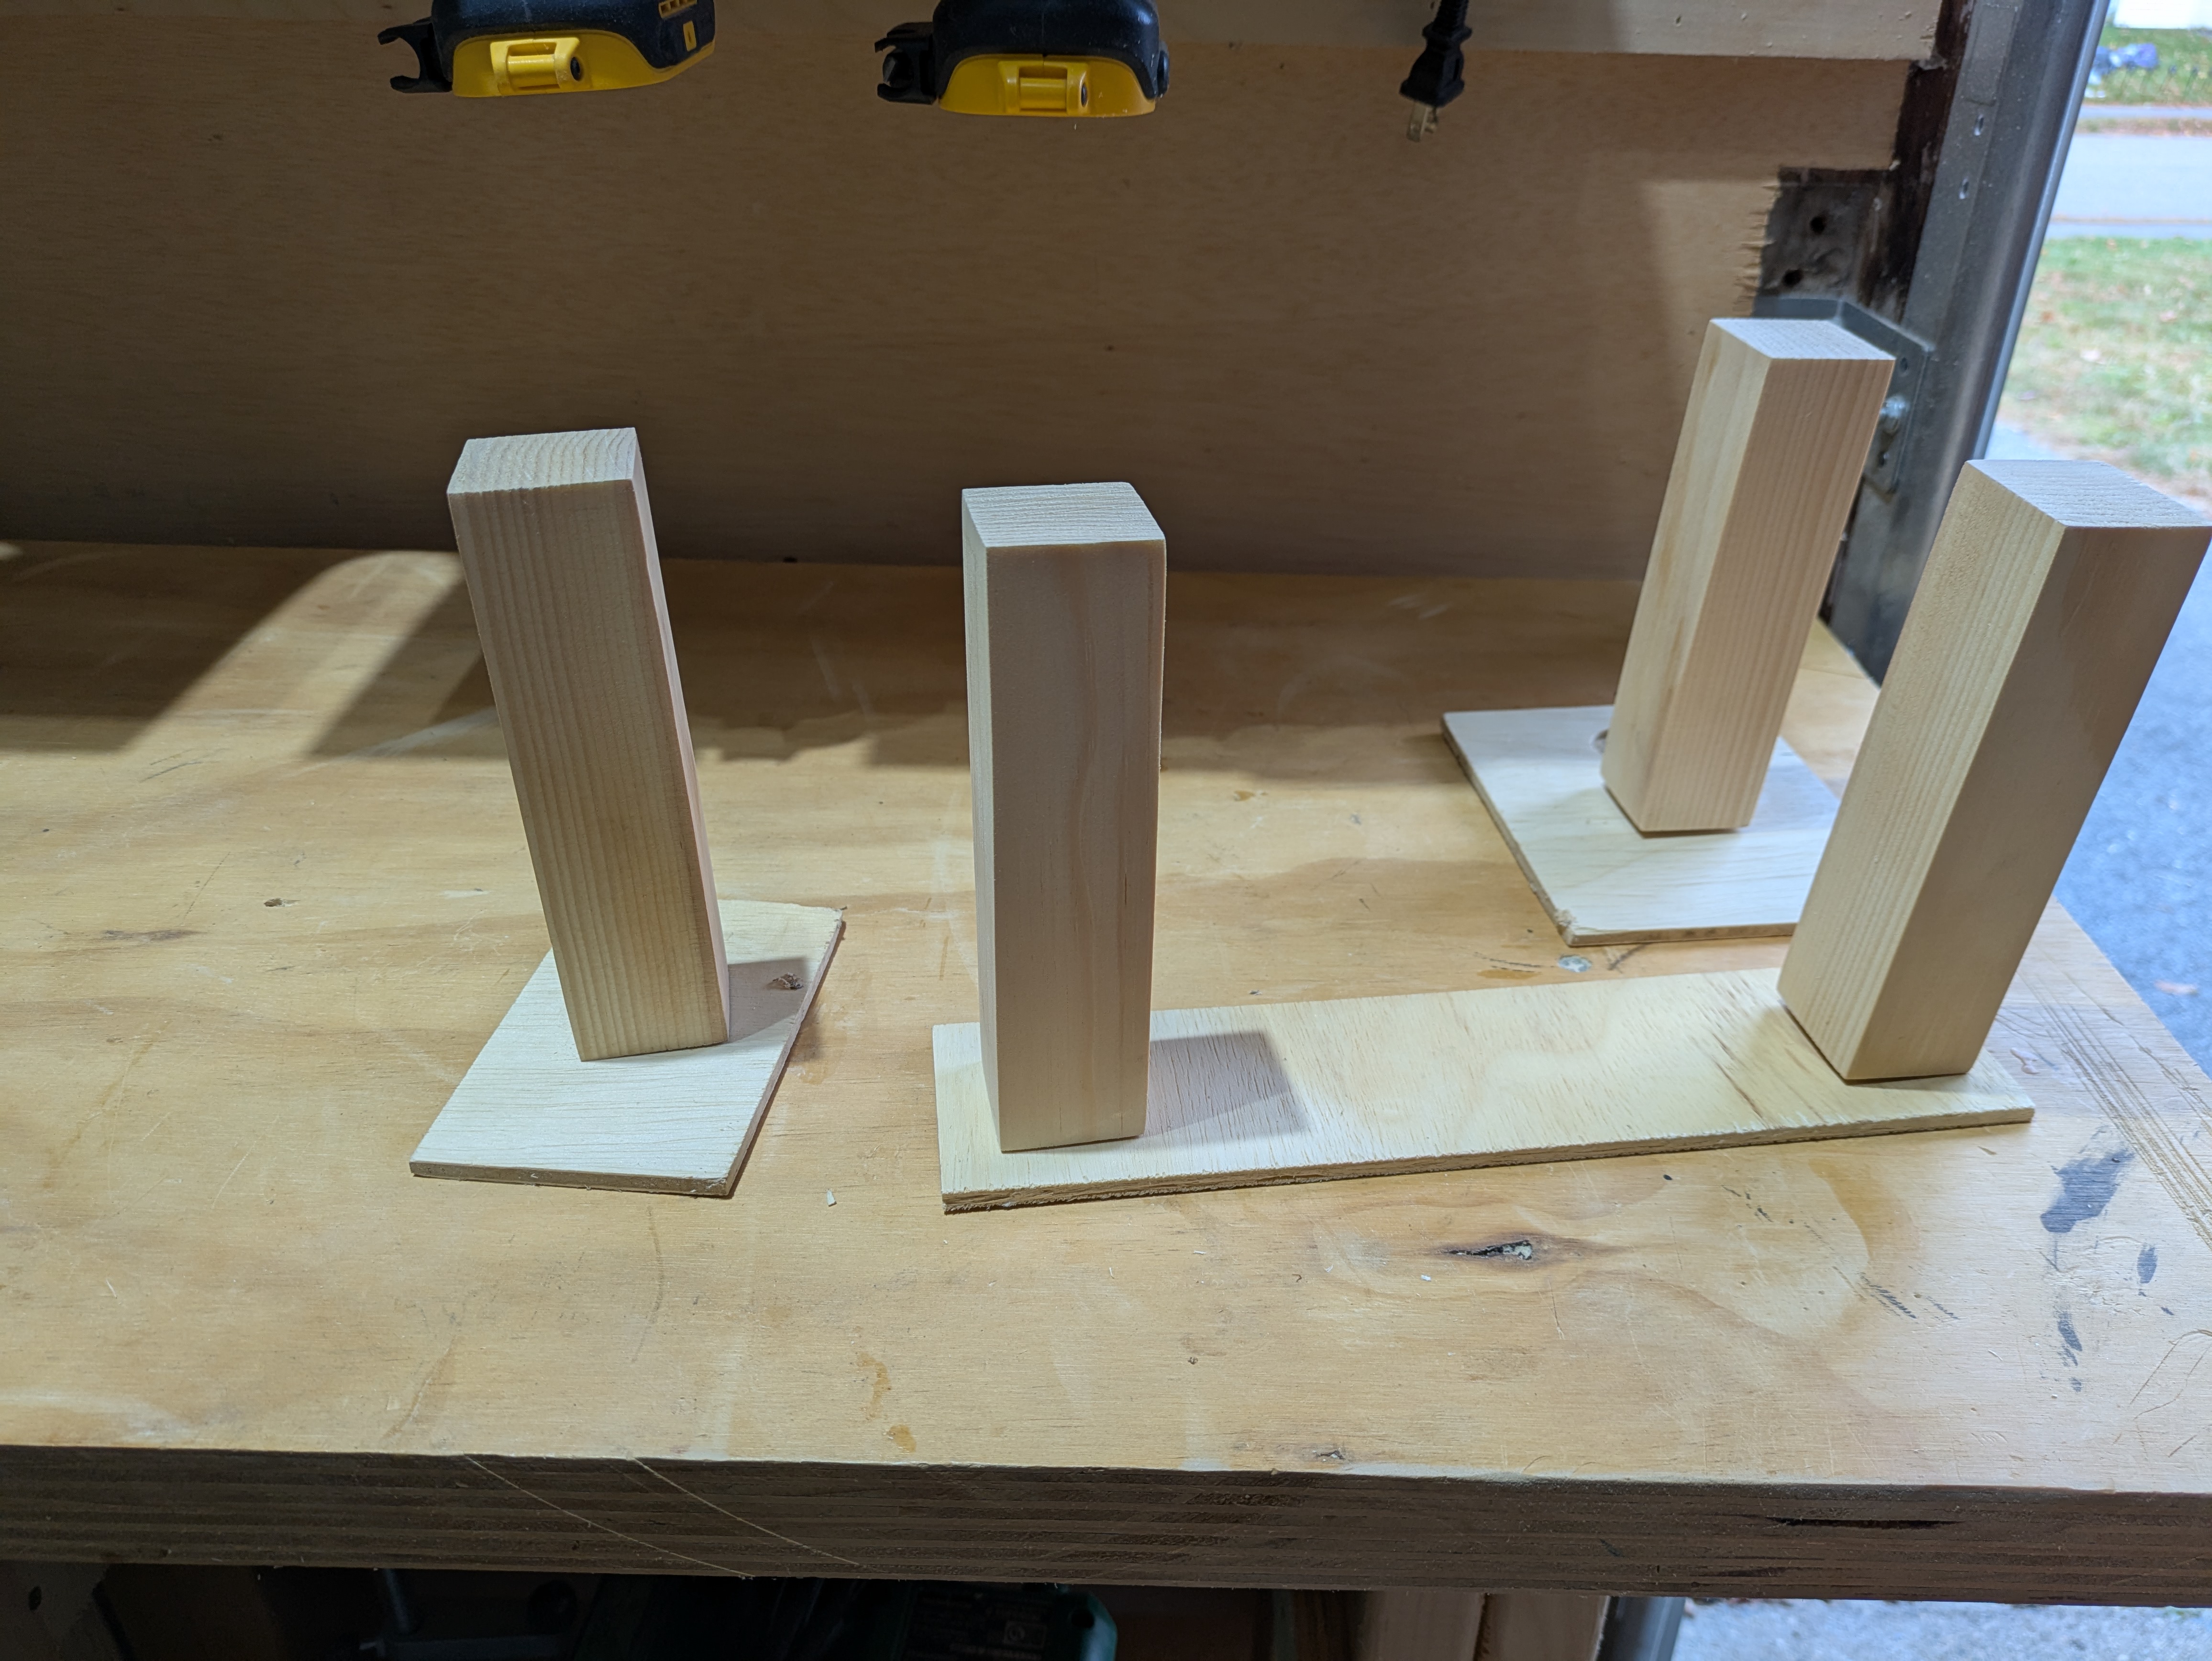
Upon arrival, I went searching for options. I found a run of 3/4" plywood that was about 7" tall and 24" long. I figured this would work to allow me to have some structure underneath while supporting the angle I wanted. The angle which I figured out was around 35 degrees, now that I had a protractor in hand.
I used the protractor and a combination square to mark out a triangle to cut out of the plywood, made it happen with my jigsaw, and repeated it to have both sides.
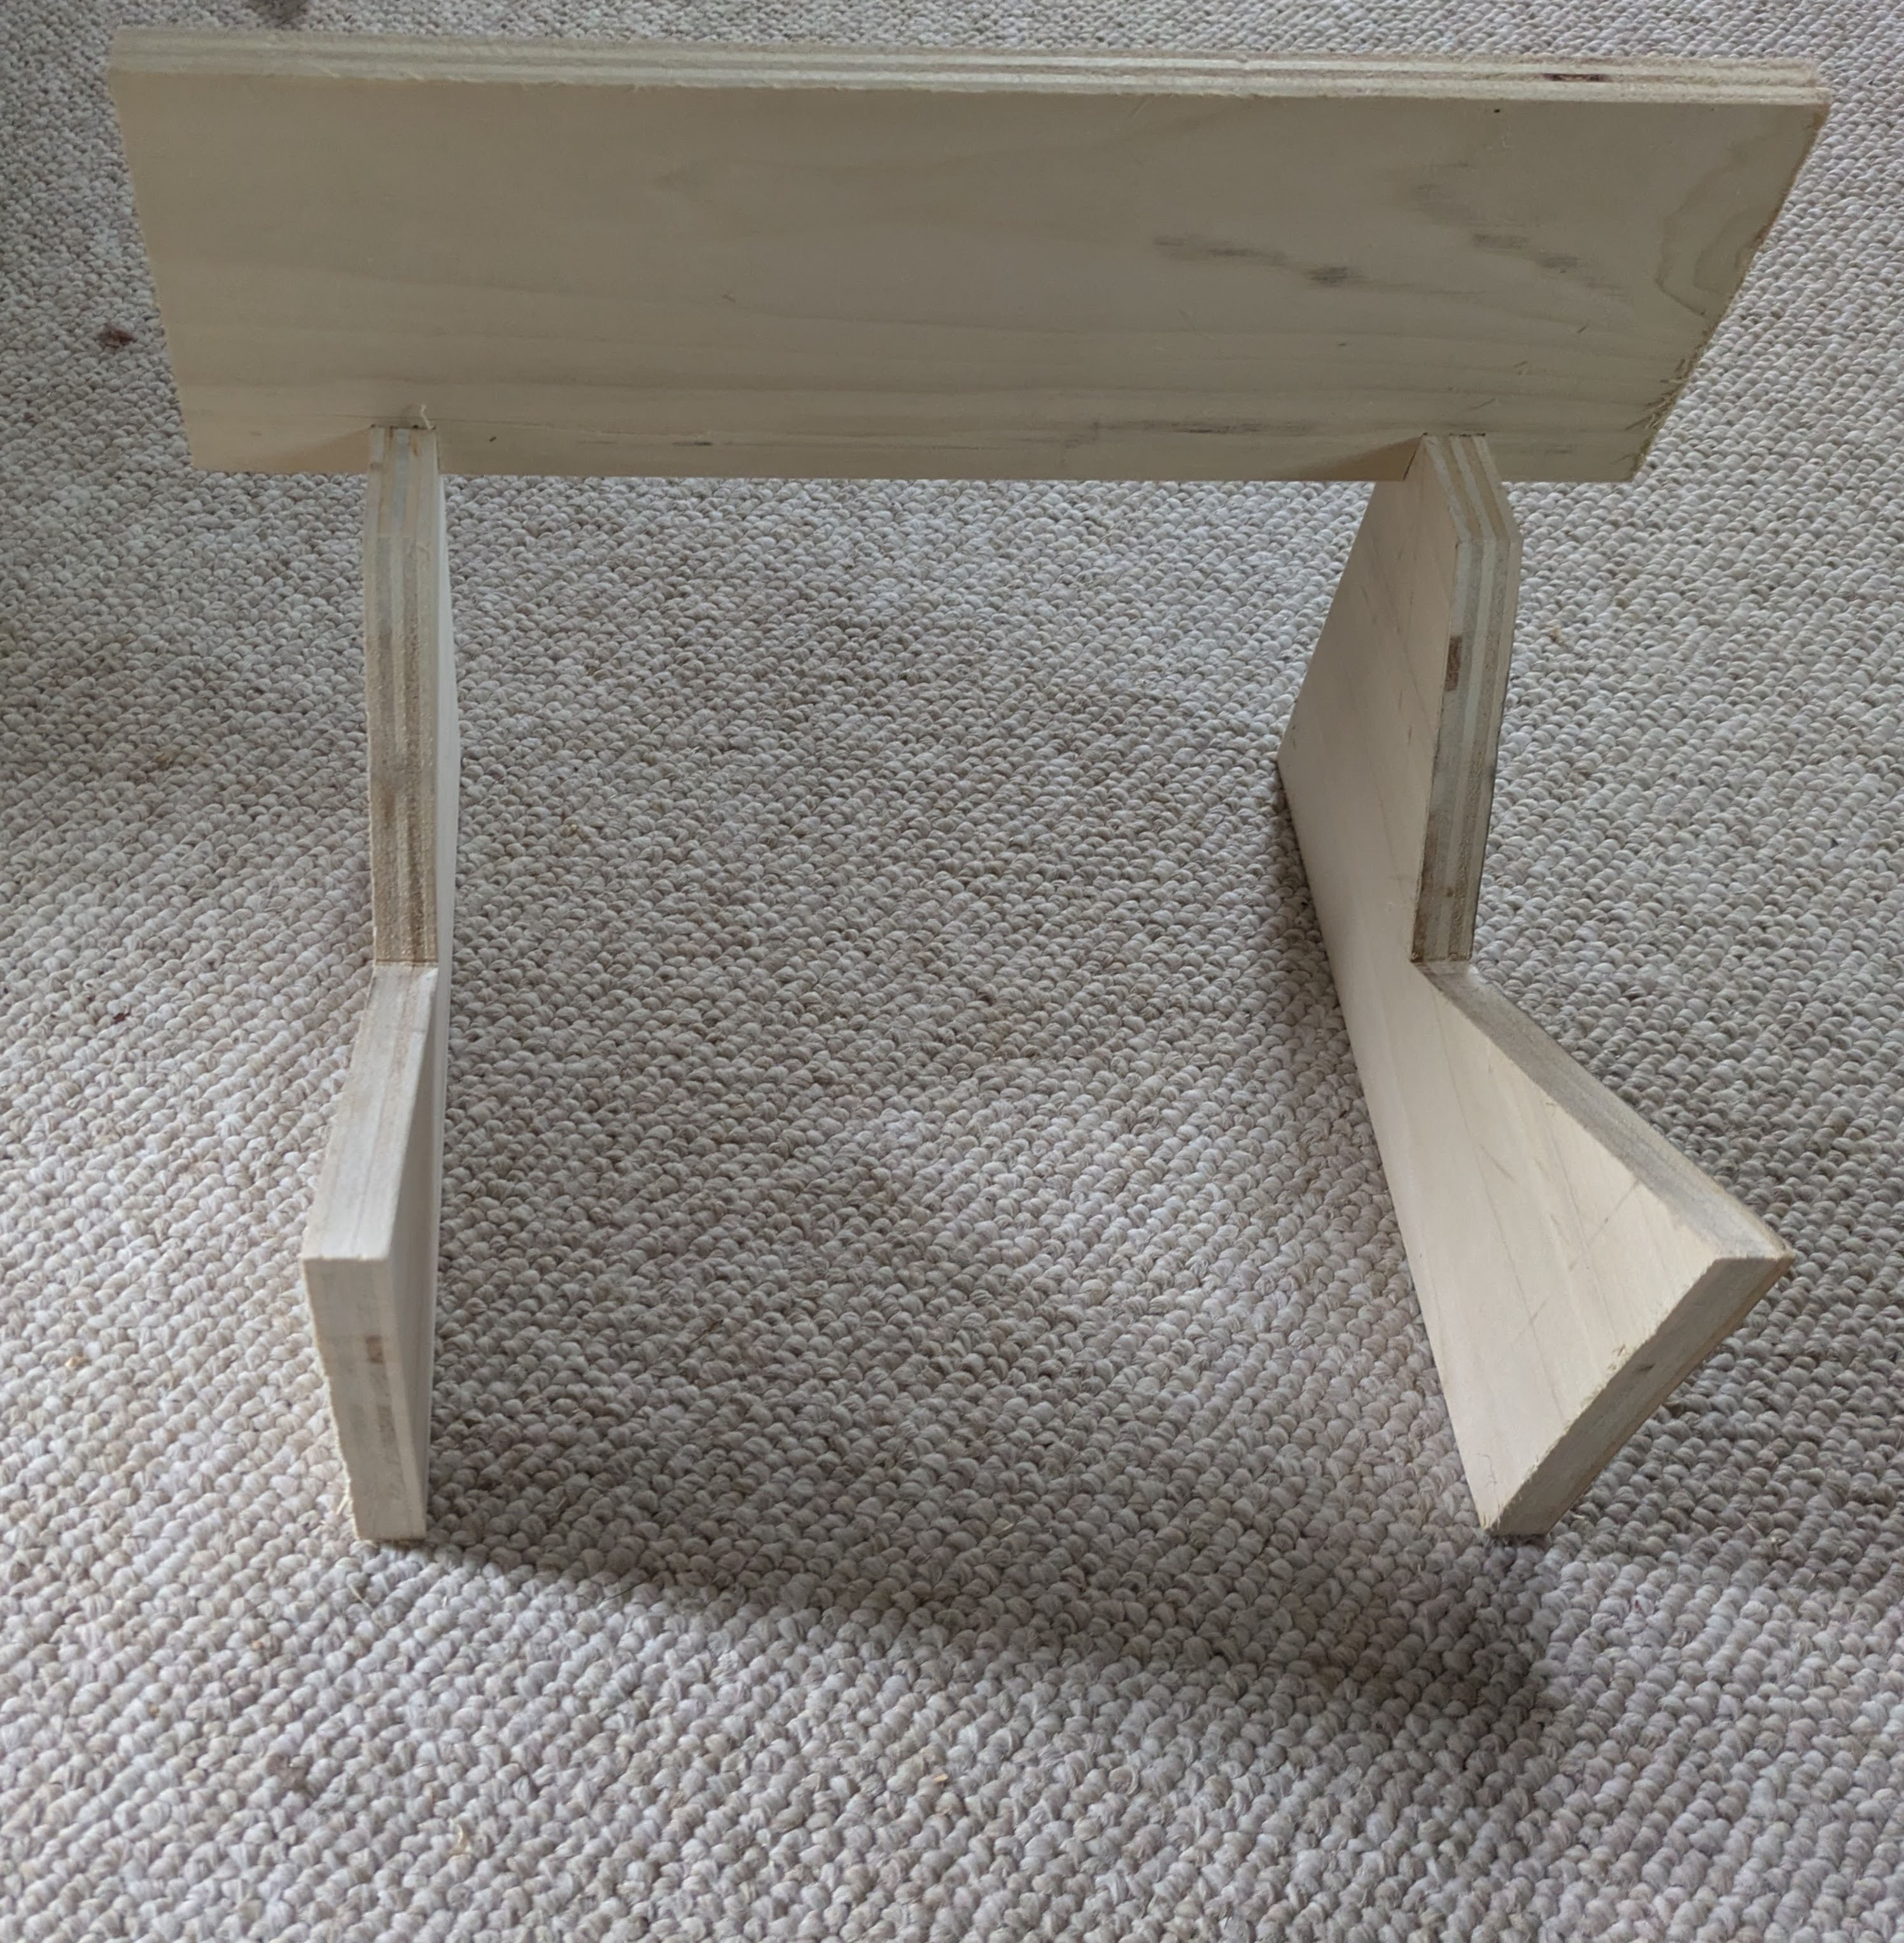
Initial Fit 🔗
I put the amp on the two supports. It became immediately evident that the hinge design wouldn’t work with what I had cut. There just wasn’t enough support. Even with the supports parallel, rather than hinged, the design suffered from my concern with the very first design I looked at. The amp is too top-heavy. It would rest on the supports, but it easily wanted to tip back.
Rear Support 🔗
I did figure that I could lodge another piece of wood on top of the supports, which the electrical components box of the open-back cabinet could rest on.
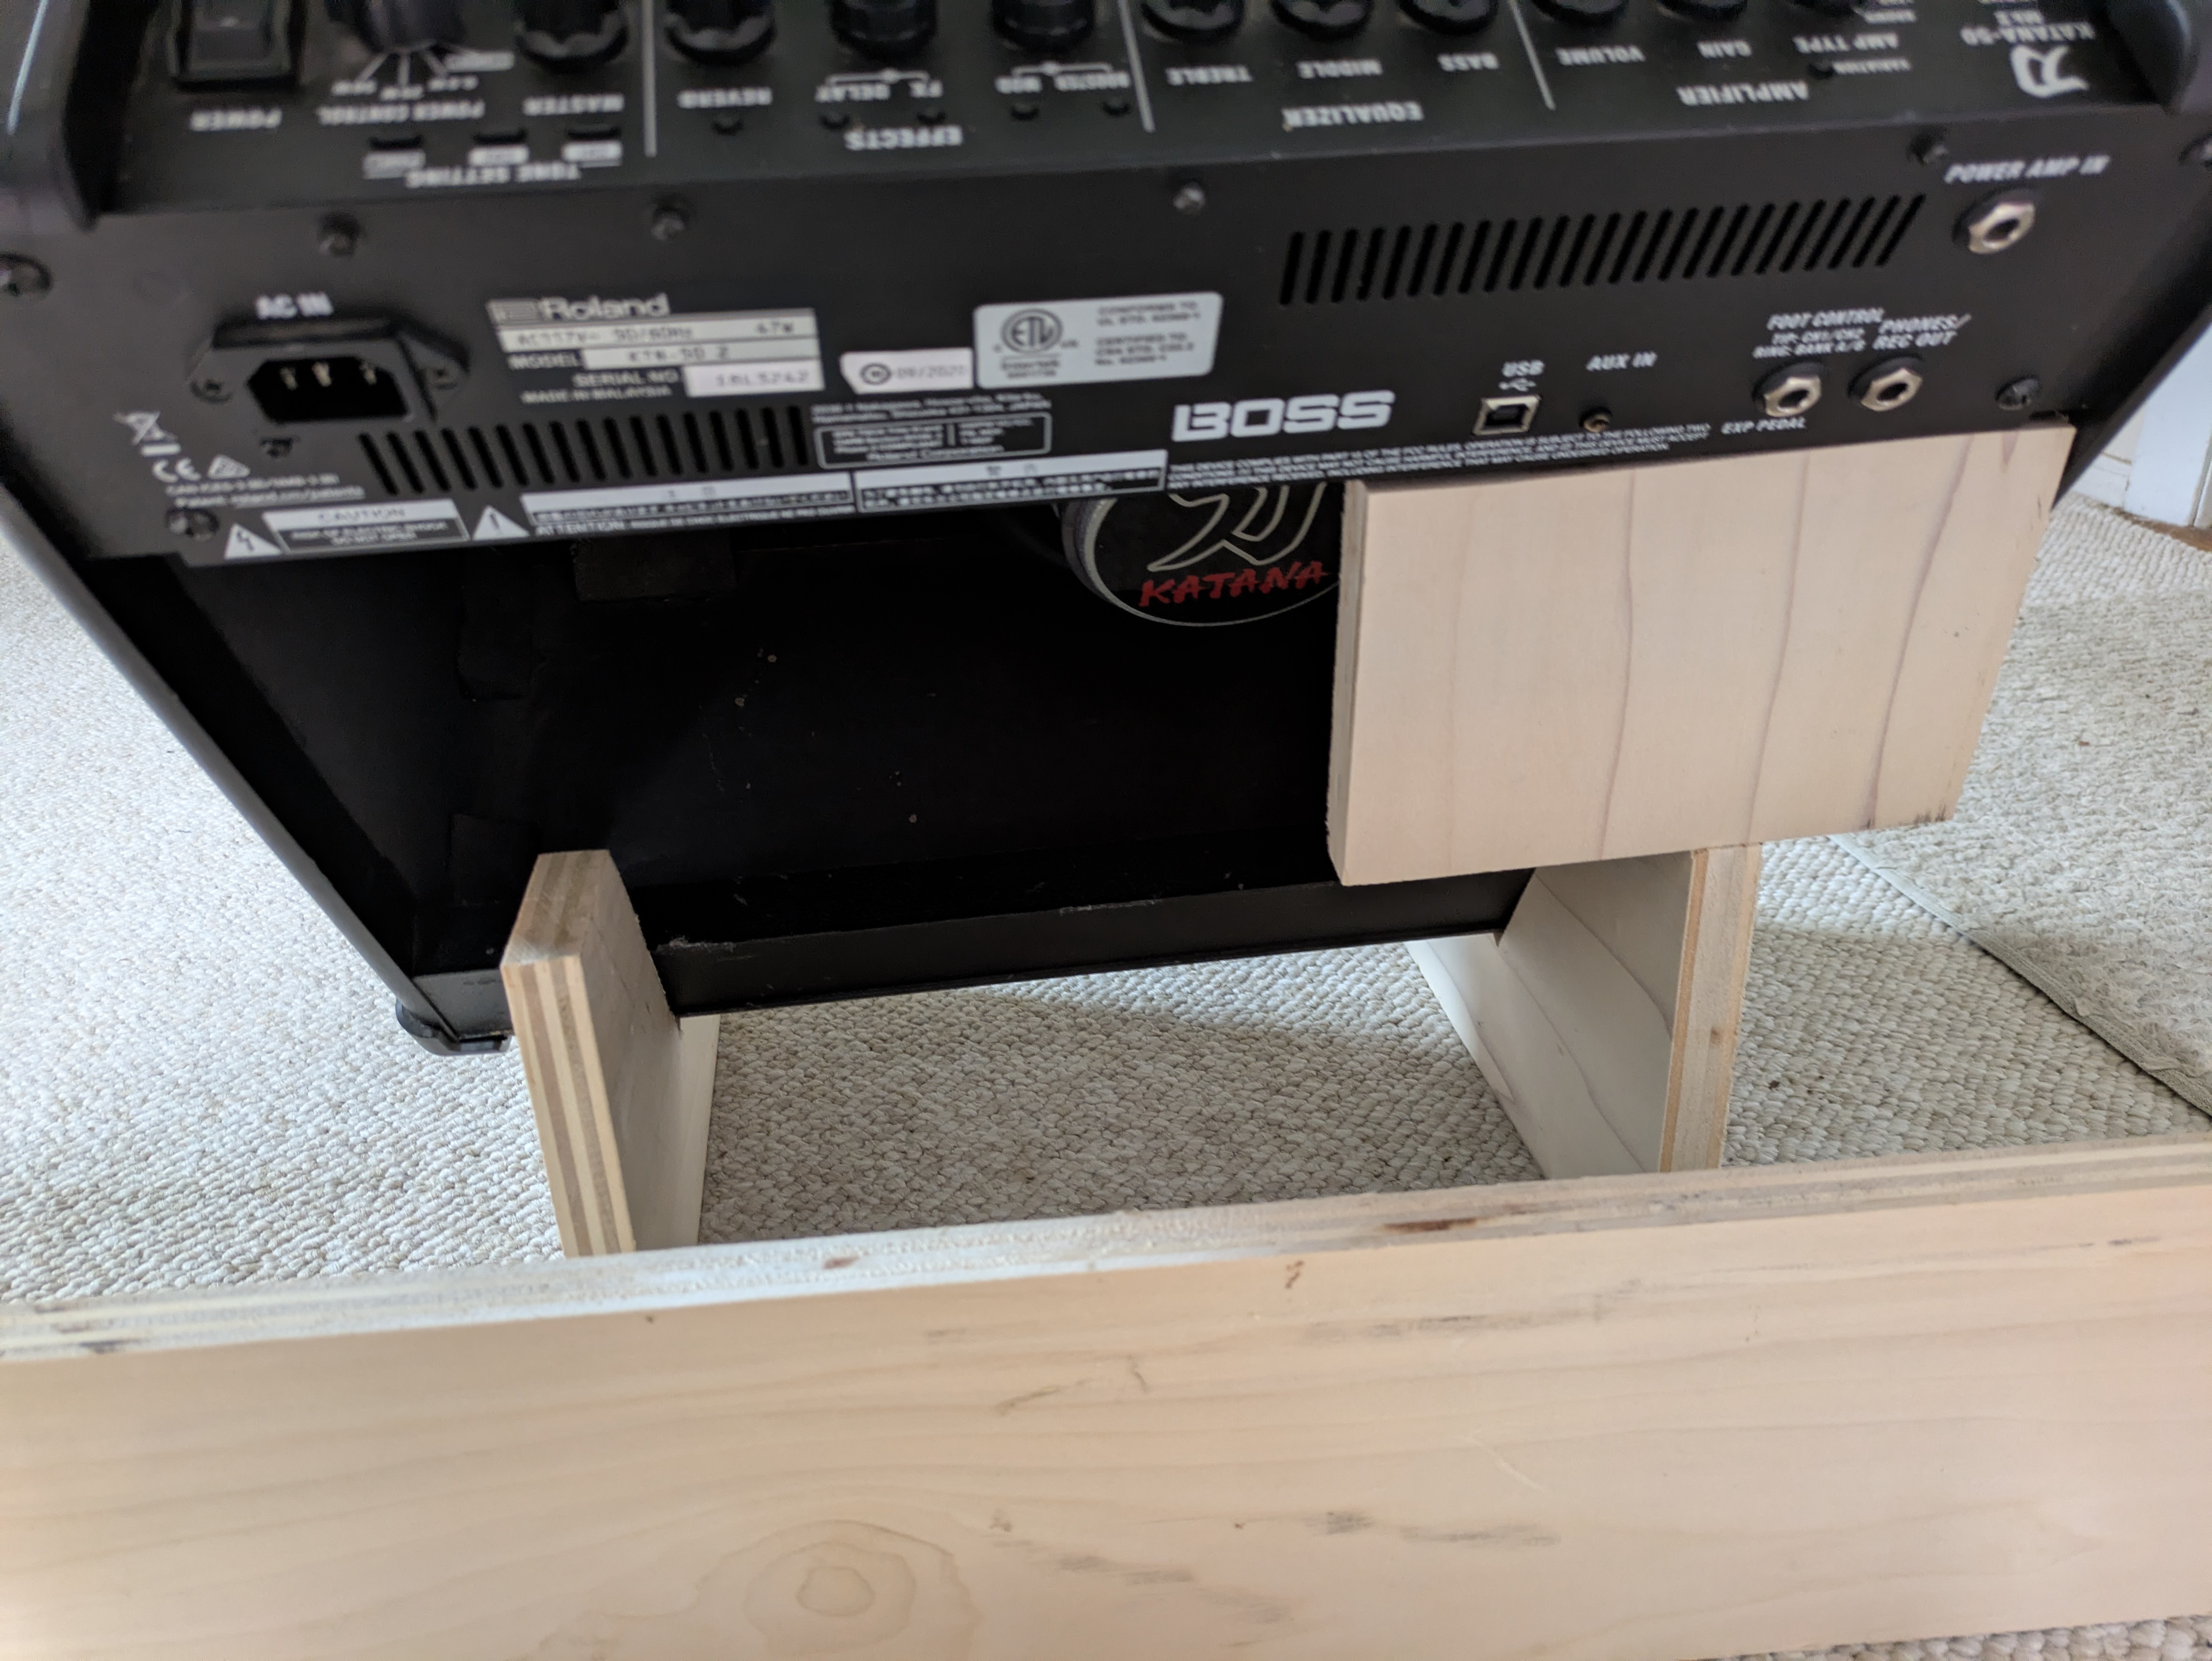
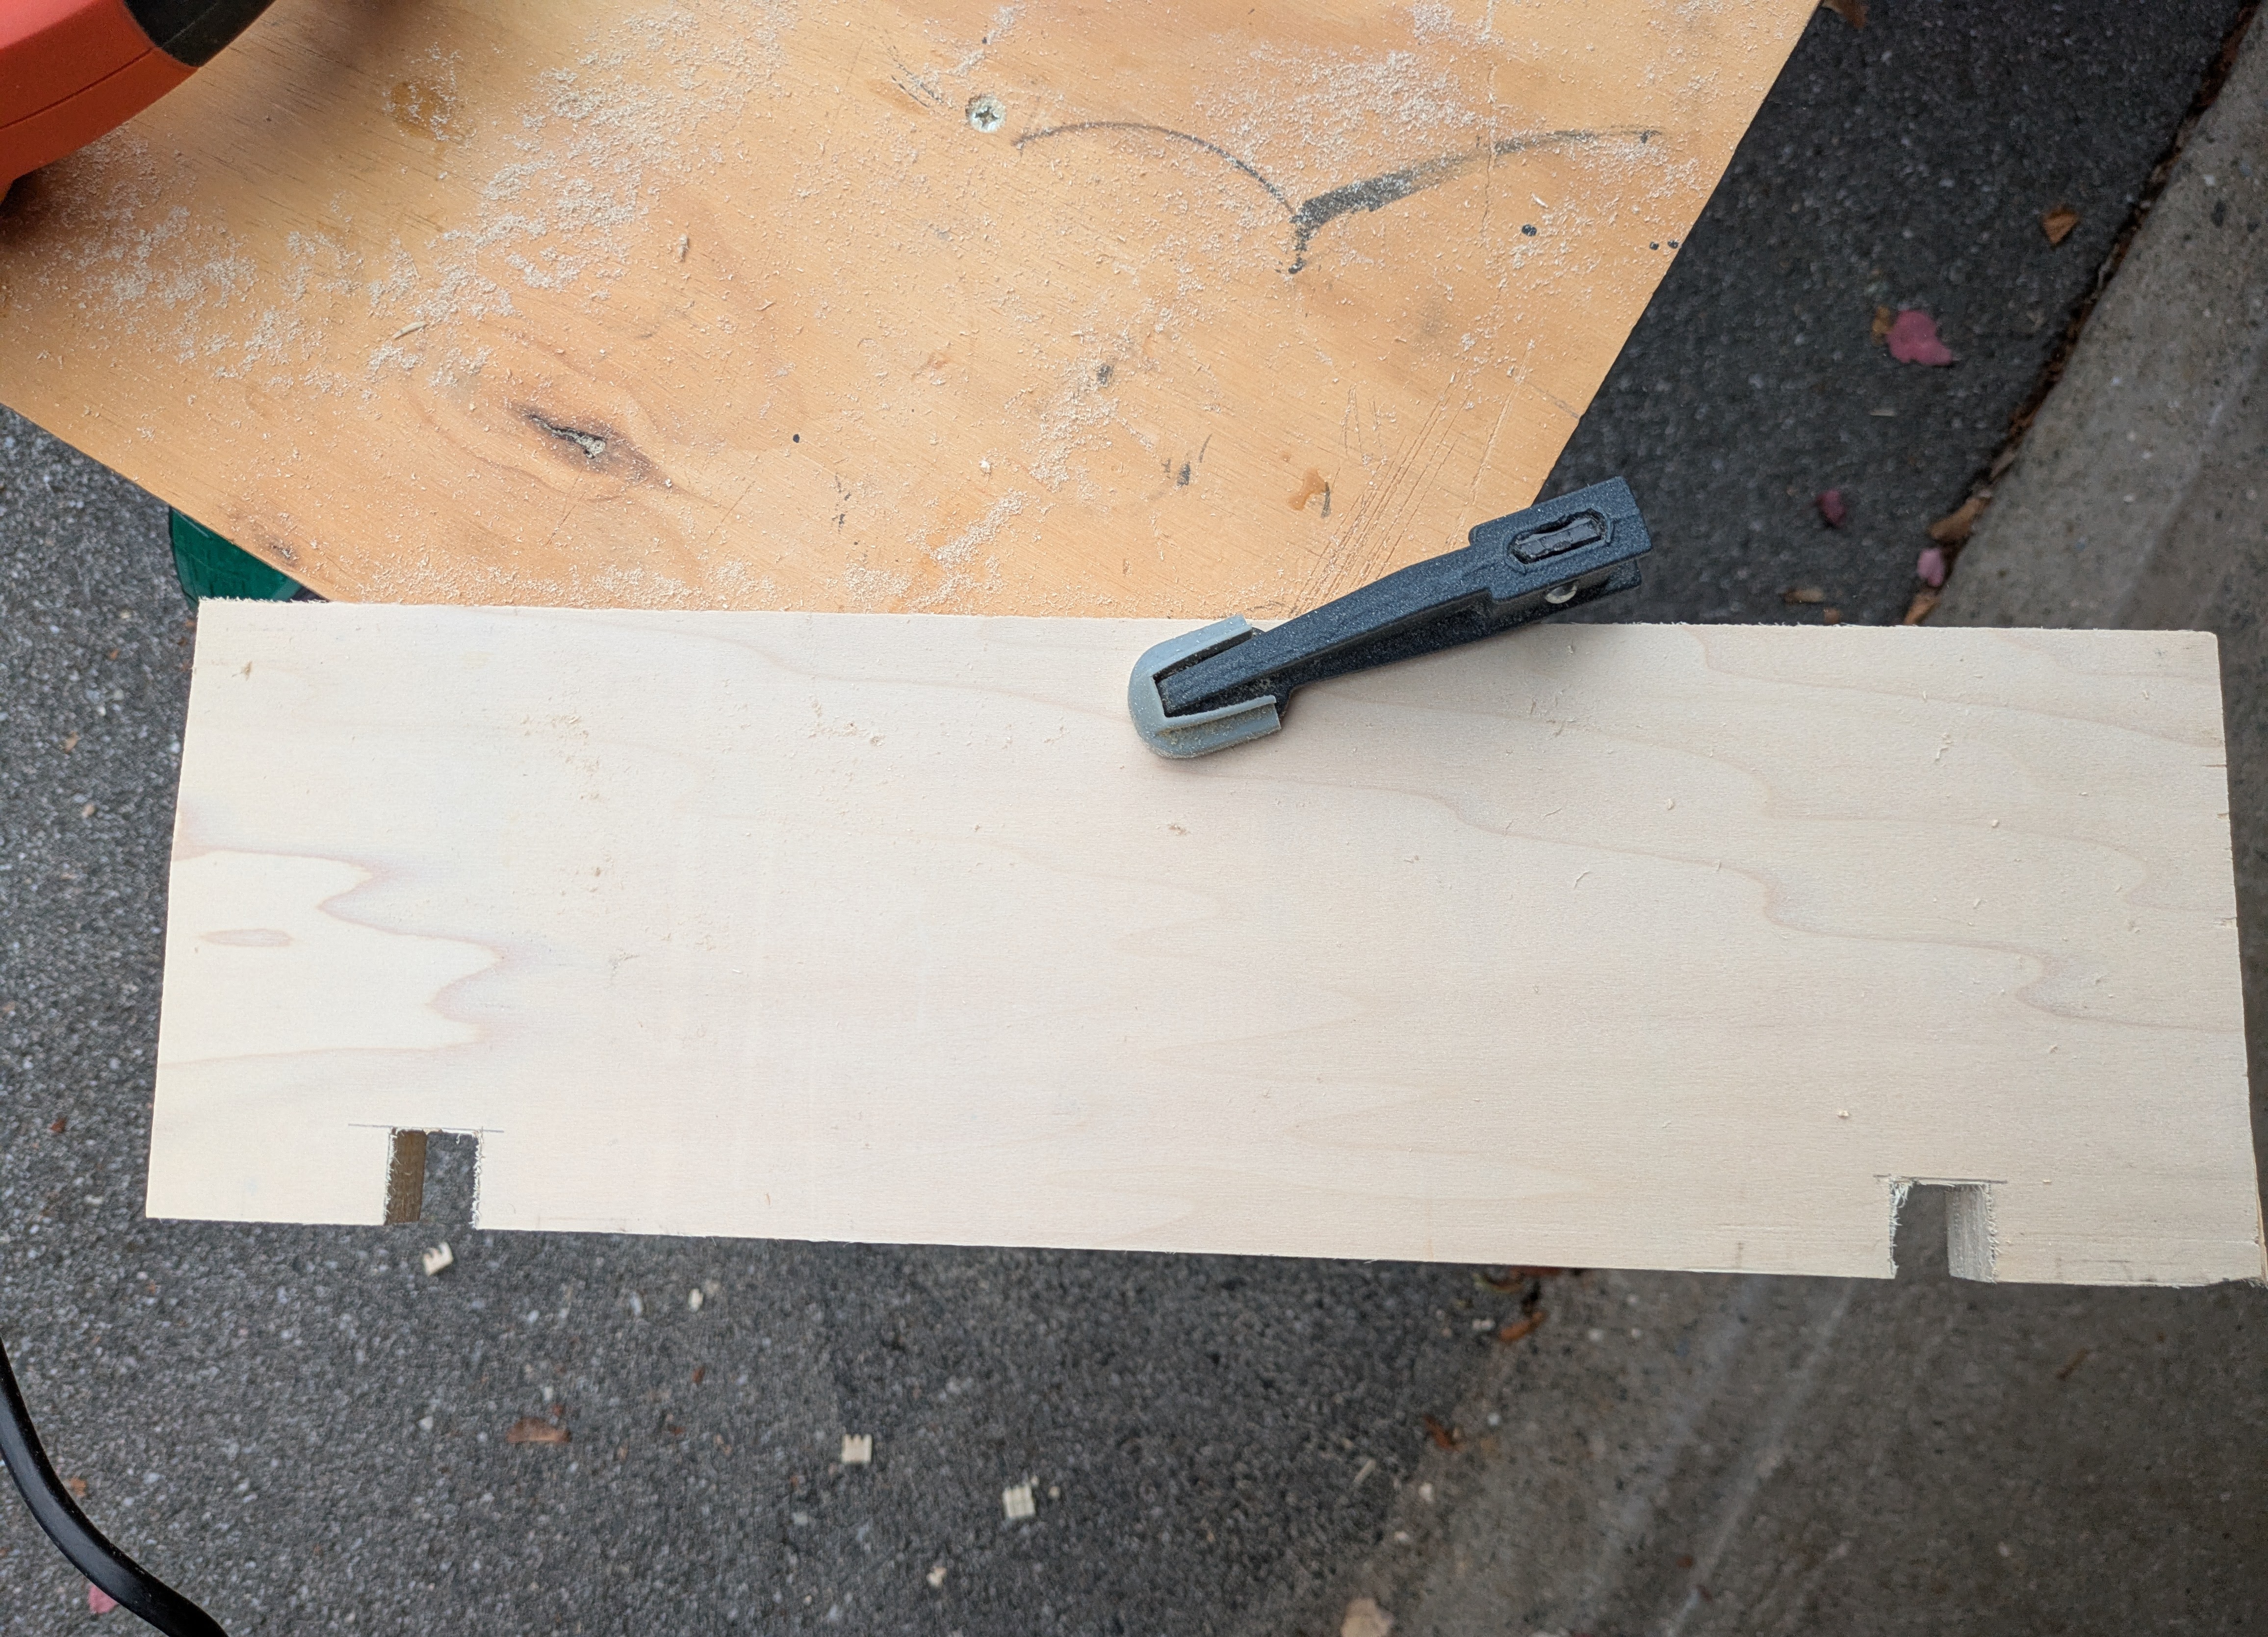
I found another piece of plywood that was just a bit too tall for the space between the supports and the top innards. I cut it to length. Then I measured and cut notches for it to slide into the supports on top of. This is why I wanted it to be too tall. The notches are as deep as it is too tall.
Second Fit 🔗
This worked much better. The amp had support with its tilt. With the notch design, I could still tear it down for travel if needed, much like the hinge inspiration offered.
Cleaning Up 🔗
With the design in place, I had to move on to less exciting matters. I sanded with 120 grit and 220 grit sandpaper.
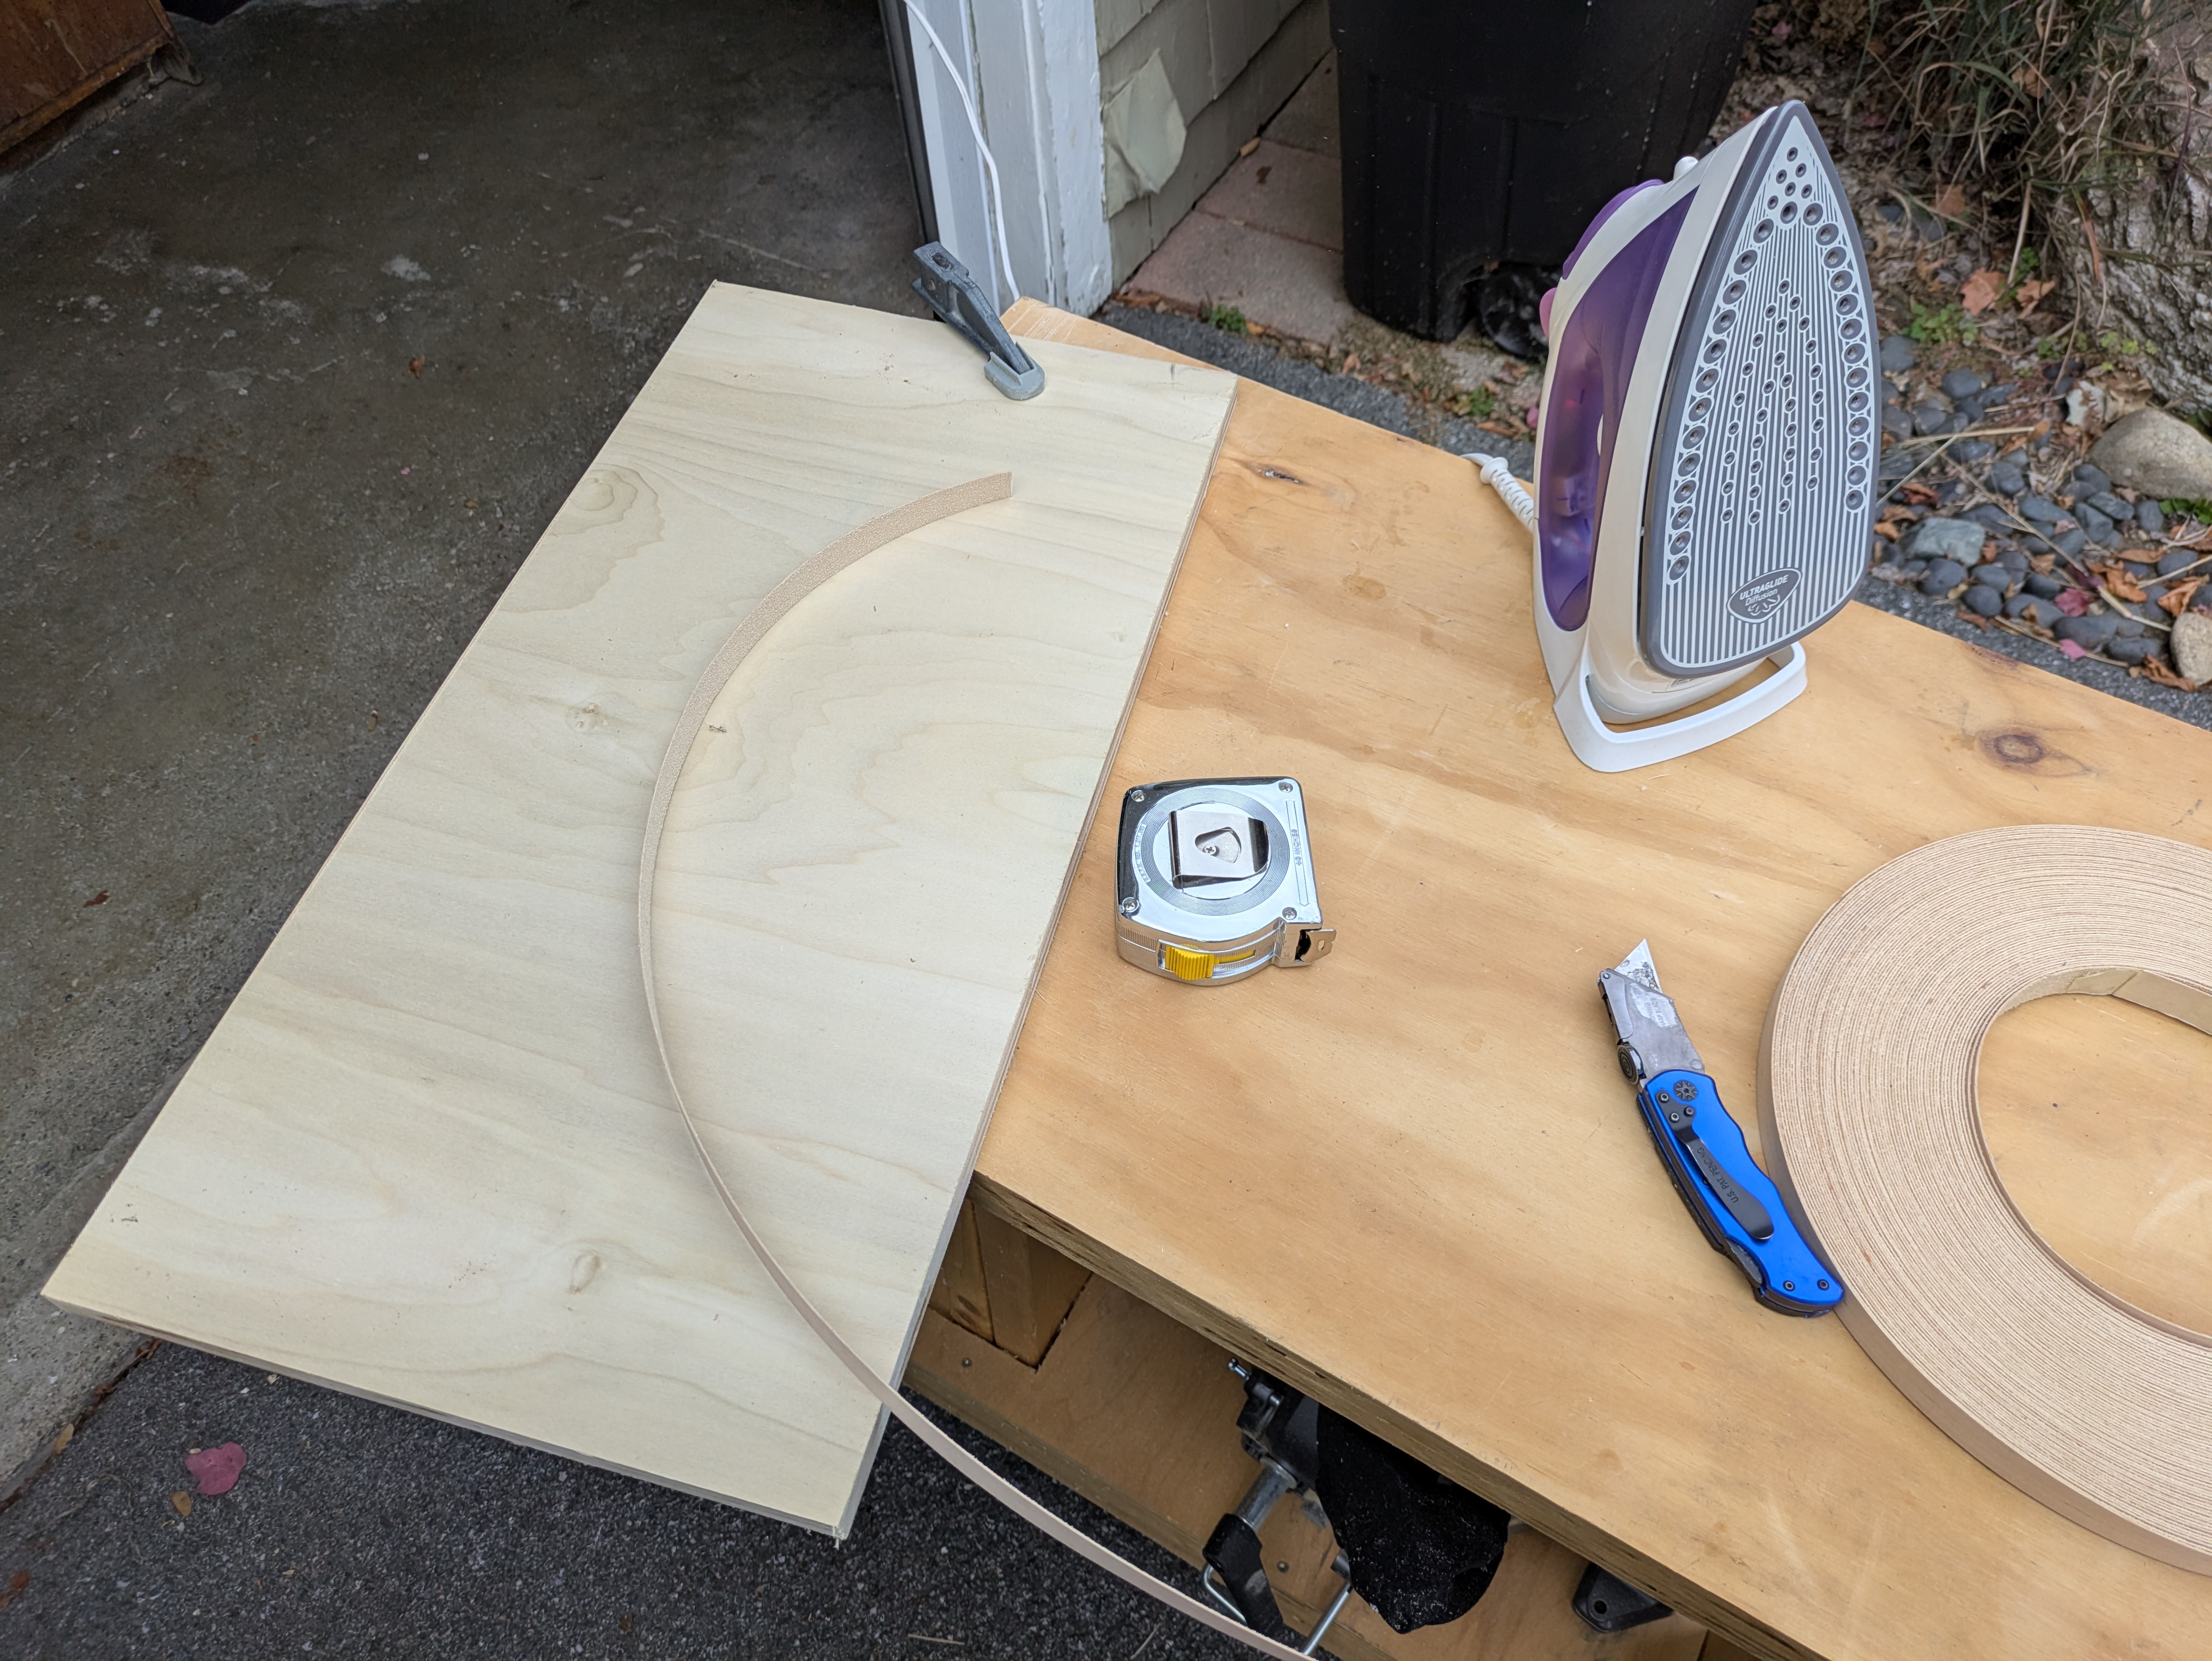
I had one more aesthetic concern to overcome. I don’t like seeing the plys in plywood. I know it’s a vibe, and some people like it, but it’s not for me. Even with a painted piece, I can still see the layers, and it annoys me. I also didn’t want to spend a ton of time on this, because I had enough to get through in the rest of the afternoon, so I compromised. I edge-banded only the front faces of each support. The only part that should be visible to me when looking at it.
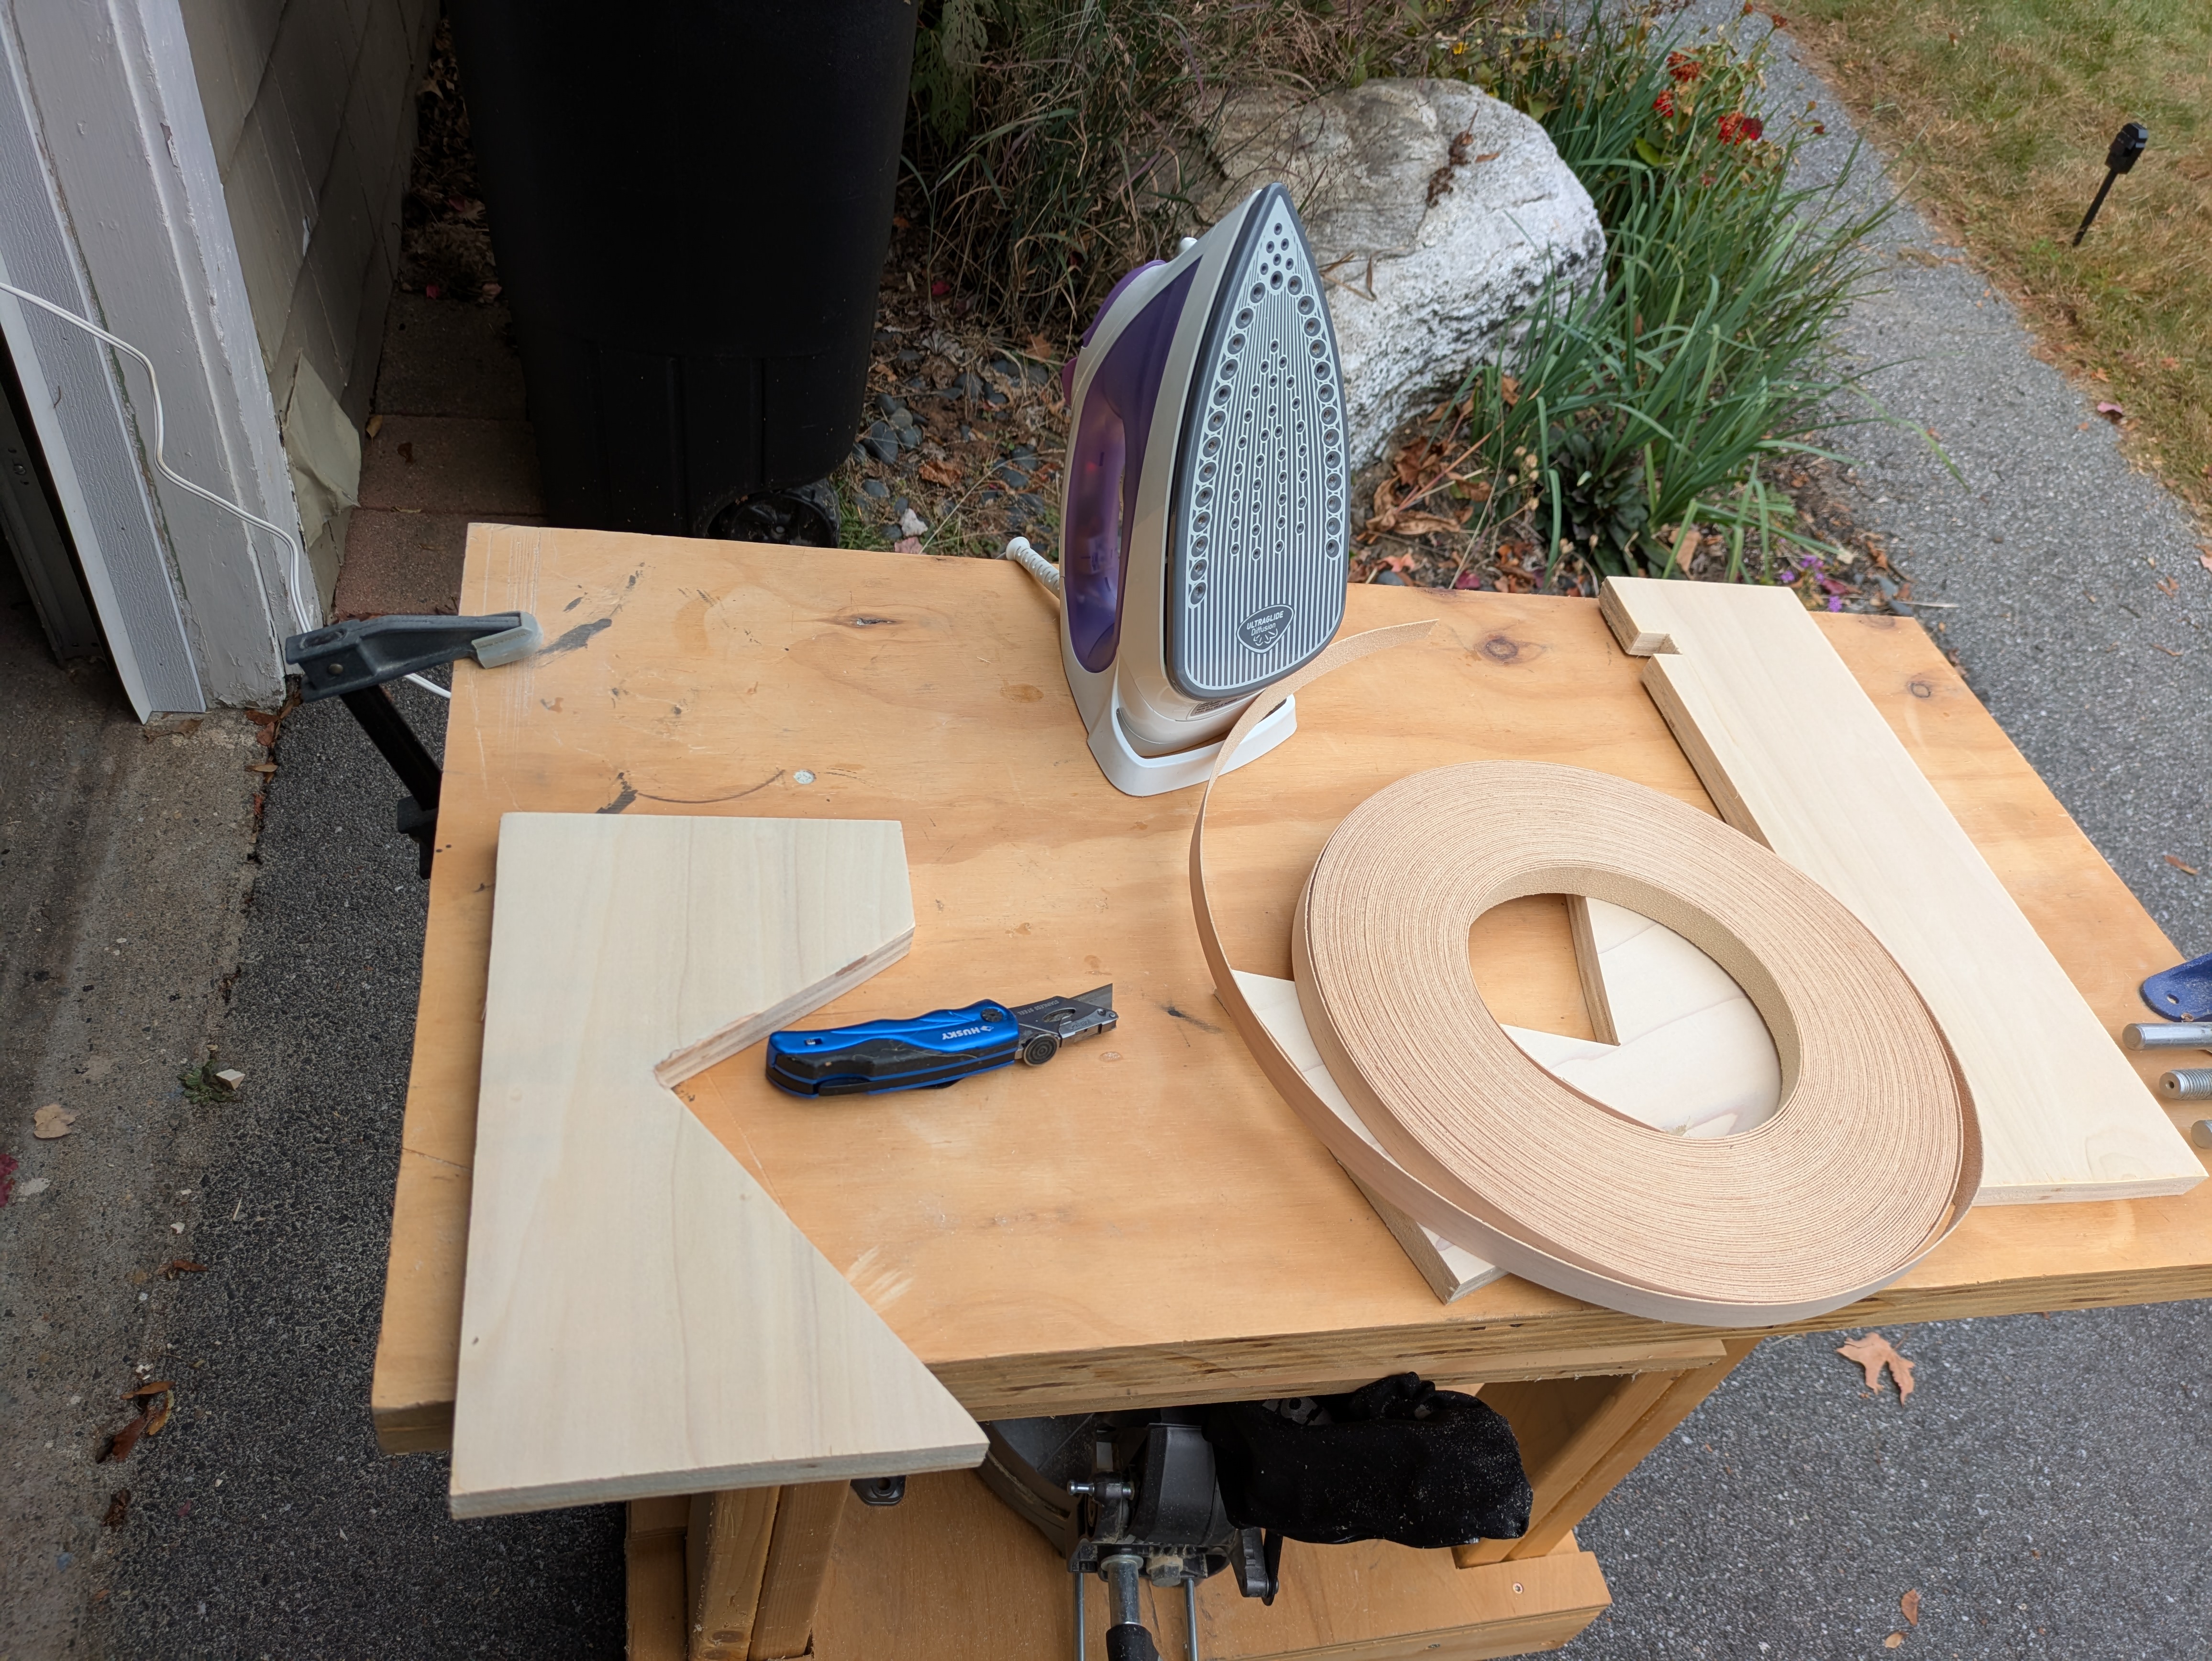
This involved getting the iron out to heat up the adhesive on the other side of the edge banding, running it along the edge banding when pressed against the faces, pushing them in place, and cleaning up the edges with a utility knife.
I needed to put some sort of finish on the stand, but again, didn’t want to spend any money. I had a can of black spray paint, but didn’t think it’d be enough. I also had a used can of gray primer. I primed the pieces with gray, and then went with one coat of black over each side.
Platform for the Stand 🔗
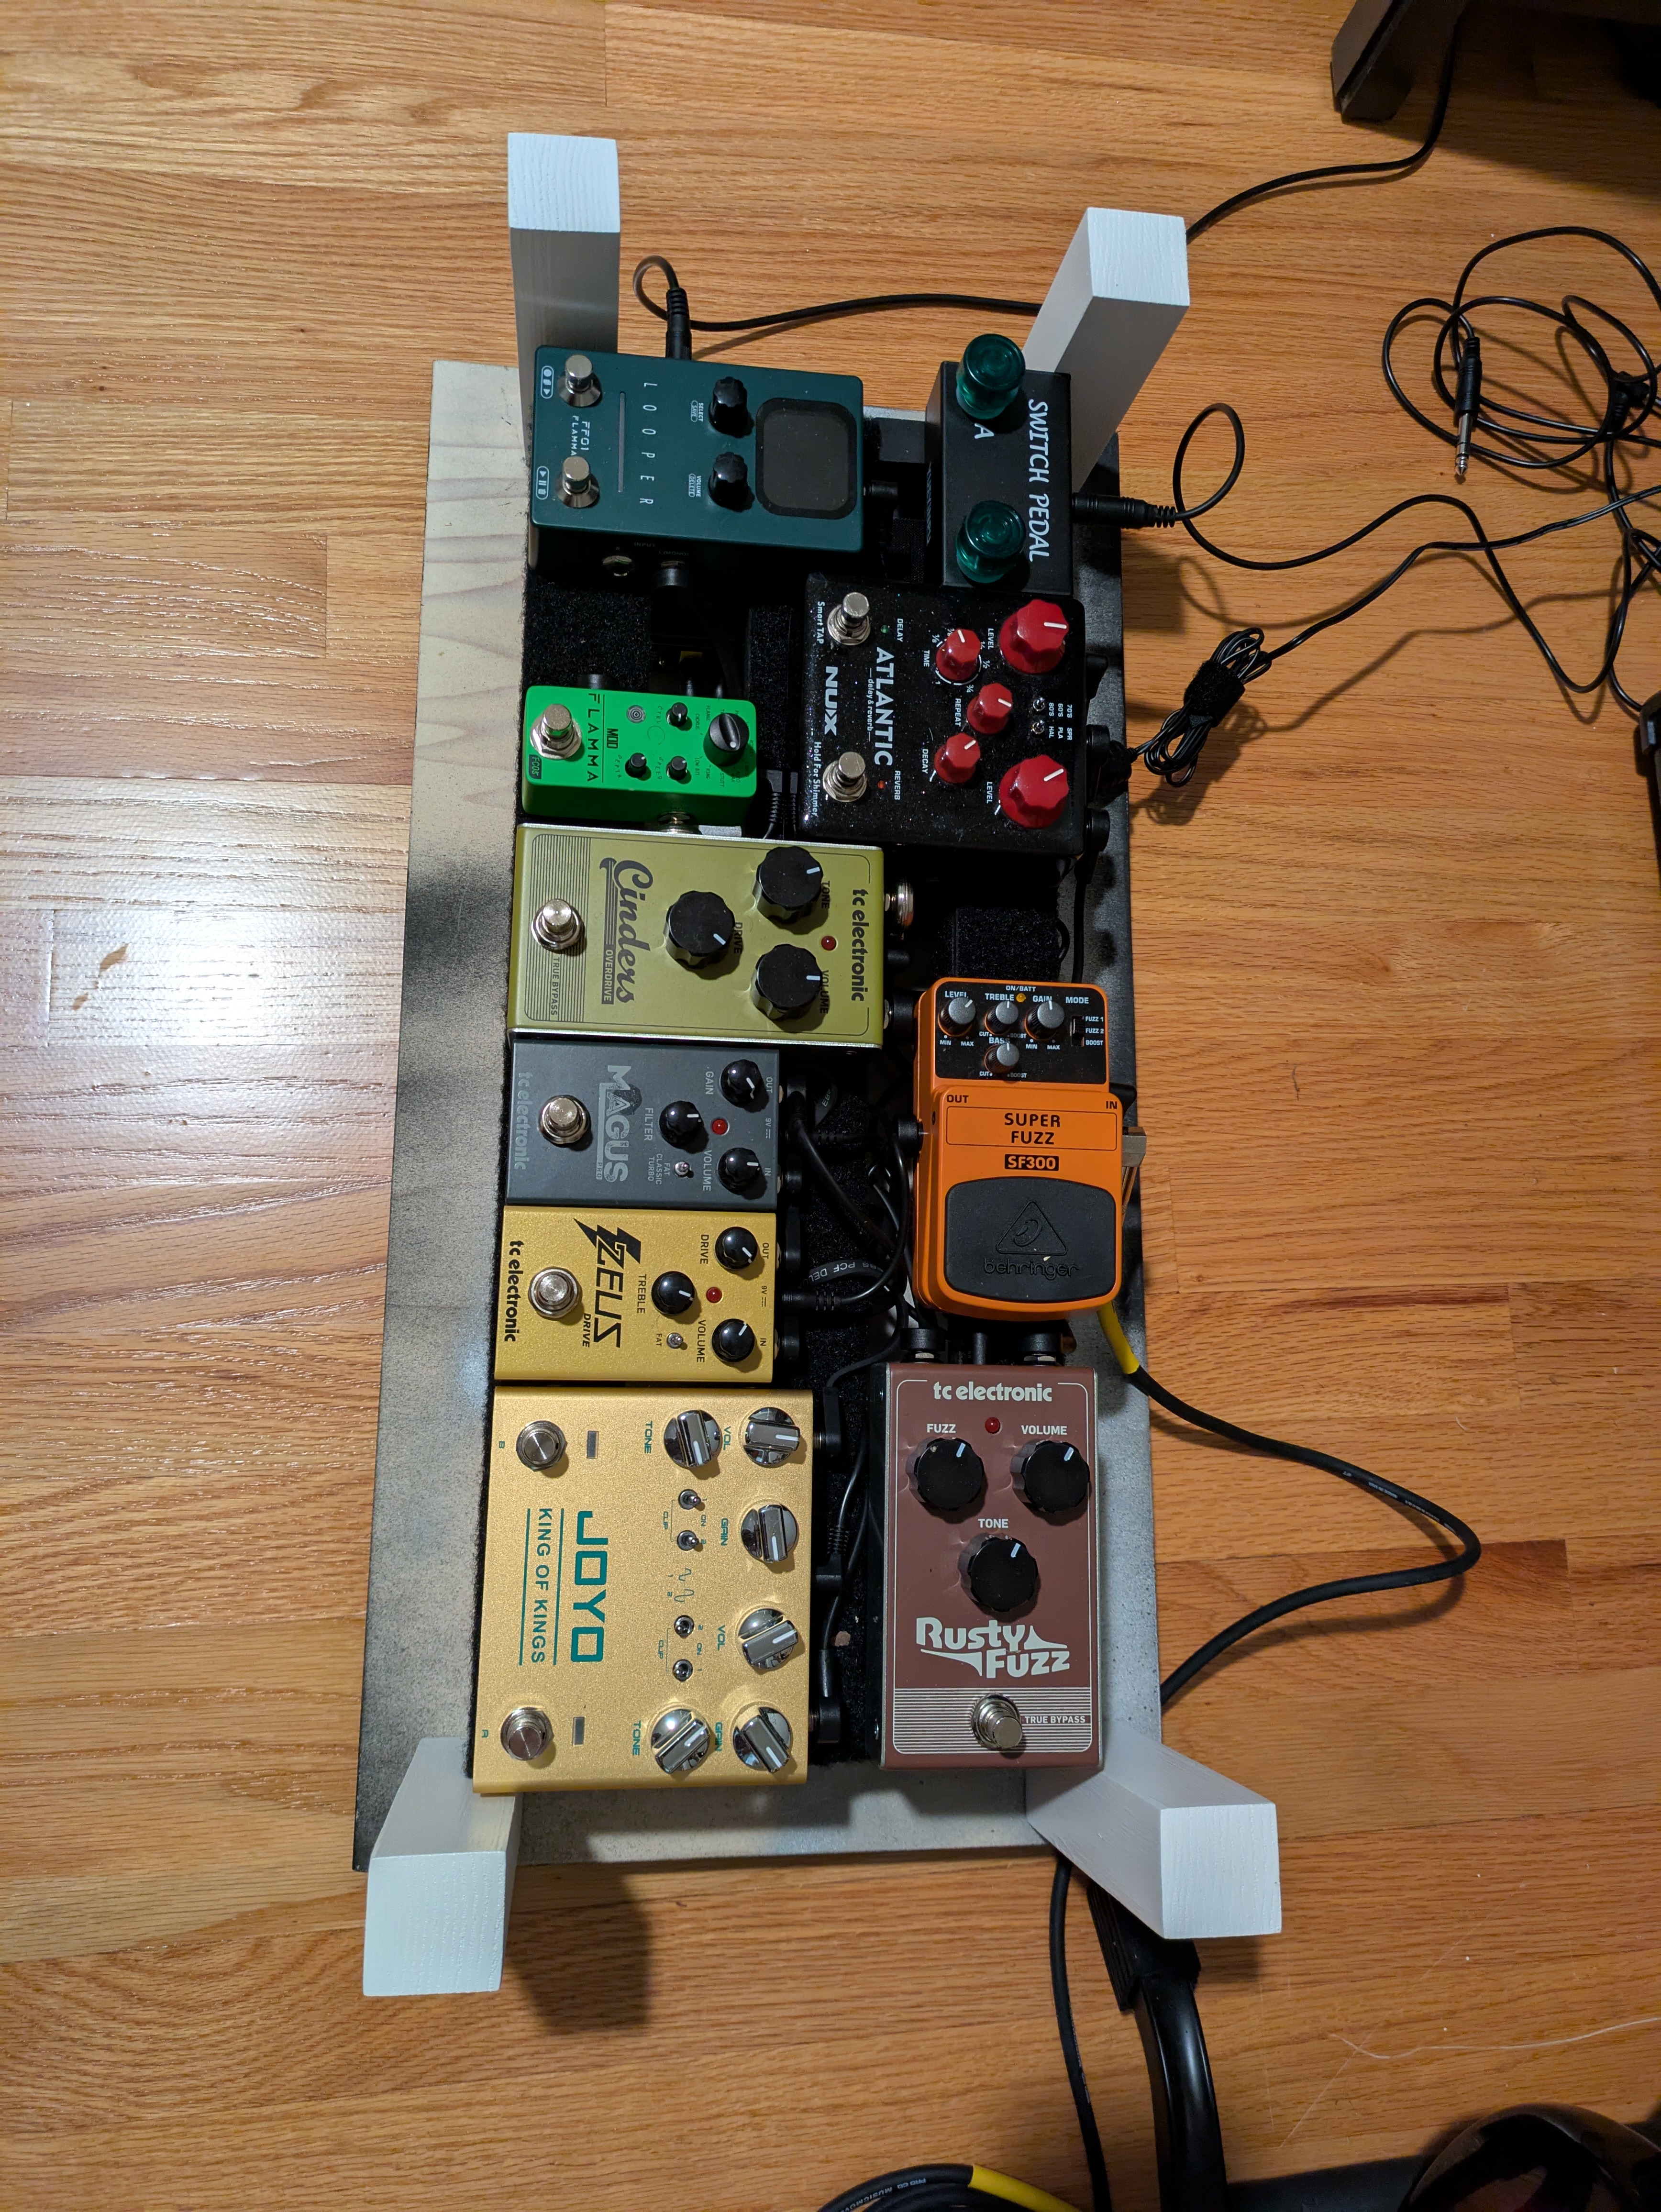
In between coats, I surveyed what other wood I had at my disposal. I found a 24" long segment of plywood and had an idea. My pedalboard is about 20" wide. I could build a platform that the amp stand sits on top of, and I could tuck my pedalboard just barely underneath this platform if I wanted to tidy things up and gain some floorspace in my room.
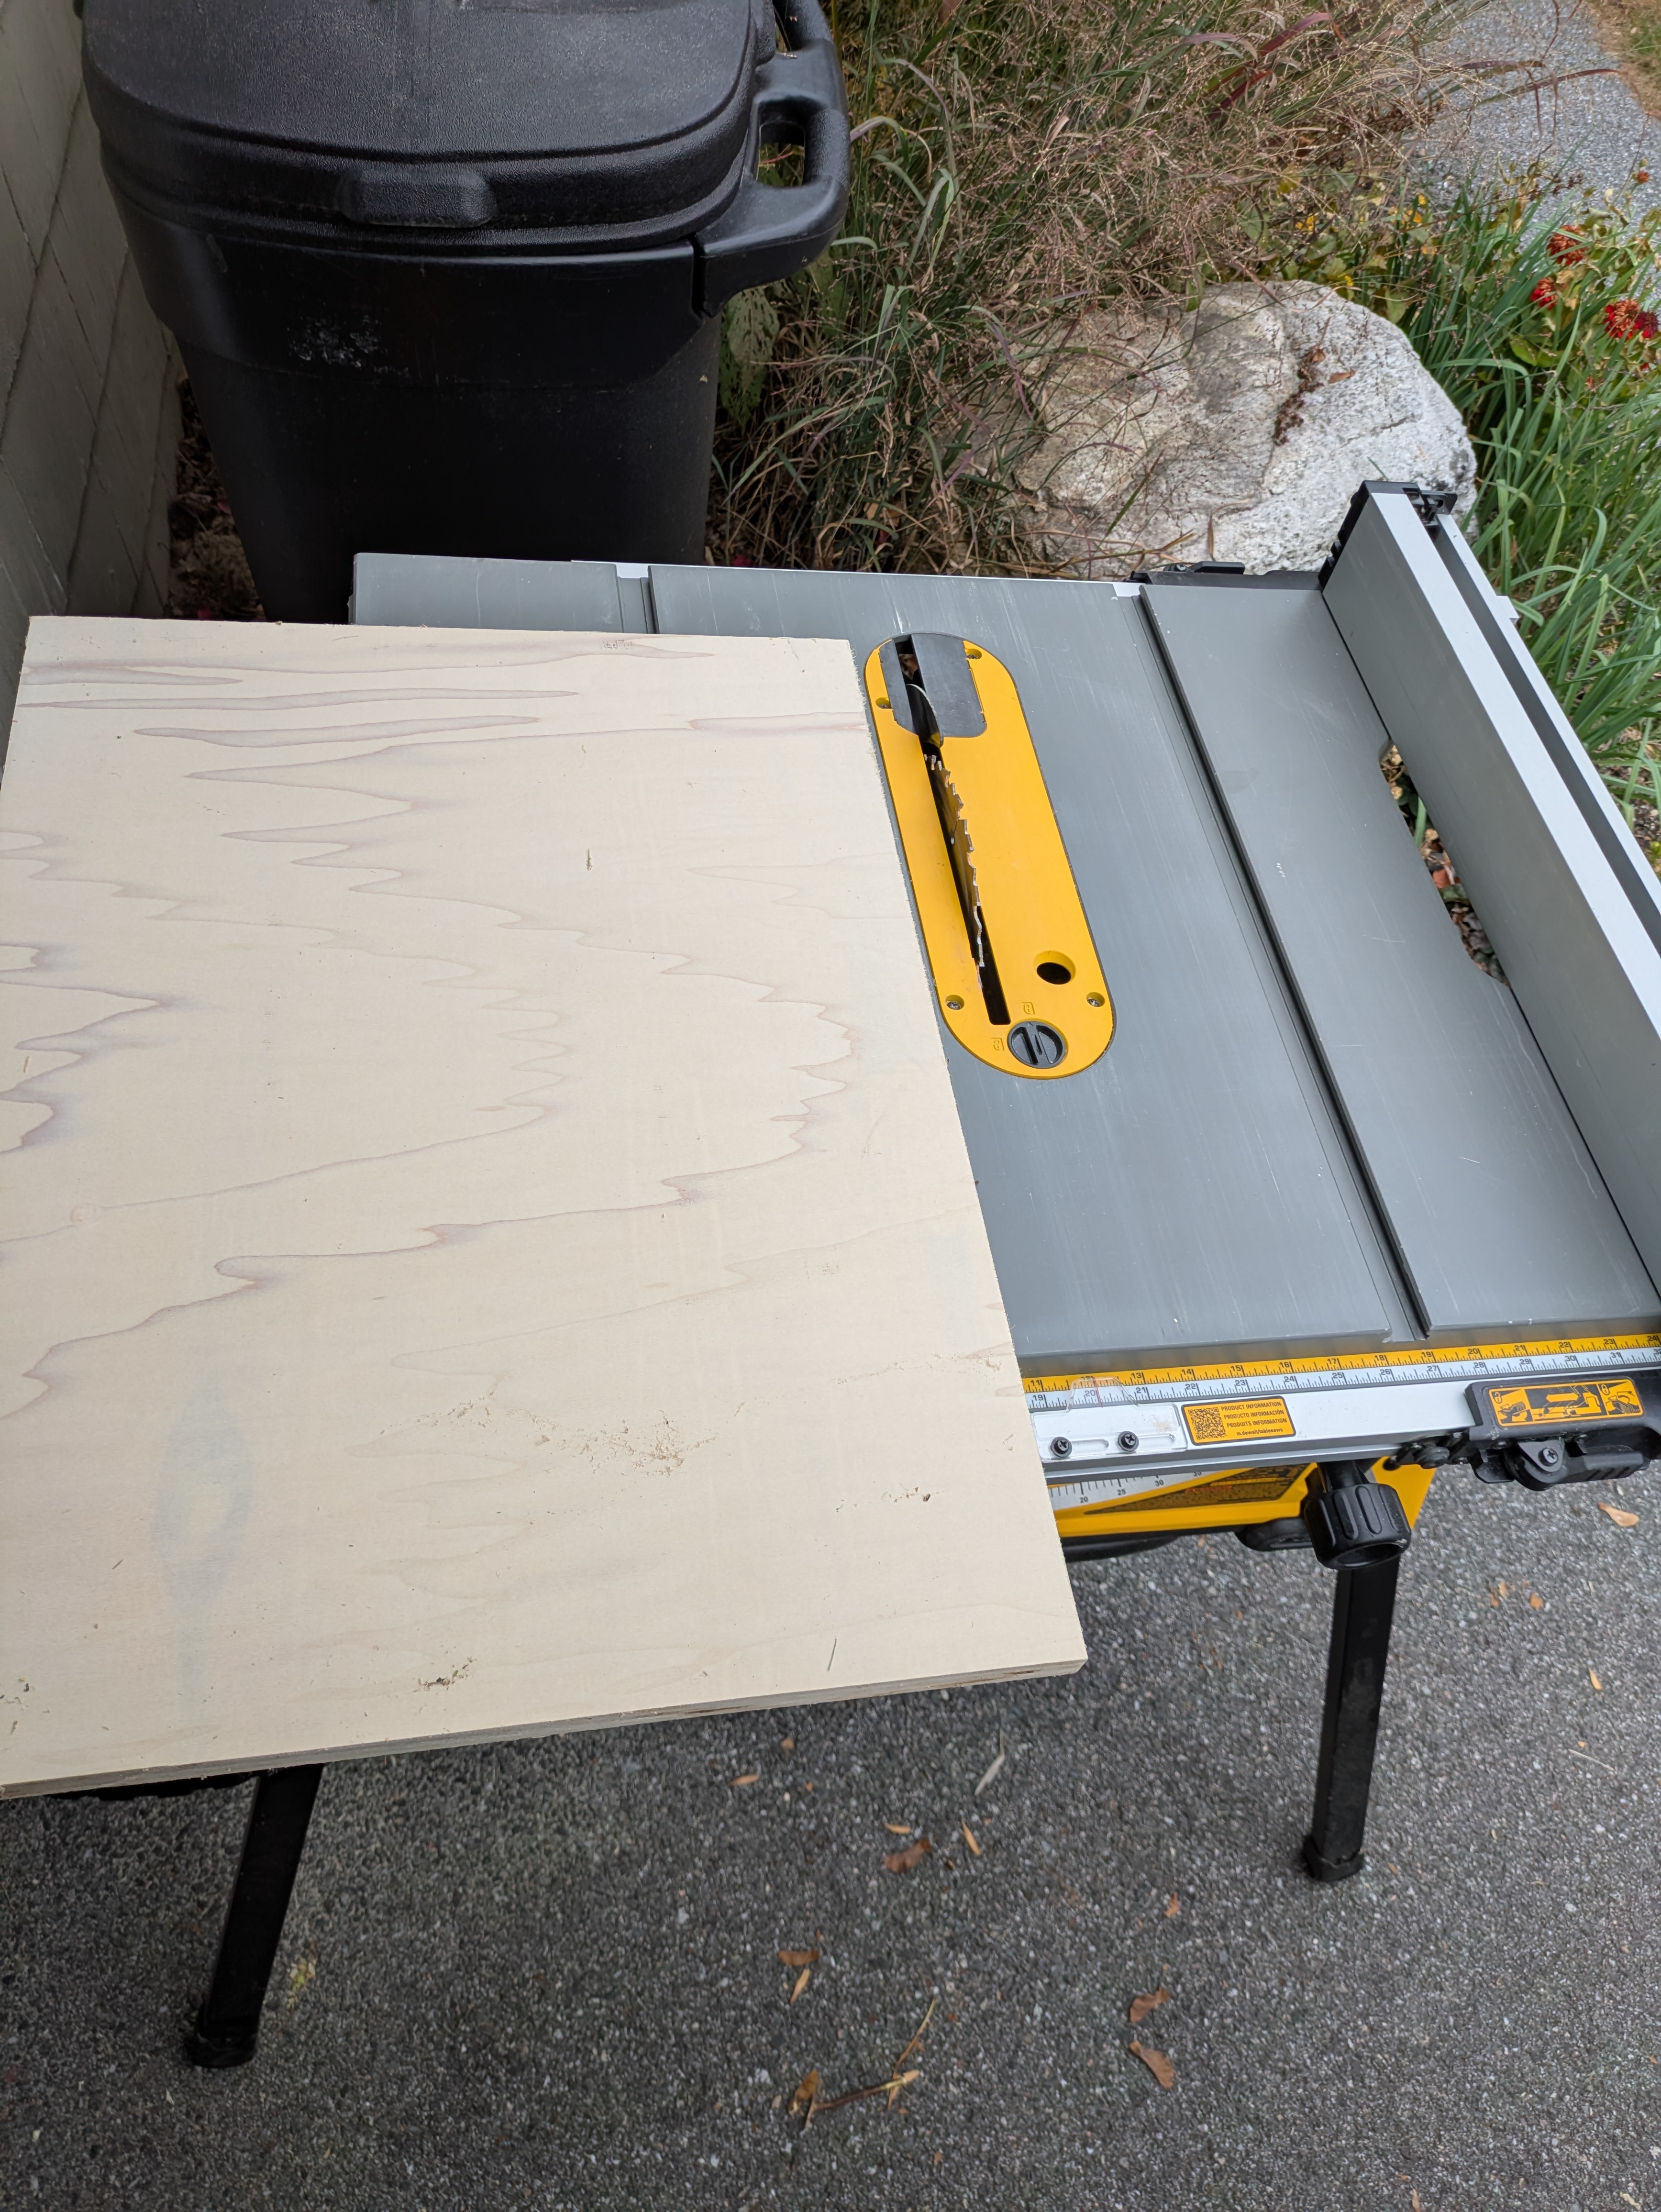
I cut the depth I wanted the platform to have on the table saw.
These edges would be visible as well, so I got the iron back out and edge banded all four sides of this piece.
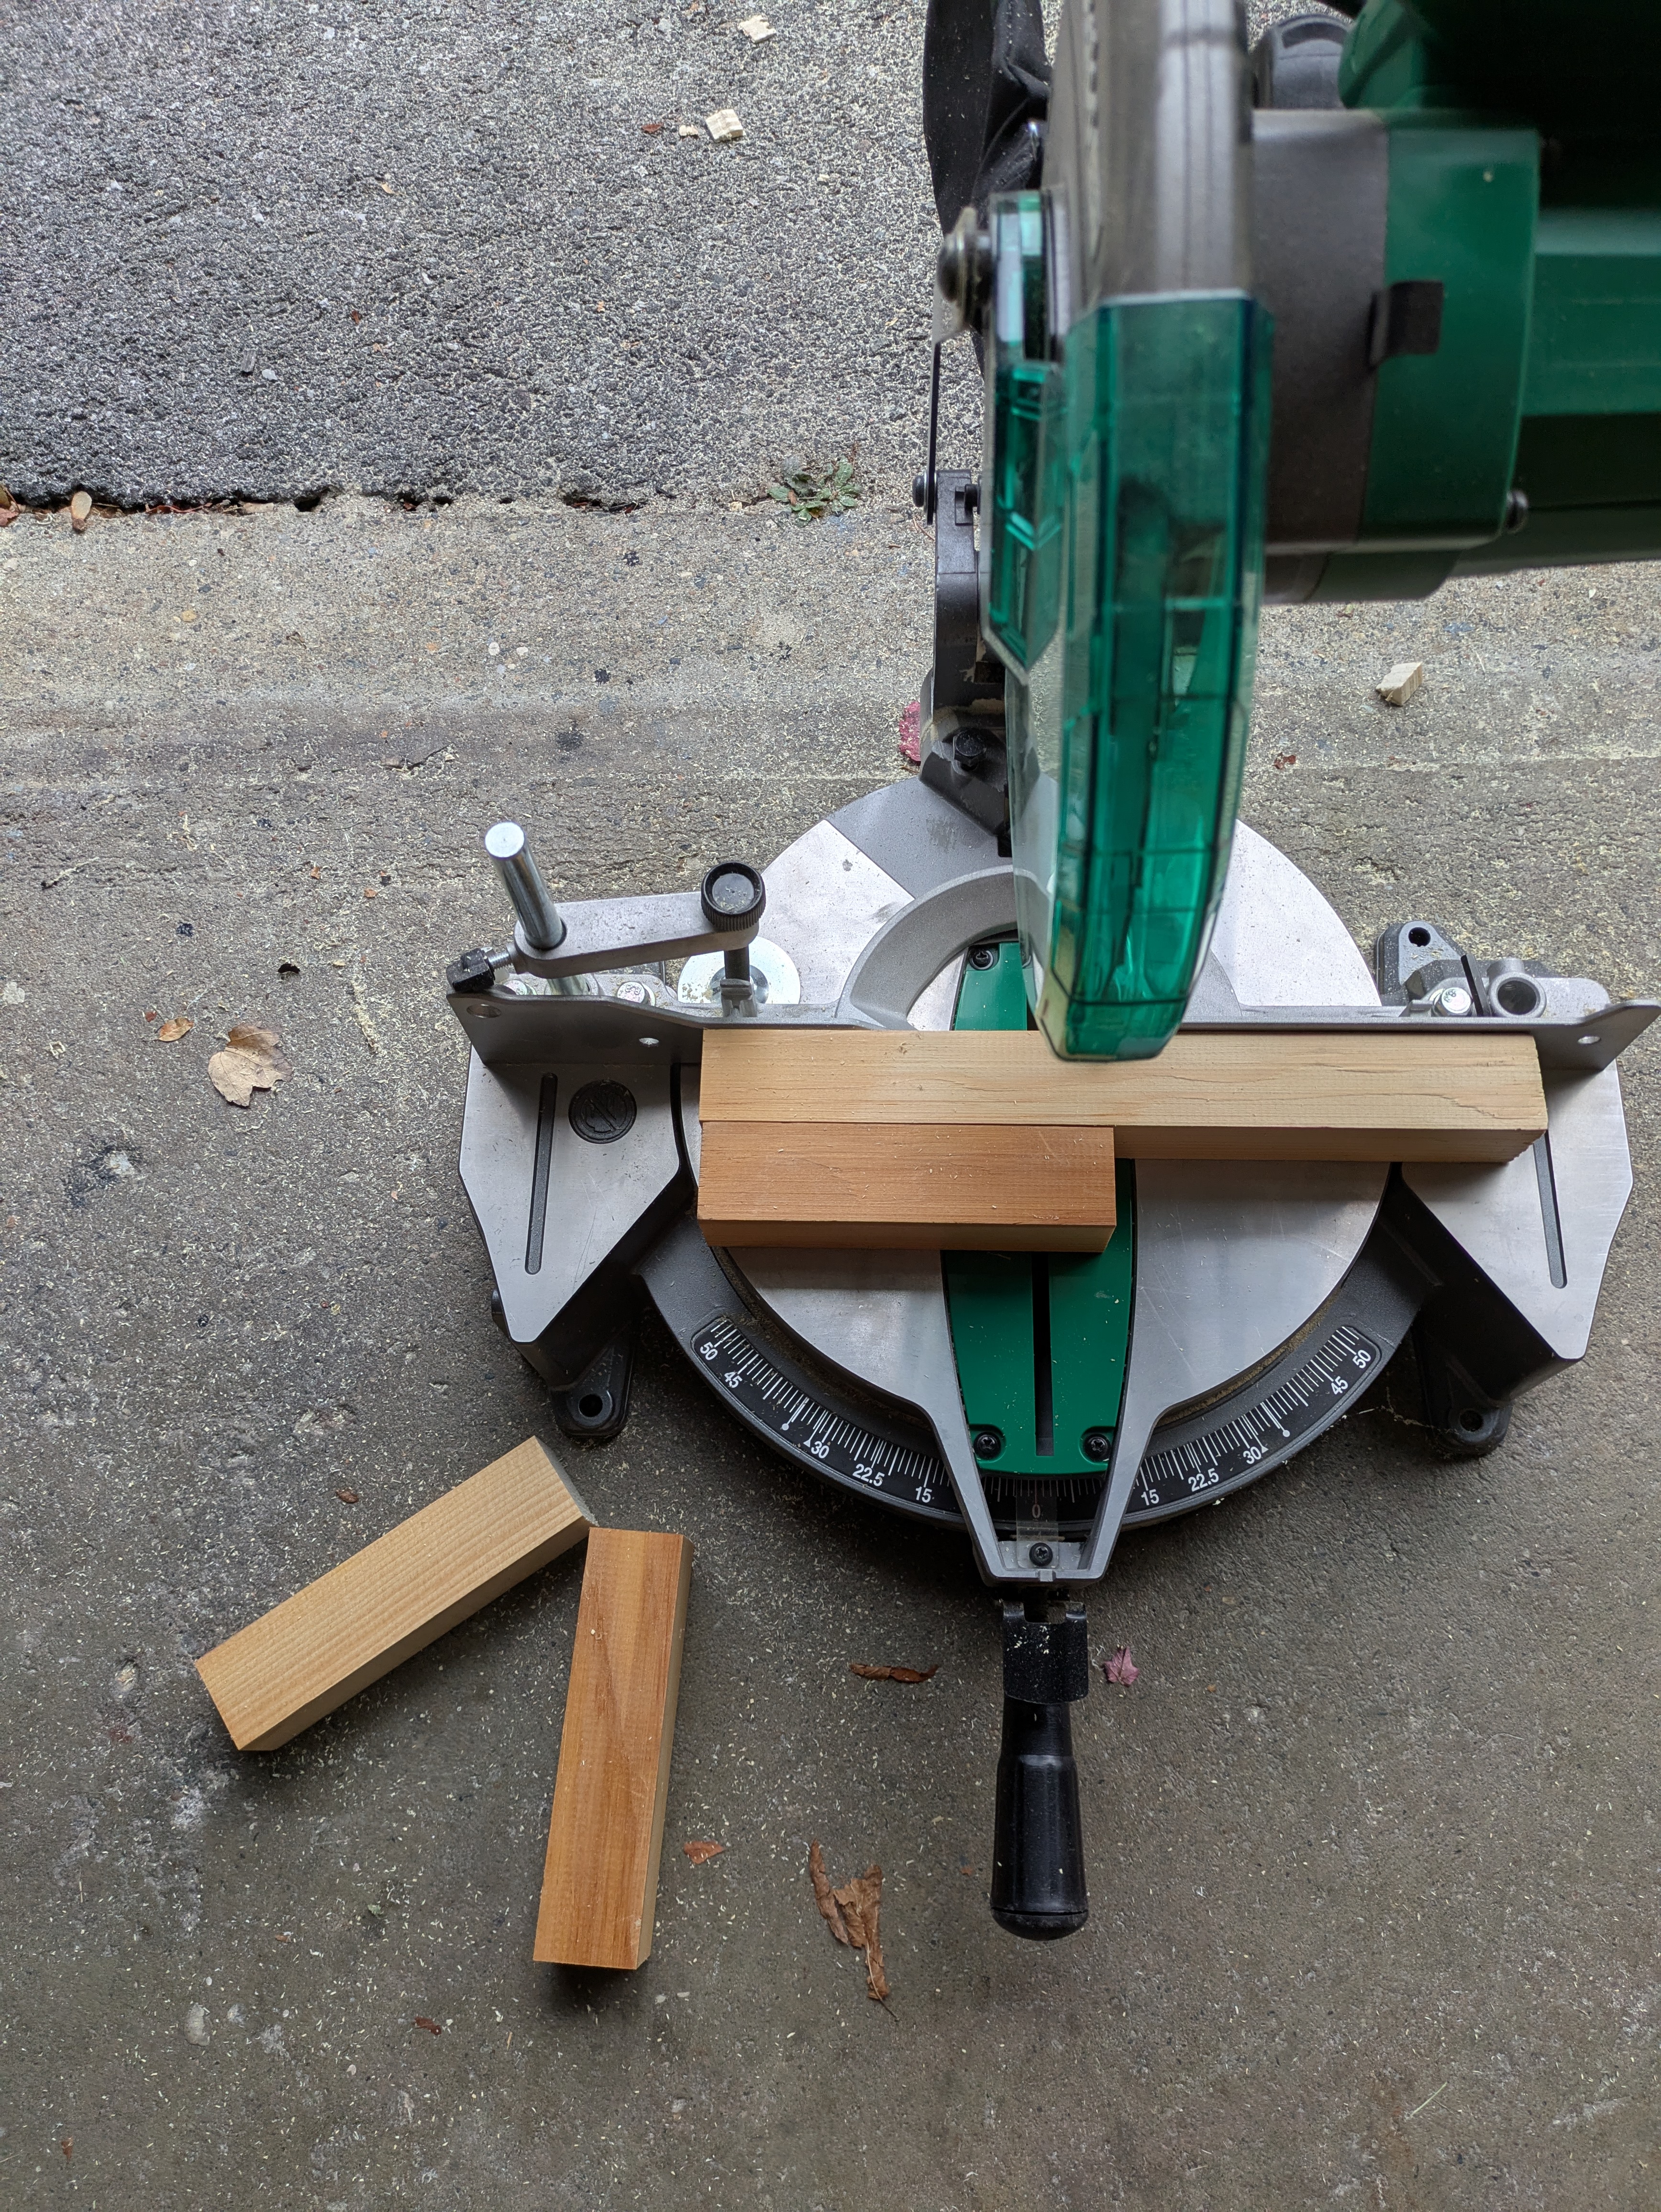
I found a length of 2"x2" (actually 1.5"x1.5") that I could use for the legs. That would give me 21" of clearance for the pedalboard - and for a 20" pedalboard, that’ll just barely do.
I cut those to height on the miter saw.
Then there was more sanding.
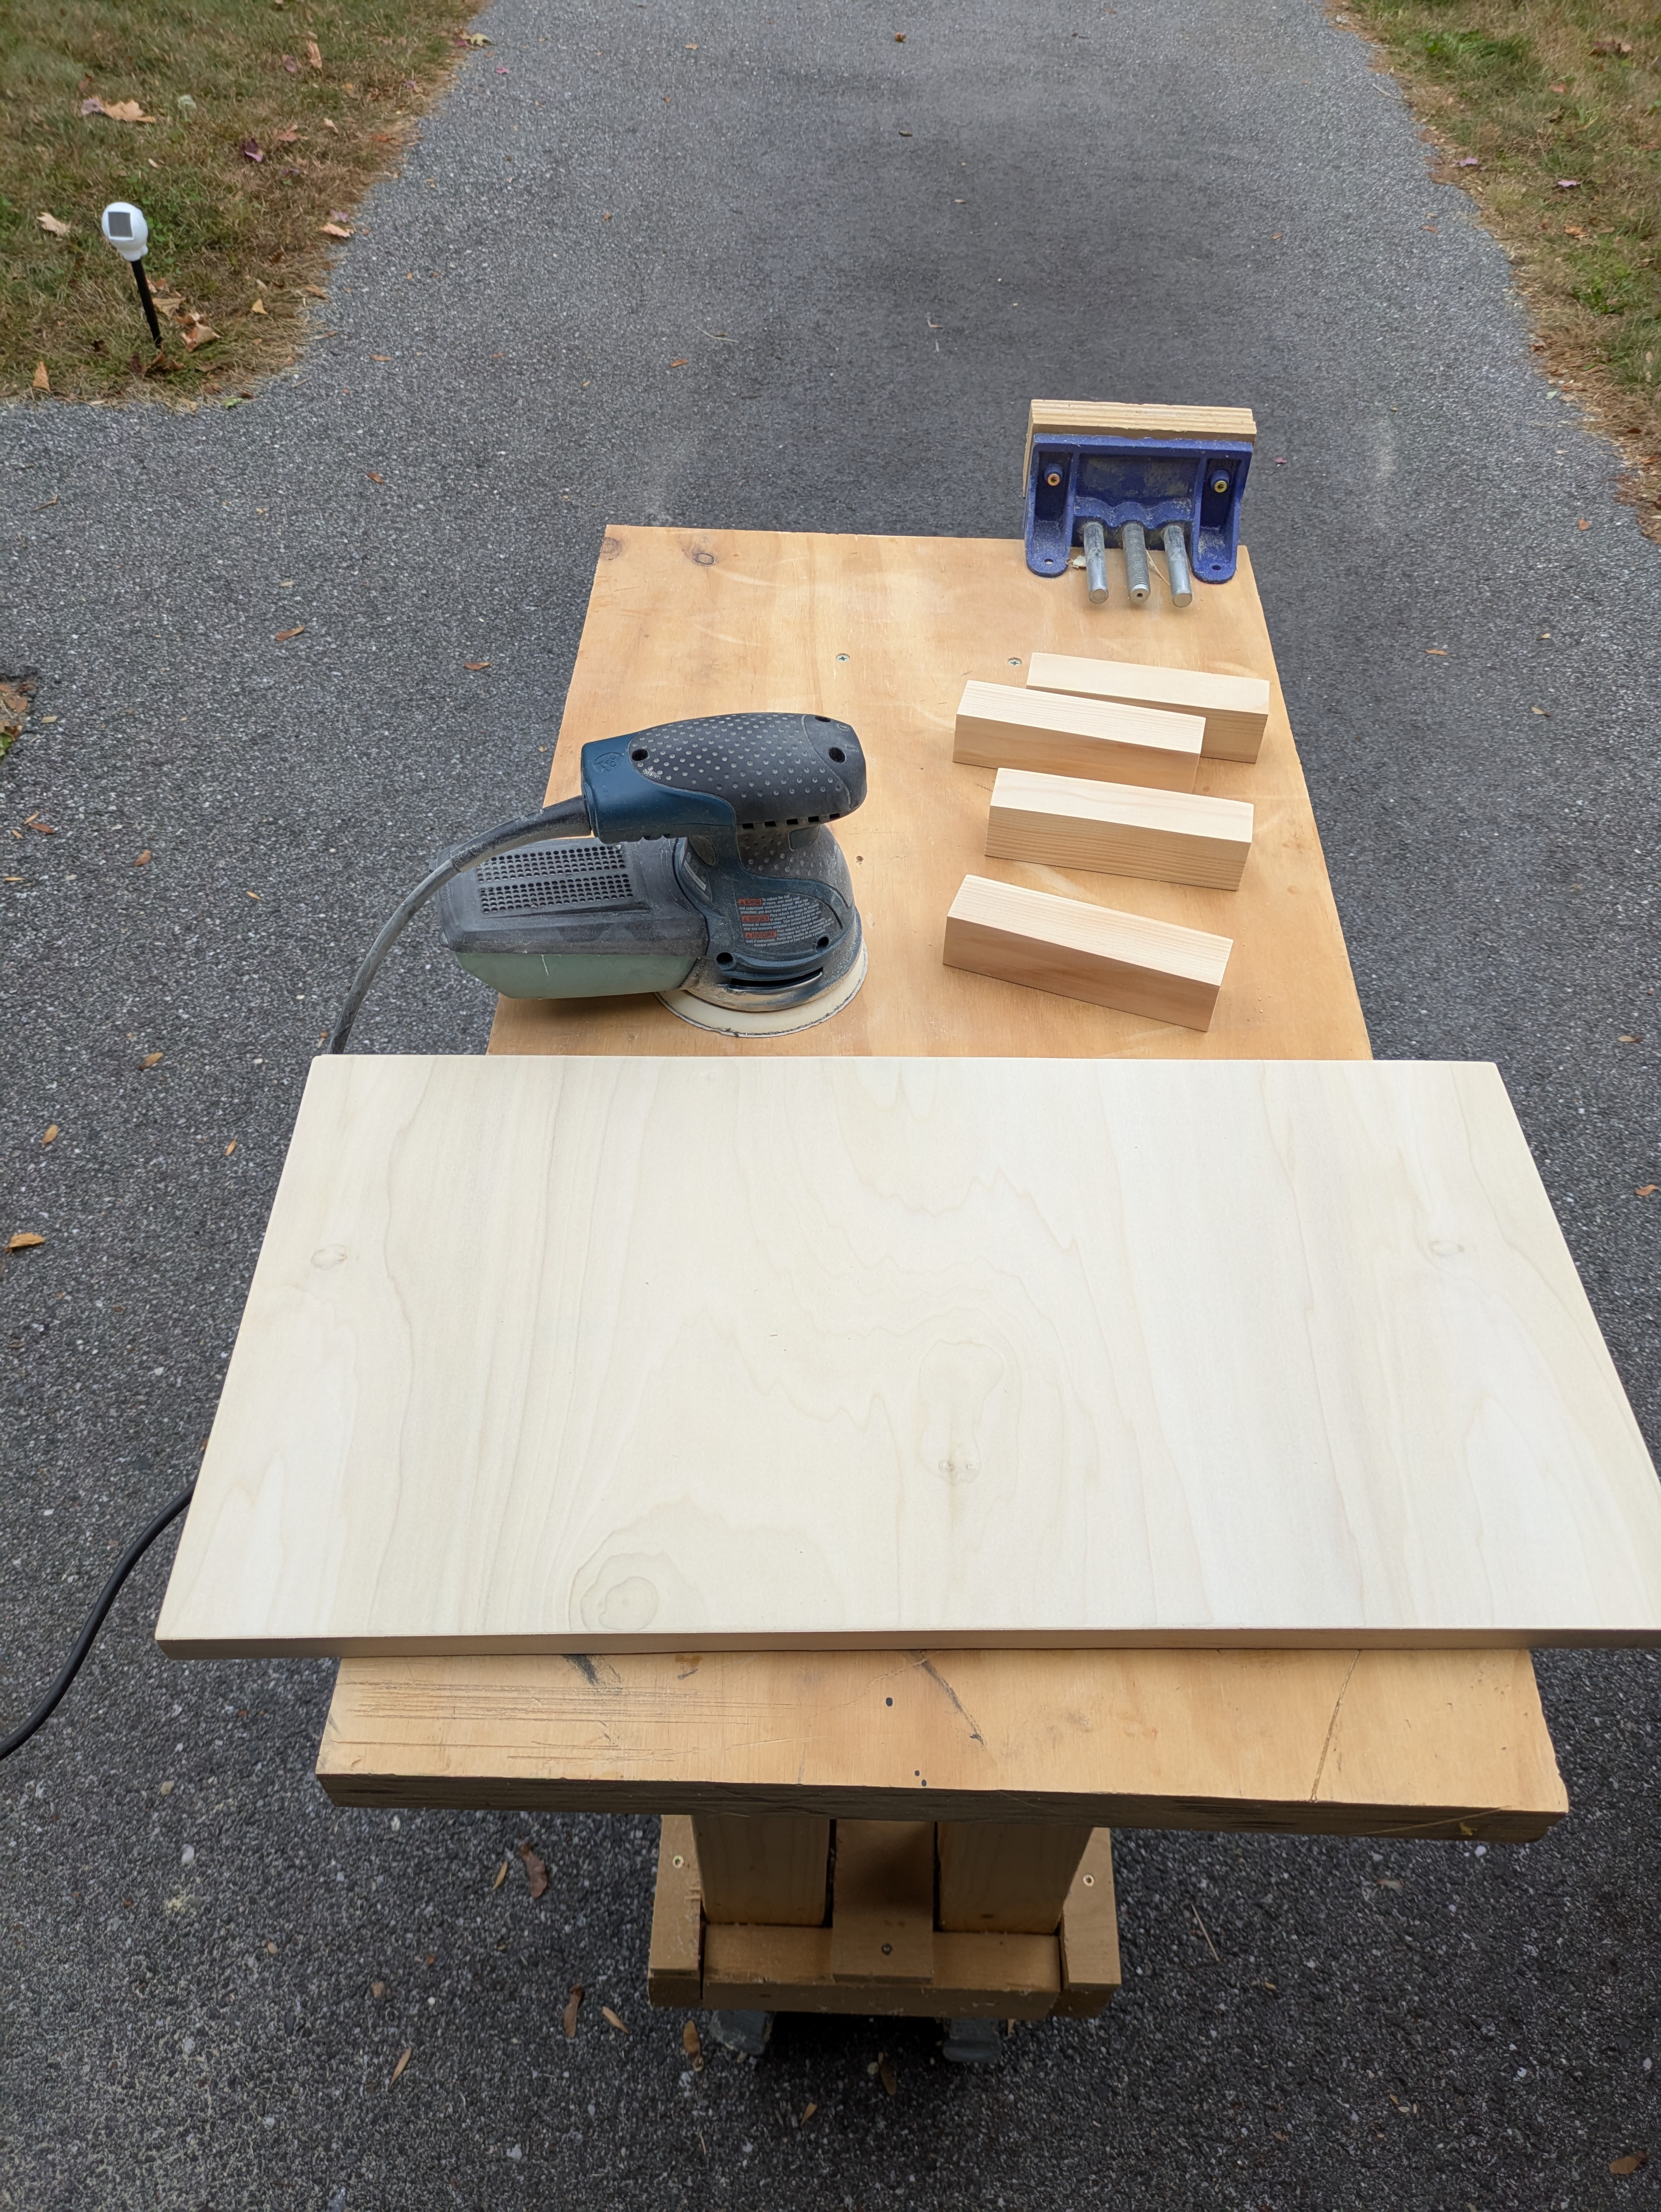
I knew I had to paint the legs, but I also didn’t have a lot of time to sit around waiting for drying. I had some 1/4" plywood scraps and some finishing nails. I attached them as little platforms so I could paint all sides of the legs, other than the side that would attach to the bottom of the platform, all in one go.
I had just enough black spray paint to cover the top and sides of the platform, but not the bottom. And also not the legs. I used some white paint for the legs, giving them two quick coats. With that, I was done for the evening.
Assembly 🔗
The next day after bringing things back to their final location and letting things dry, I could work on getting things together. I wanted the legs to be a bit inset from the sides of the platform. I also didn’t have a lot of room to play with so the pedalboard would fit below it.
I figured out the maximum spacing by flipping the platform over, putting my pedalboard on top of it, and placing the legs such that the pedalboard would fit between them. I could only inset the legs about 1/8", but it wasn’t nothing. The legs were placed 1.5" off from the front and back of the platform. I didn’t have my combination square, which would have made this easier, but I did what I could with a ruler.
I told you I ran out of black spray paint. And I didn’t want to spend any money. So the bottom of this platform will just be our secret.
I marked the locations of the legs on the bottom of the platform with pencil. I had some corner bracket braces available I could use to attach the legs to the platform. I only used one per leg. It’s not the most secure thing, but this also isn’t going to be doing much moving.
I sat down on the floor to put them together, and remembered I had a critical piece of equipment at my disposal: a table. I moved things over to the table so I could work more comfortably.
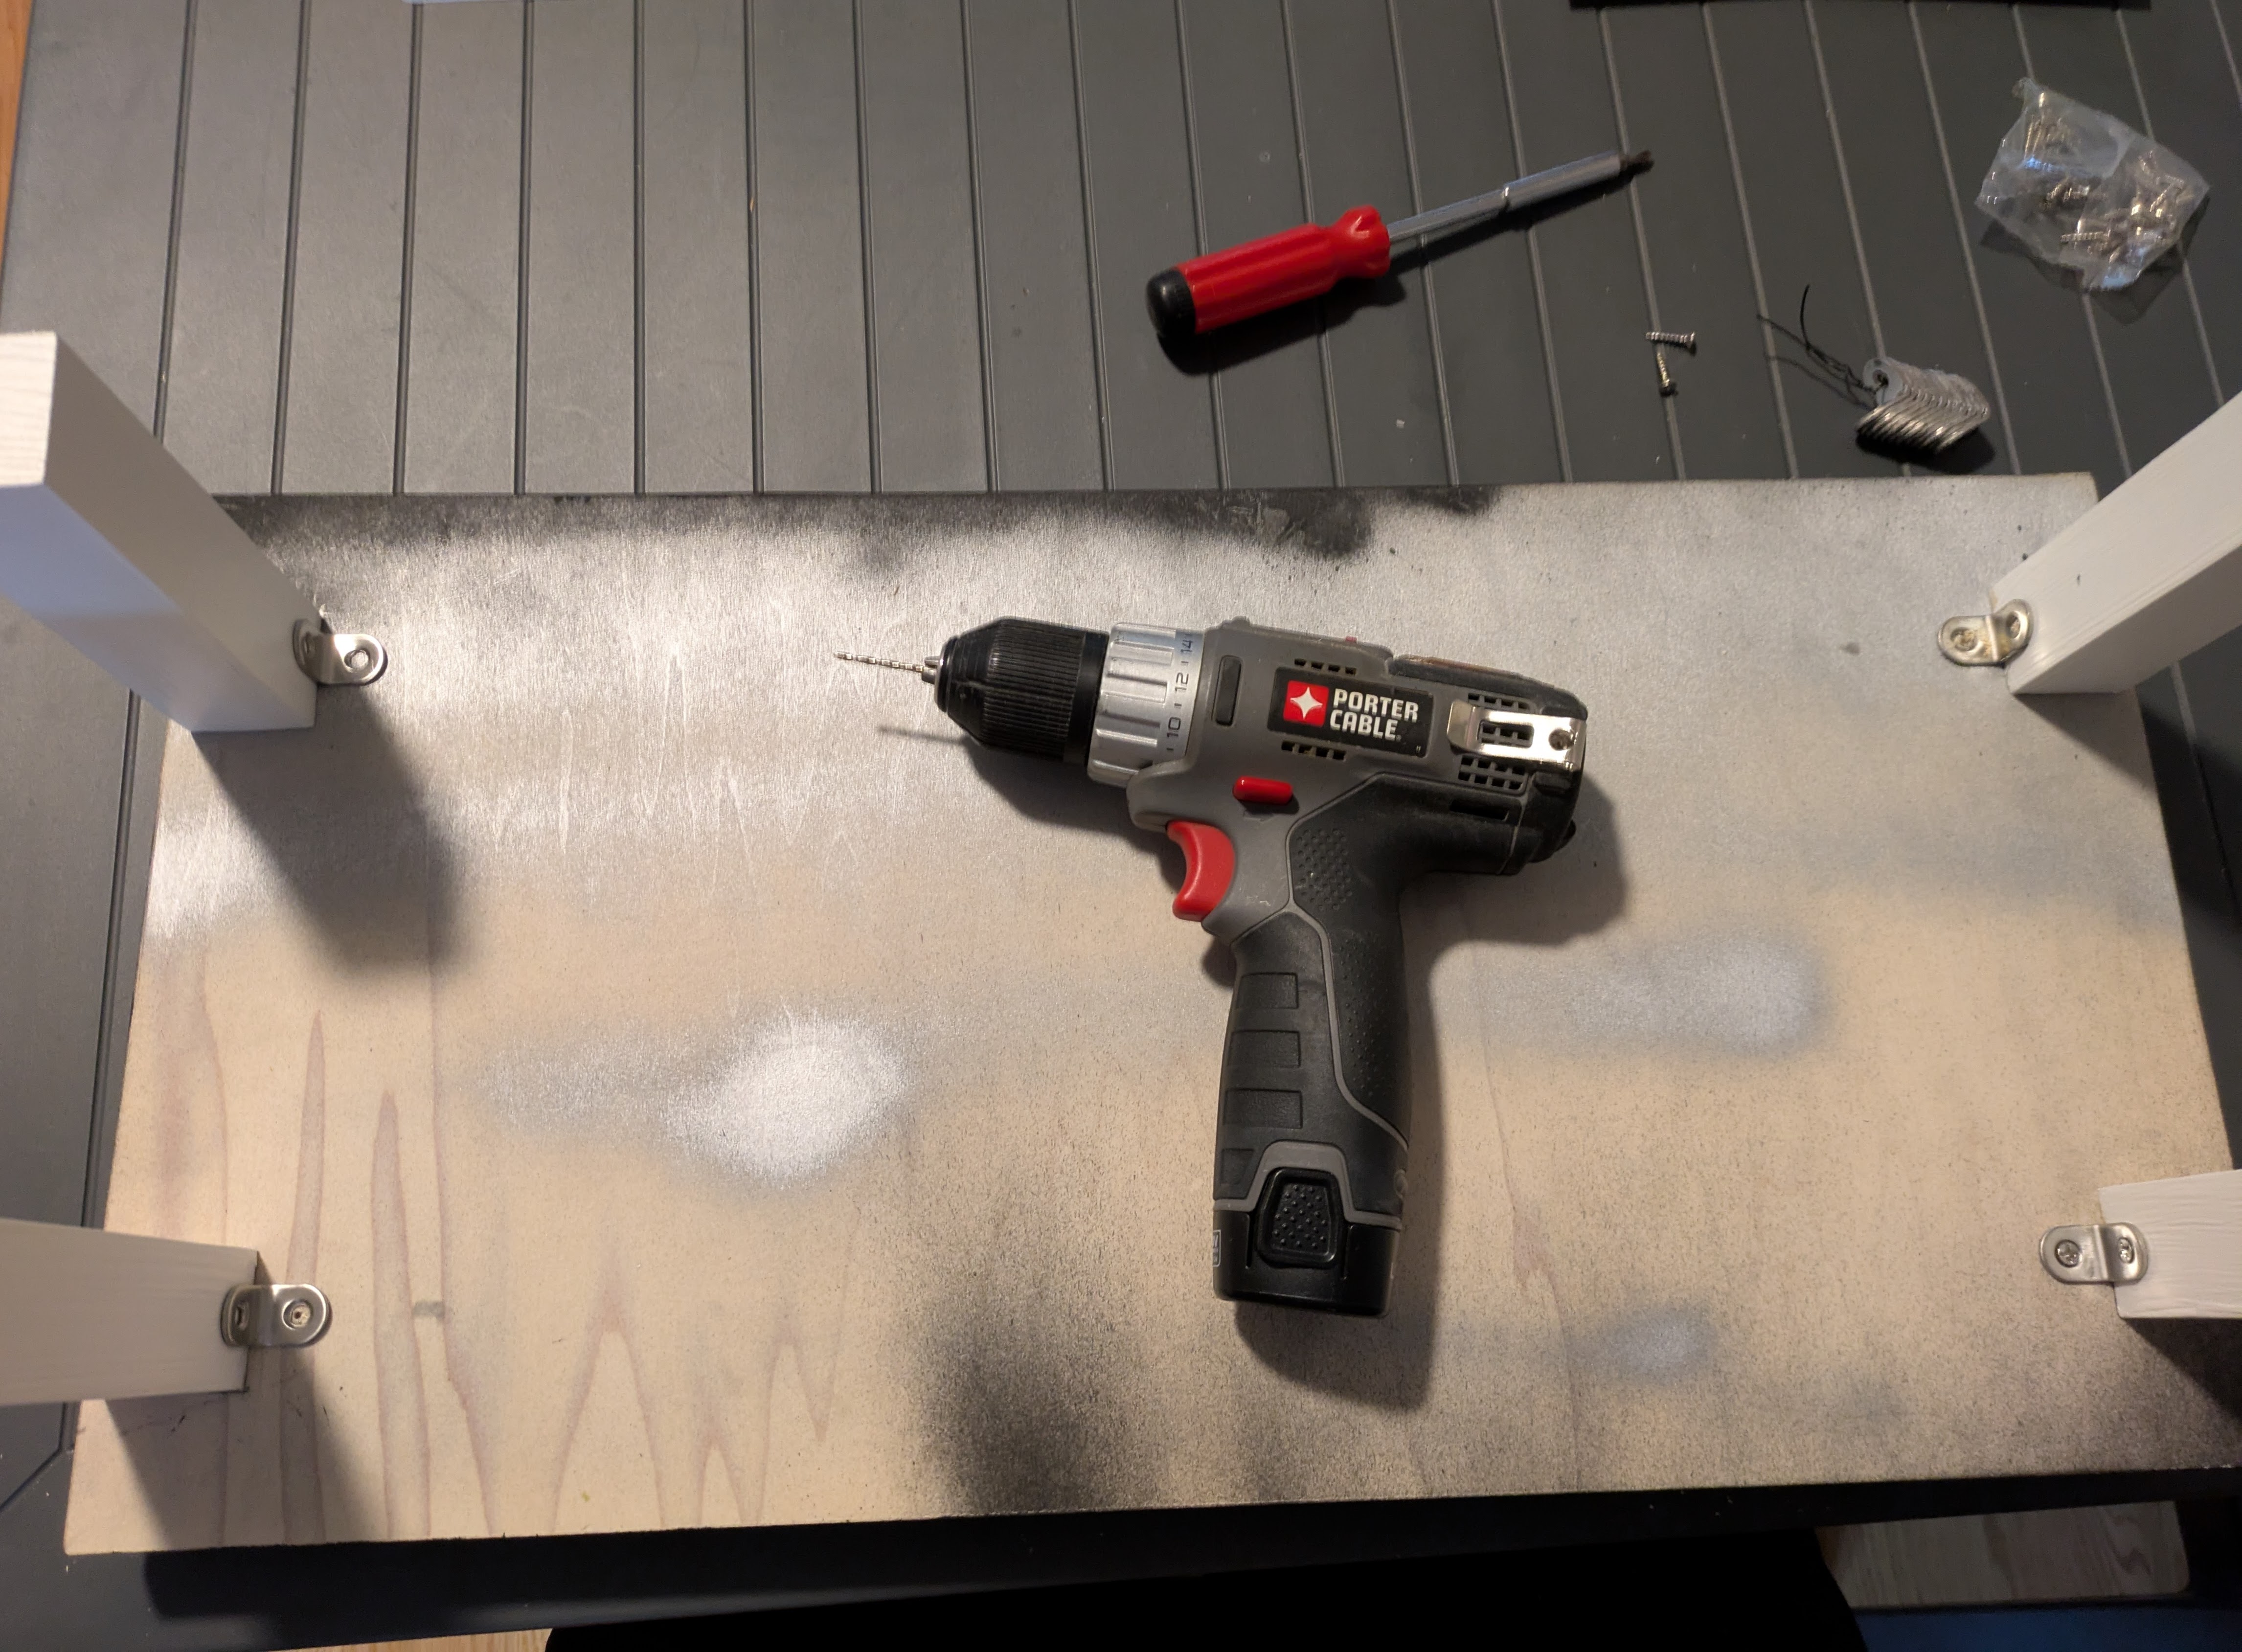
8 pilot holes and screws later, I was ready for the final step: I put some felt on the bottom of each leg, and also on the bottom of the side supports for the amp.
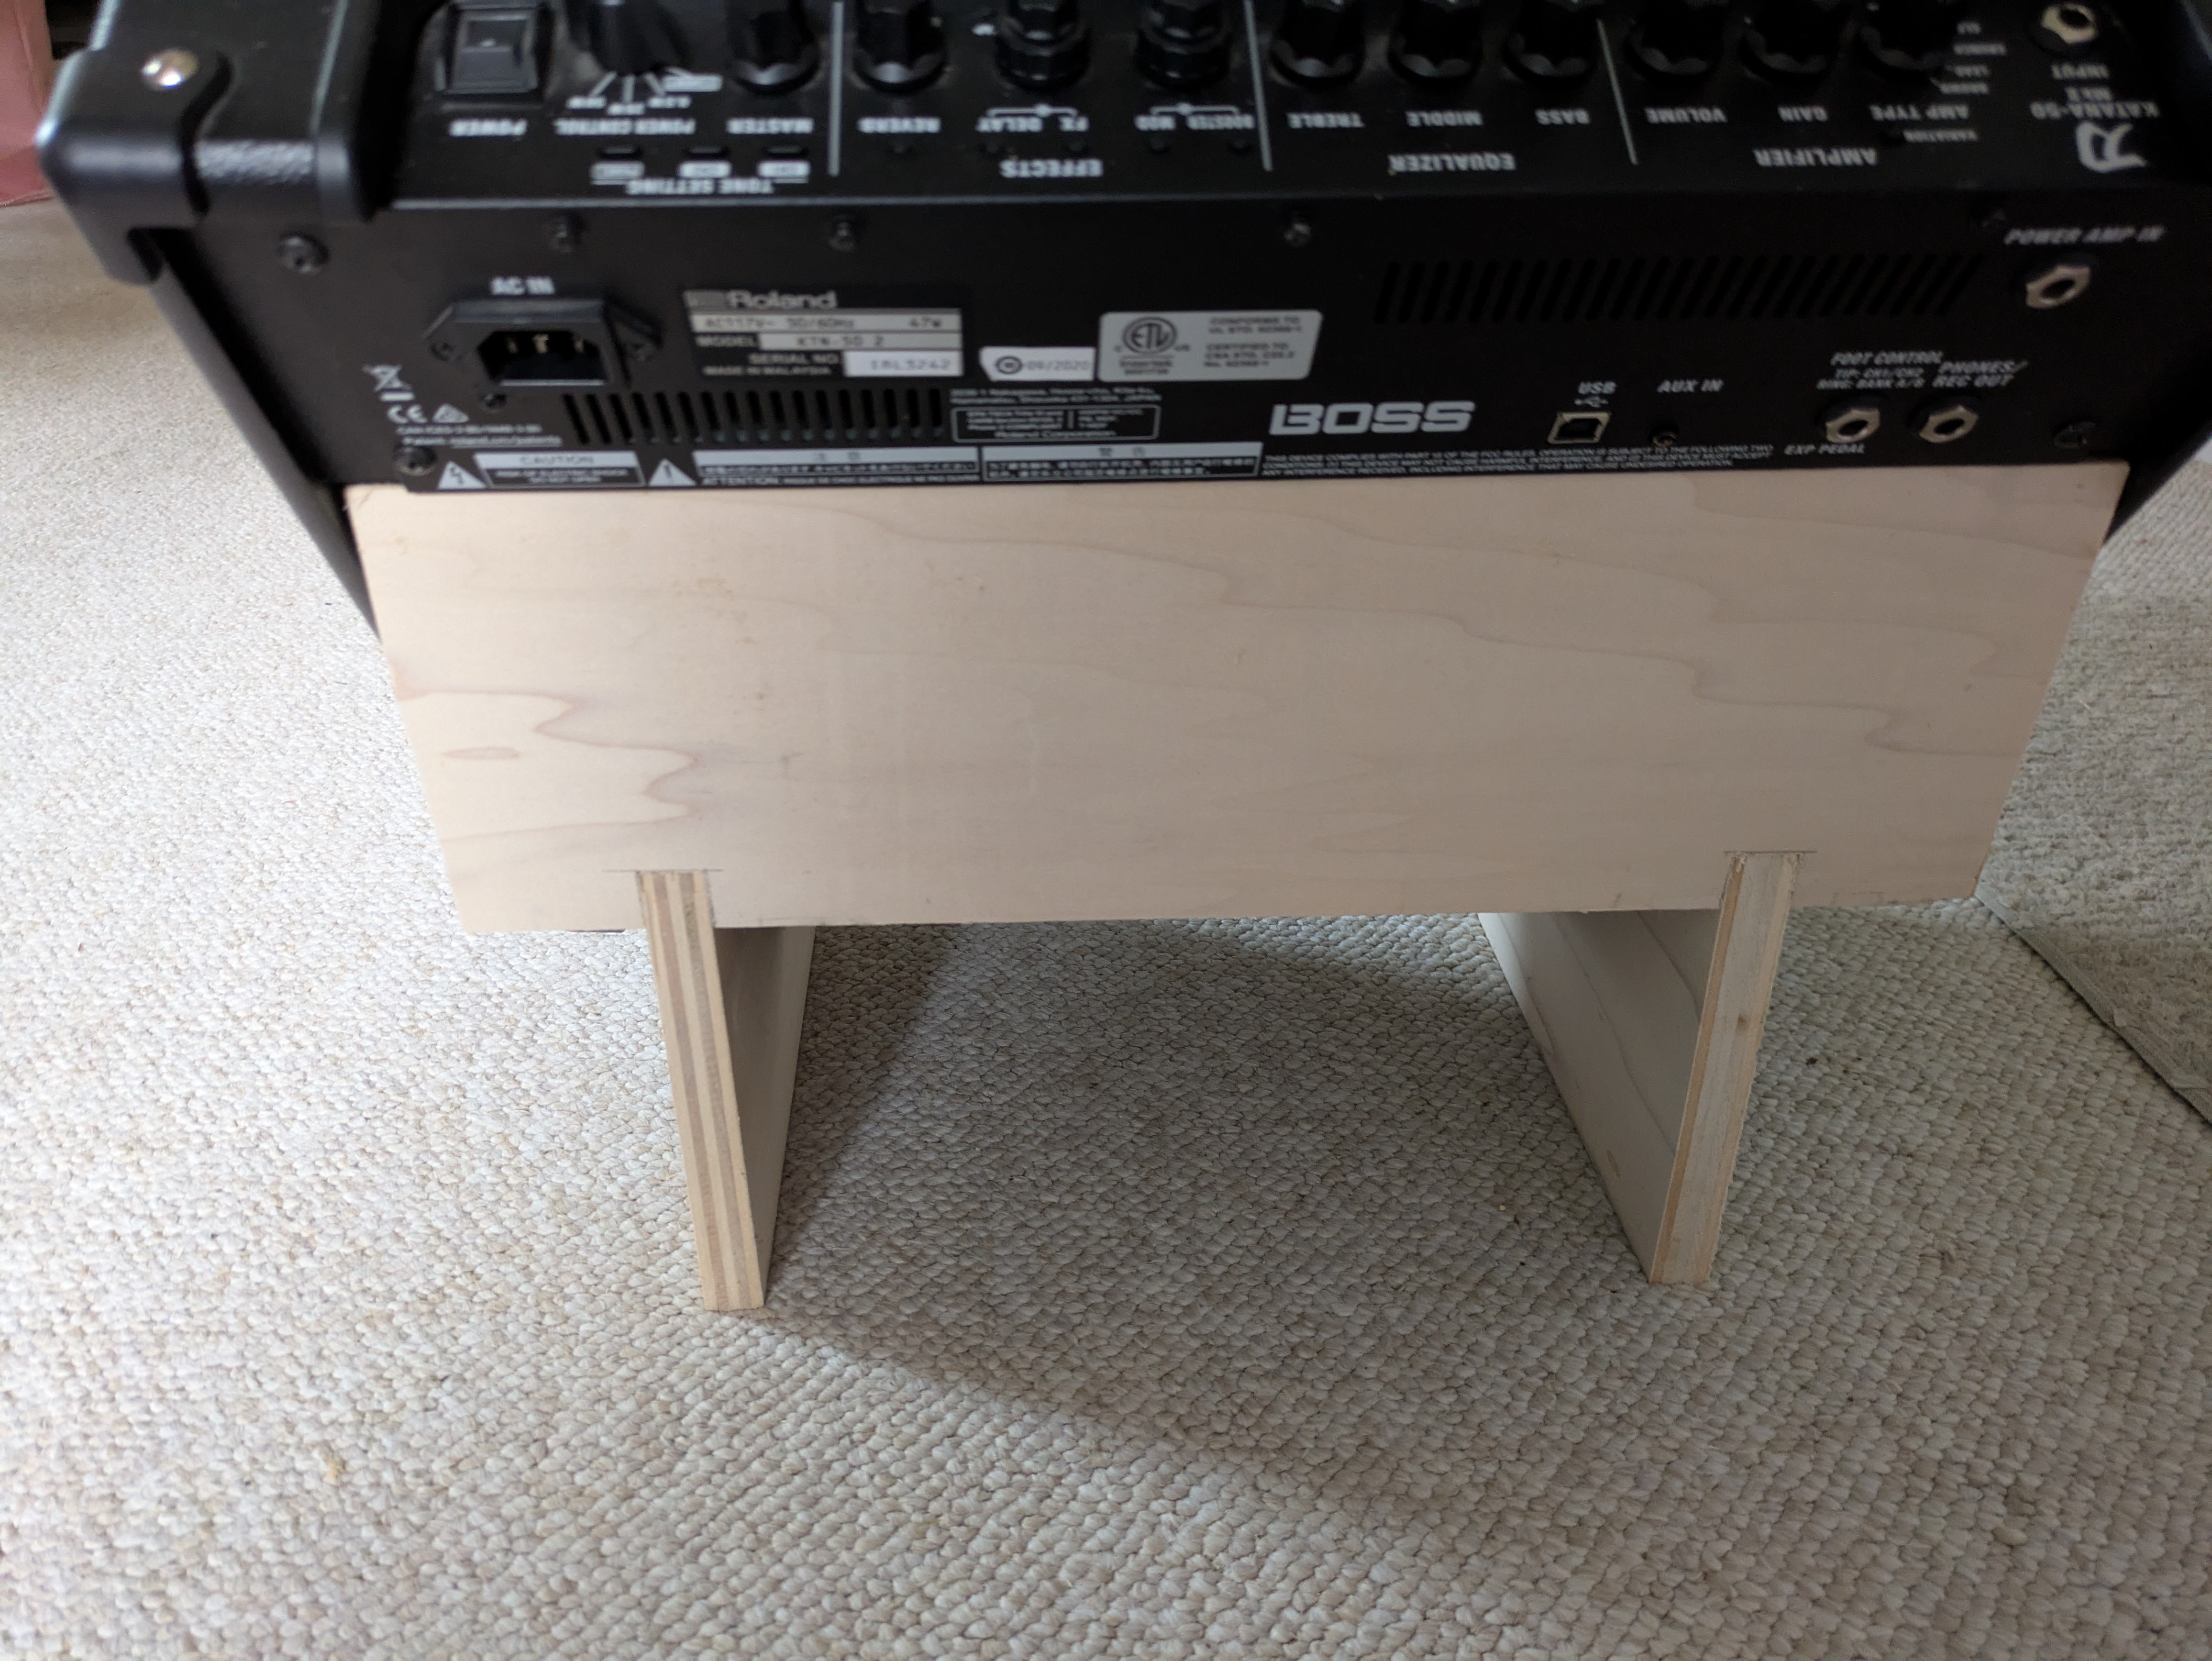
Final Fit 🔗
I started by sitting the notched support on top of the sides of the tilt-back stand. The amp went in the stand and I ensured the rear support was…supporting the back. That felt reasonably secure. Then I took the amp off the tilt-back stand, centered the stand on the platform, and put the amp back on the stand.
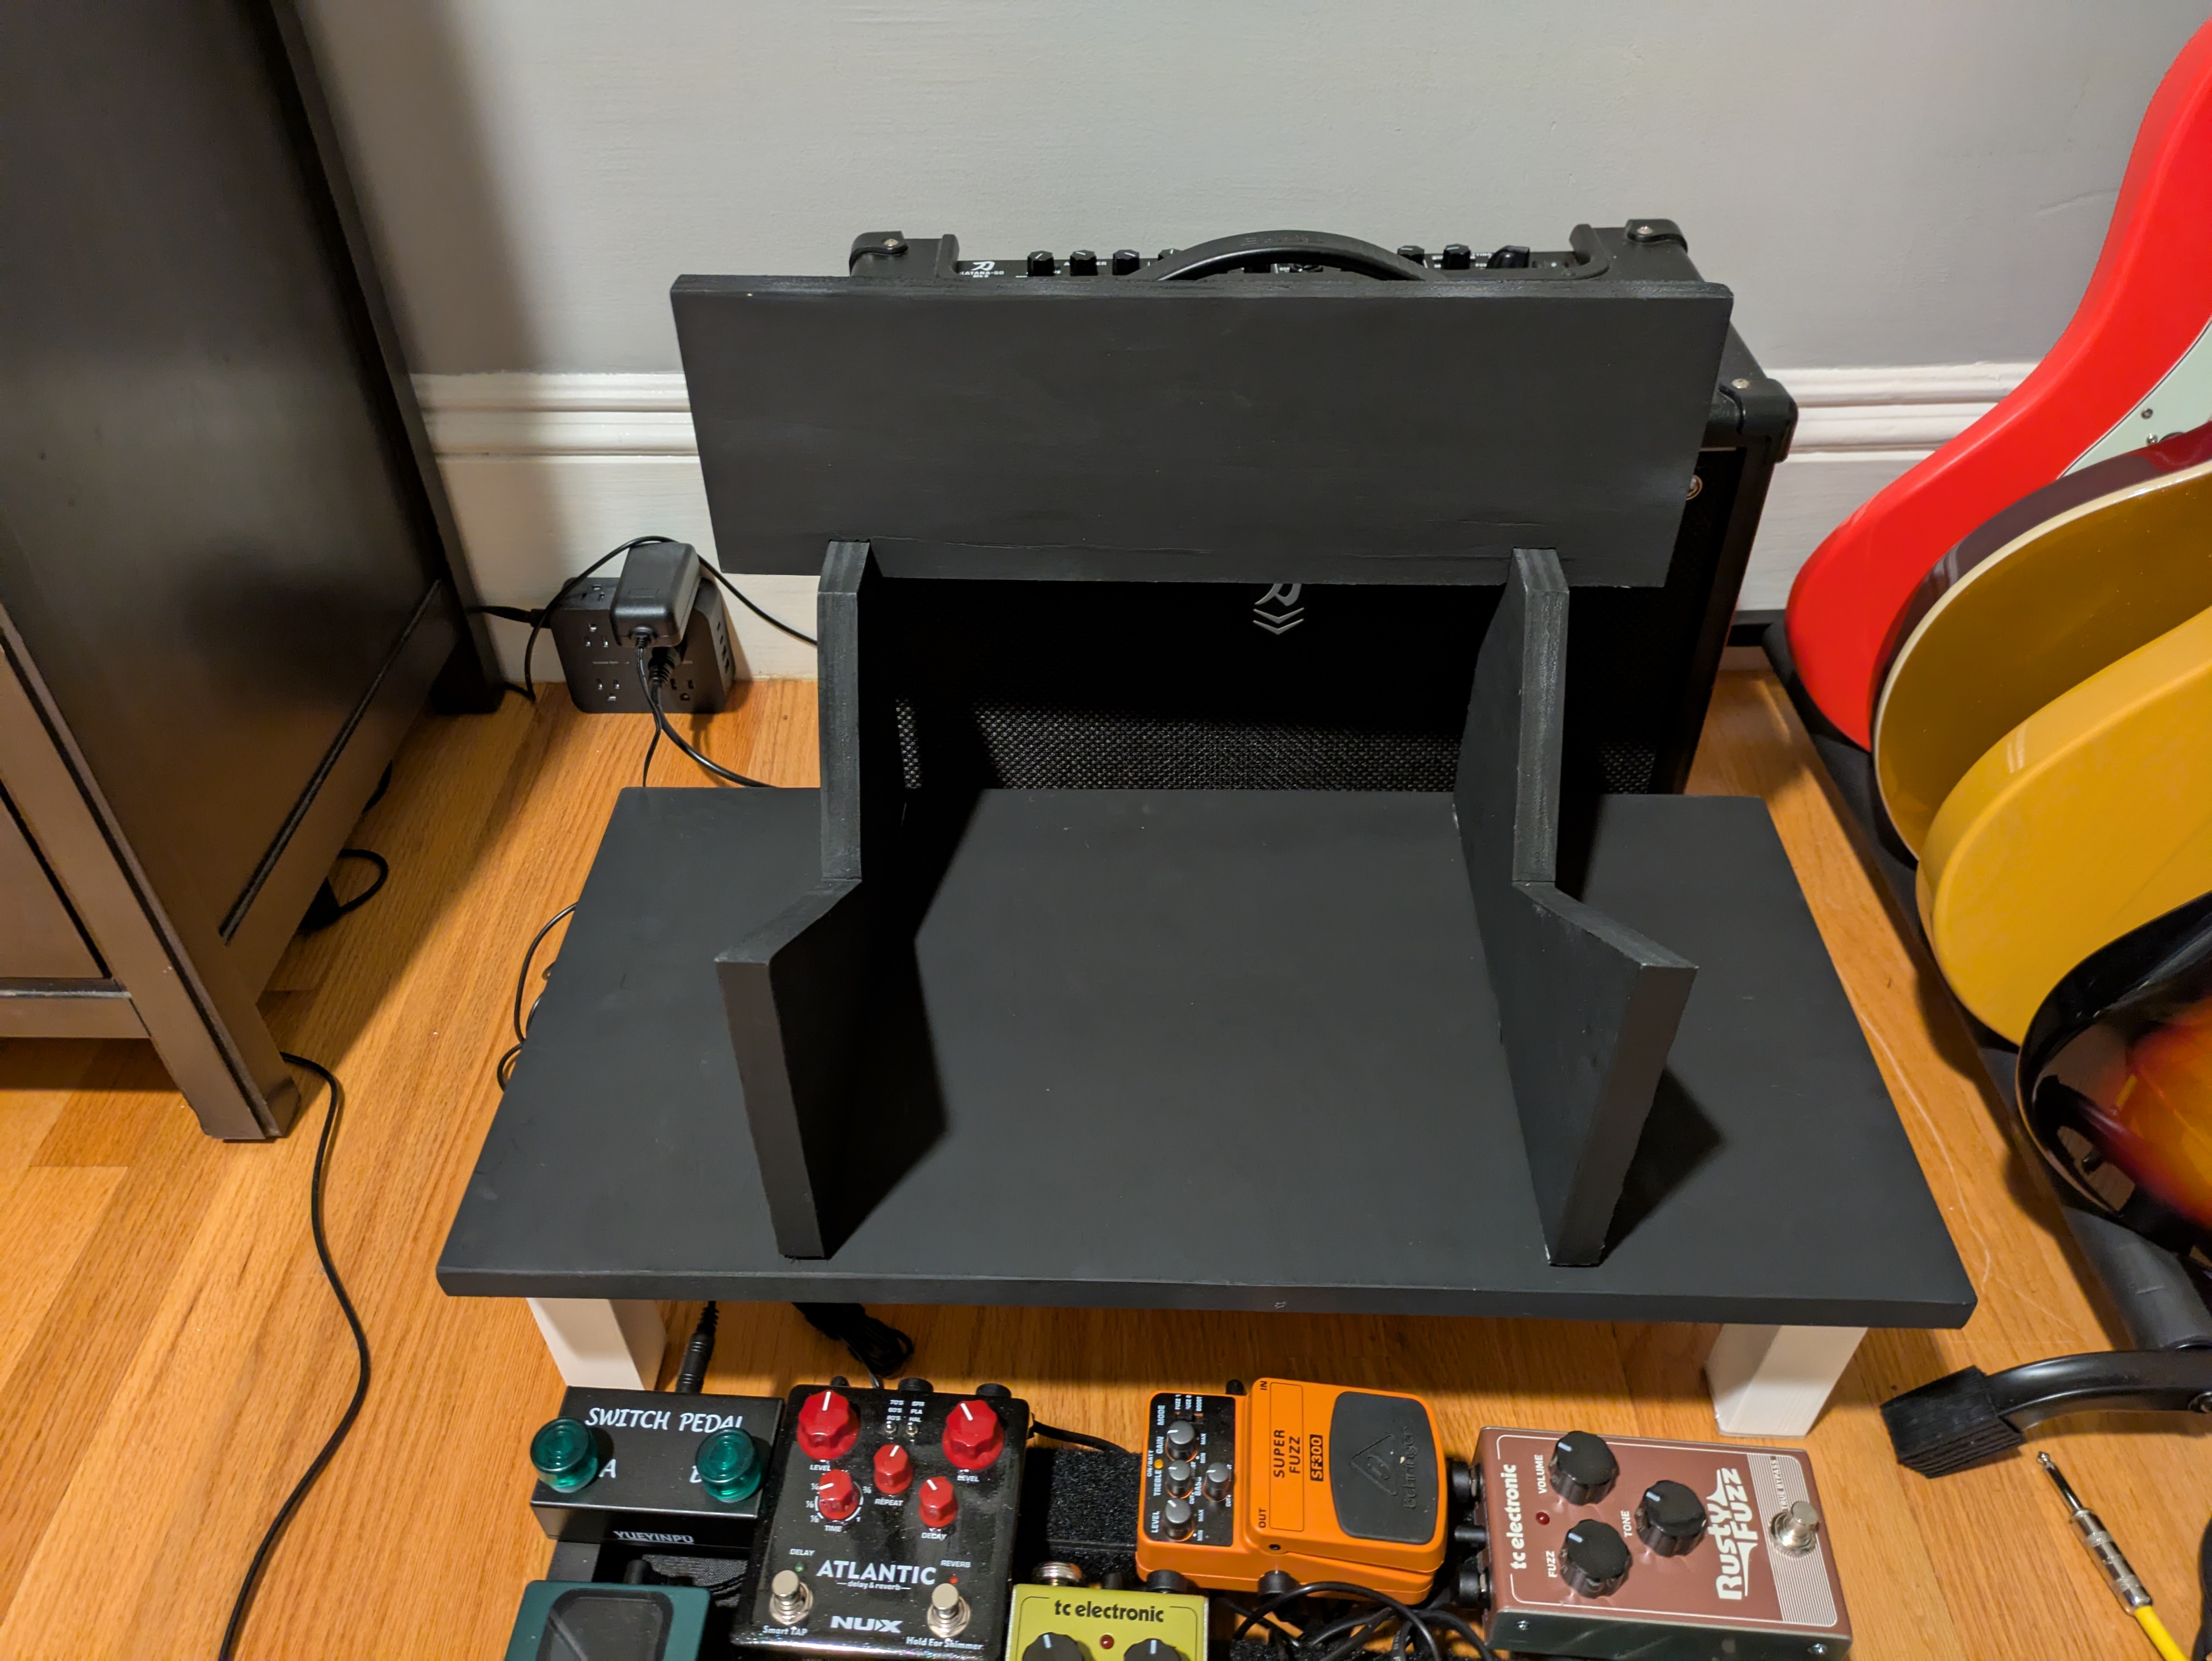

My pedals can also tuck under the platform.
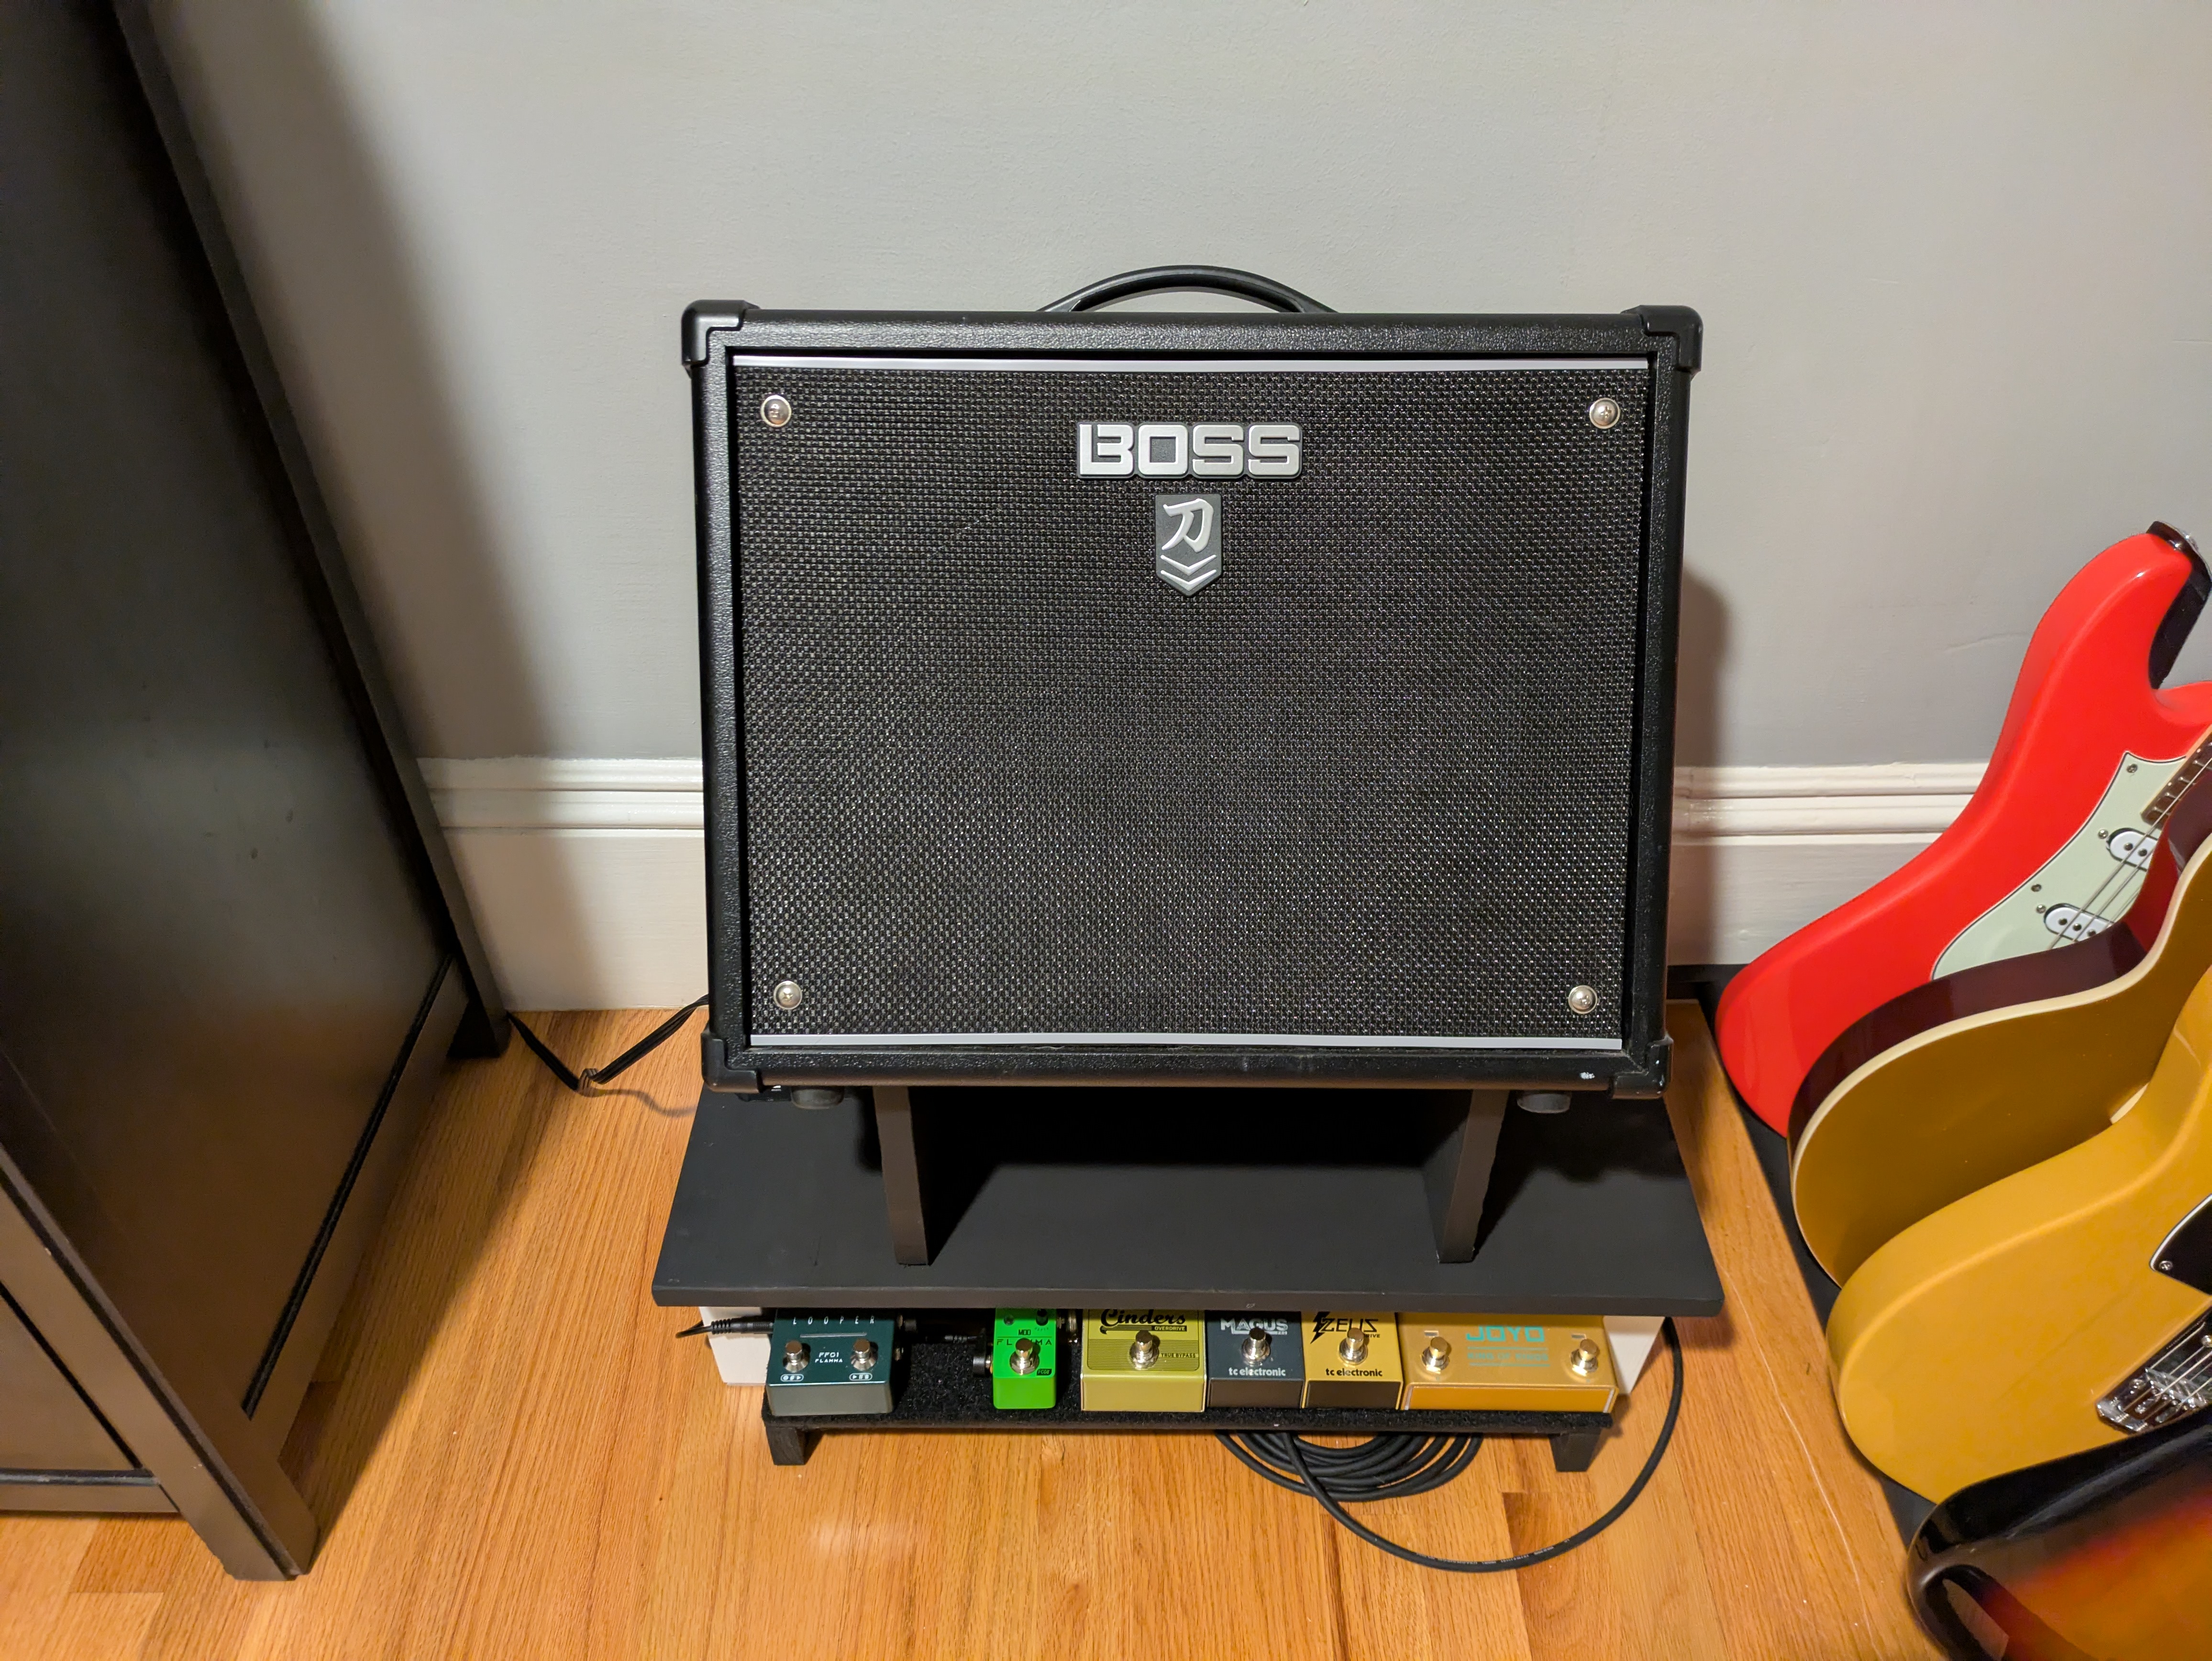
This also gave me some better cable management. I can move the surge protector I have to power and turn on/off the whole rig onto the platform, making the switch easier for me to reach. The amp footswitch cable can route under the platform up to the amp, same as the output at the end of my signal chain to the input of the amp. My instrument cable to the guitar can also go around the rear of the platform from my pedalboard and coil nicely in front of everything.
I get the speaker directing sound towards my head, rather than my feet, and a cleaned up playing area. Overall, this was a valuable use of an afternoon. Even better to succeed in not spending any money on materials and without designing detailed plans beforehand. Now, off to play…