Office End Table Construction
Building in 3D 🔗
I make a lot of things. Most commonly code. I blog (maybe you’re aware, given you’re here). I build conference talks. Sometimes manifestos. Most of these live on the computer. Sometimes I need to step away and not look at a screen.
On occasion, I’ll build some piece of furniture we need in the house. Or some small accessory out of wood that I’ll use on my desk. This is one such time, and I decided to document it.
Similar to my recent posts on music I’m listening to, this isn’t directly related to software development. If you want to bail because of that, no judgement.
The Problem 🔗
In my office, I have a couch. Right now there’s a metal filing cabinet next to the couch that I’m using as an end table. It’s working fine, but I don’t even have much paperwork in it. I wanted something different. This DOES show up in my video background. I thought it’d be interesting to have something I’ve built in my background, even just for myself.
On the other side of the couch there’s a basket with a blanket that’s on the floor. I wanted to move that off the floor. And a drawer to store whatever I want not on the tabletop.
The Design 🔗
The goal here is to be simple. I’m not going to win any design awards. But it will get done. And reasonably quickly. I do my designing on paper. I could probably be more efficient and build cut lists and stuff by learning some piece of software. But part of the point here is NOT using my computer. And now ironically I’m documenting this…on my computer.
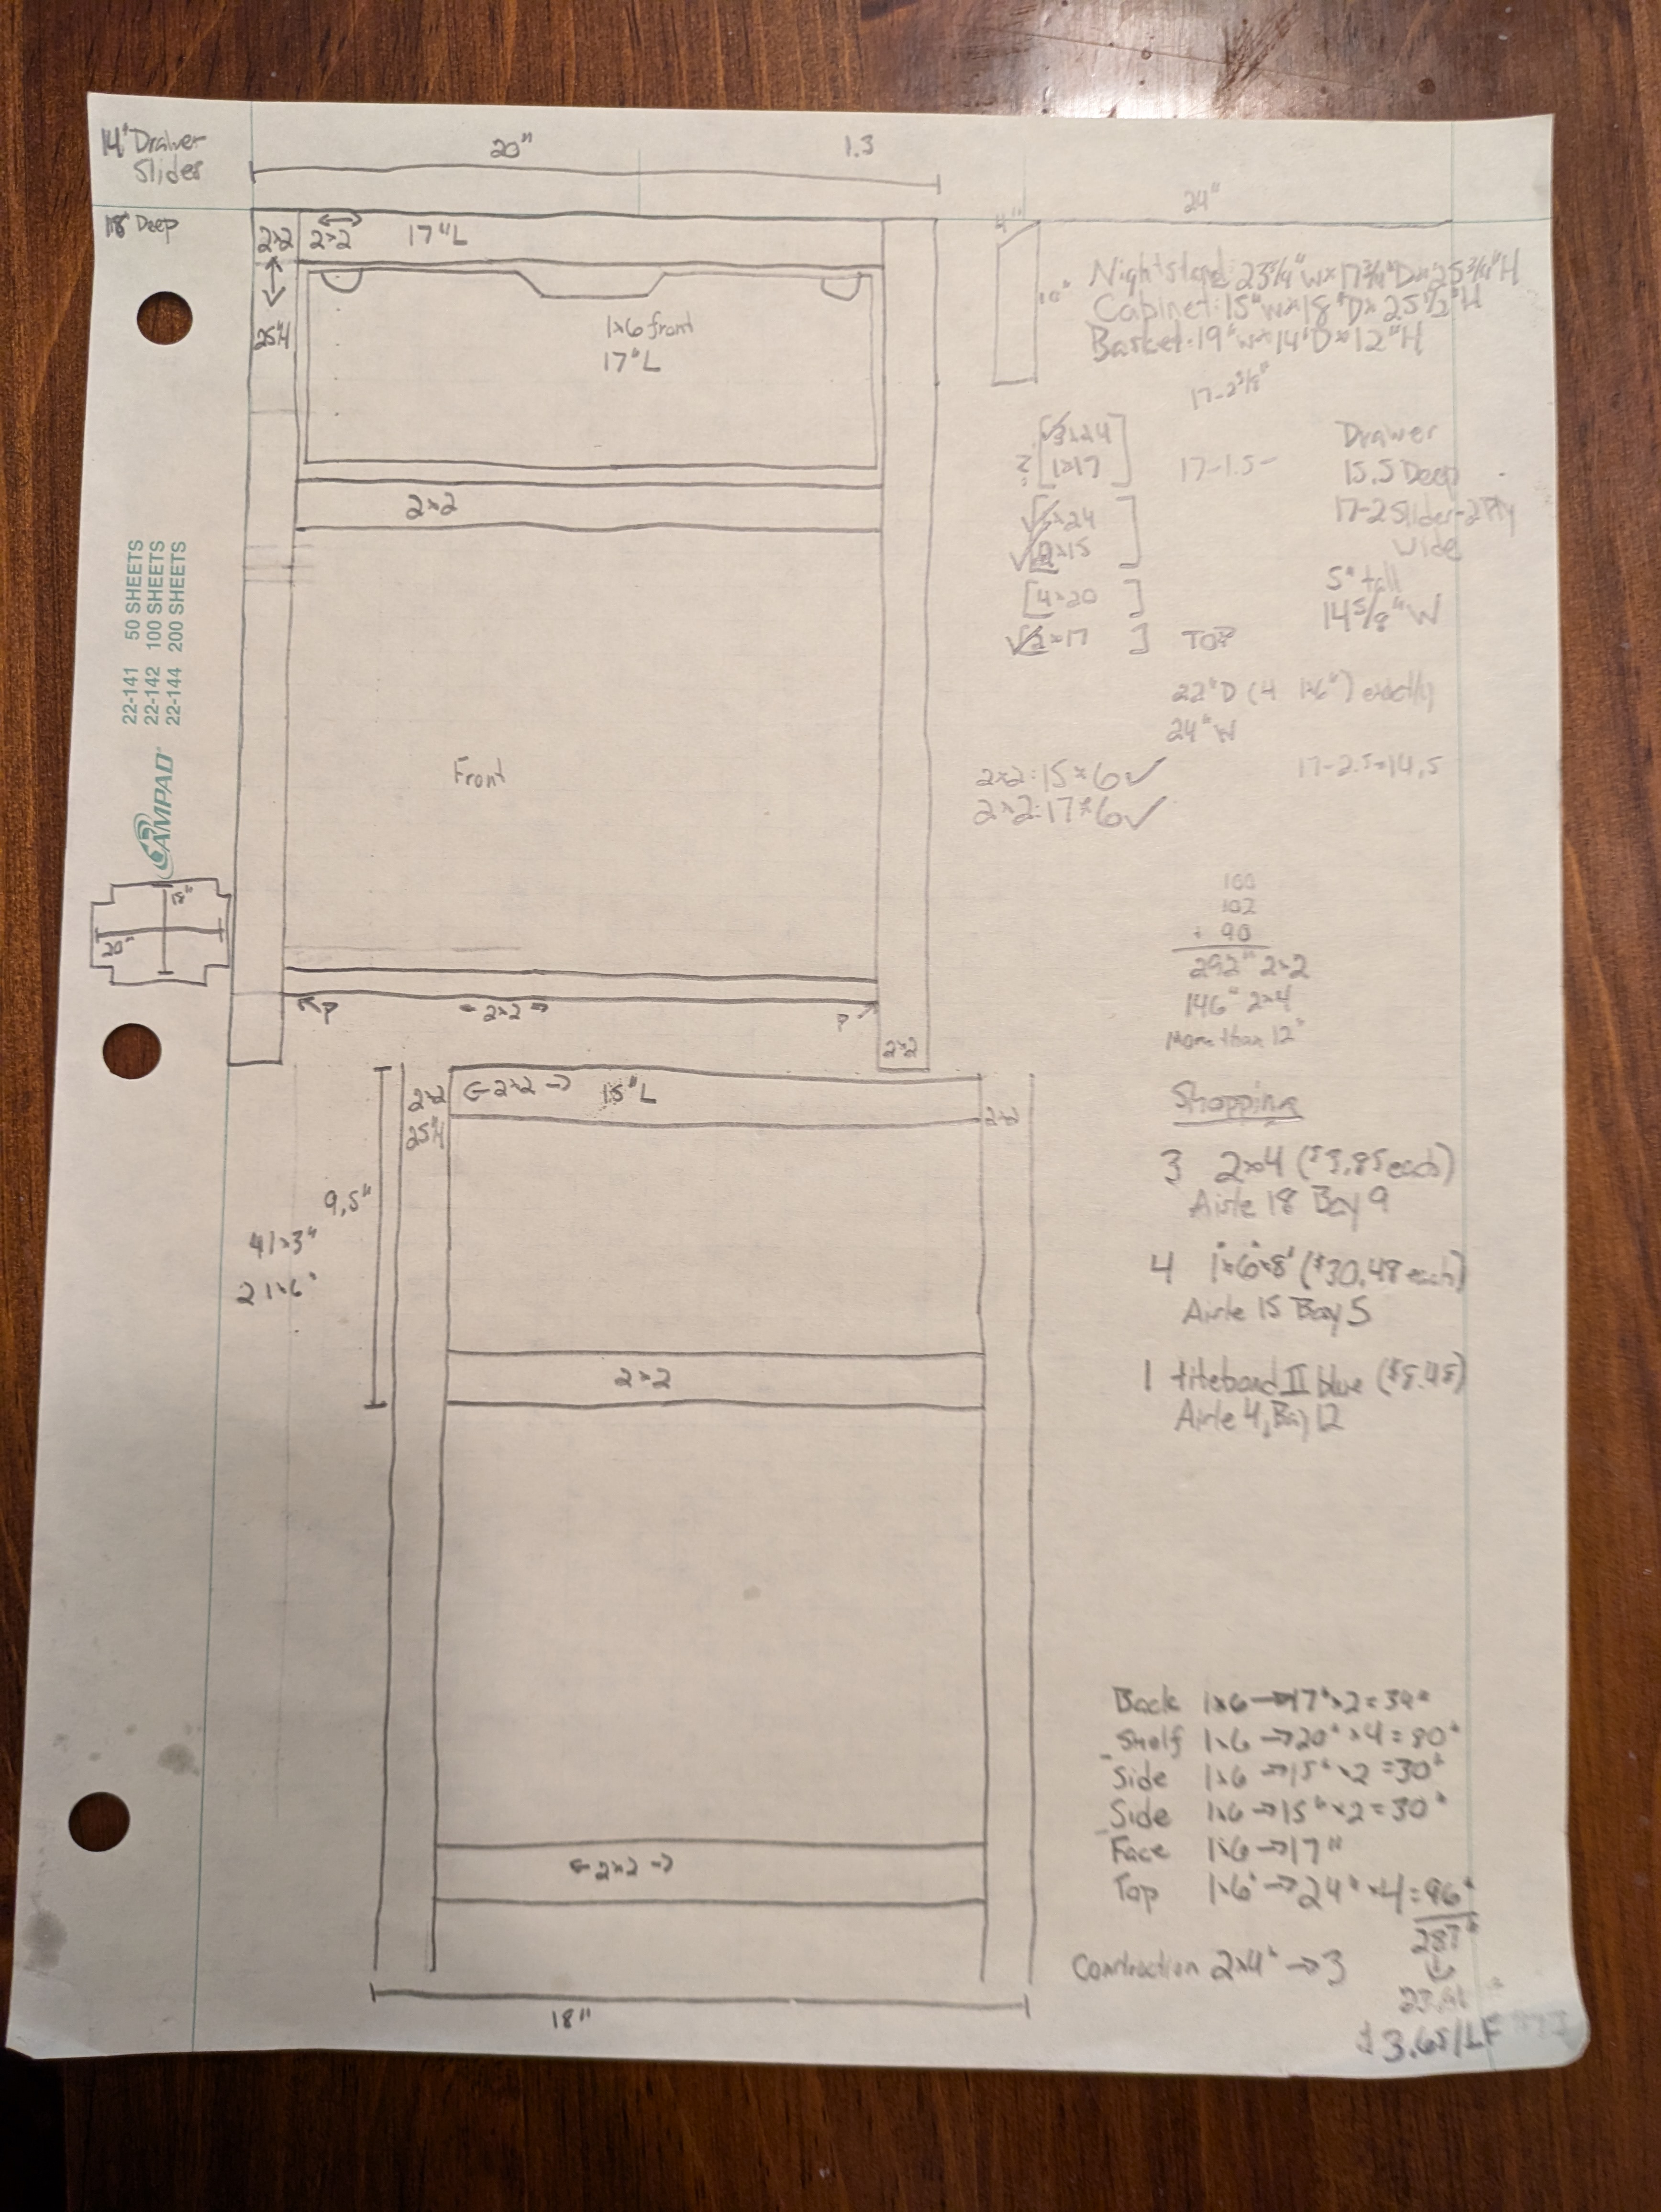
In a bold move, this will use four legs, two sides, a back, and a front. I’ve really revolutionized the world of table building here. For the drawer, I’m not going to have hardware to open it. Instead, I’m going to cut a hole out of the drawer face itself. I toyed with making a few holes on the side. After consulting with my design partner (my daughter), we decided to land on one in the middle.
The Materials 🔗
This requires 1"x6" and 2"x2" lumber. For the 1x6s, I’m using poplar. It’s (relatively) cheap and (I think) a step up from soft pine. Some people don’t like the look of poplar. I totally get that, but the majority of this will be painted anyway.
For the 2x2s, I’m not actually going to purchase 2x2s. Instead, I’ll grab the straightest 2x4 wall studs I can possibly find. I dig through the giant pallet of 2x4s at the big box store. It’s more economical for me to do that.
The drawer box will use 3/4" plywood for the sides and 1/4" plywood for the bottom.
My main joinery method will be pocket screws. Pocket screws also get a bad reputation as not being “real” joinery. Yeah, gatekeeping doesn’t only exist in software development. However, I will be using it for the following reasons:
It’s quick.
None of the joinery will be exposed.
It’s quick.
I have the materials on hand.
It’s quick.
I don’t care what you think about my joinery expertise.
It’s quick.
One downside here with pocket screws is with how many 2x2s I’m using. There isn’t a space for multiple screws per side. That’ll leave the 2x2s able to spin. That’s a trade-off I’m willing to make. Most of them will be up against other supports. And for the rest - I don’t care.
Cutting the legs and supports 🔗
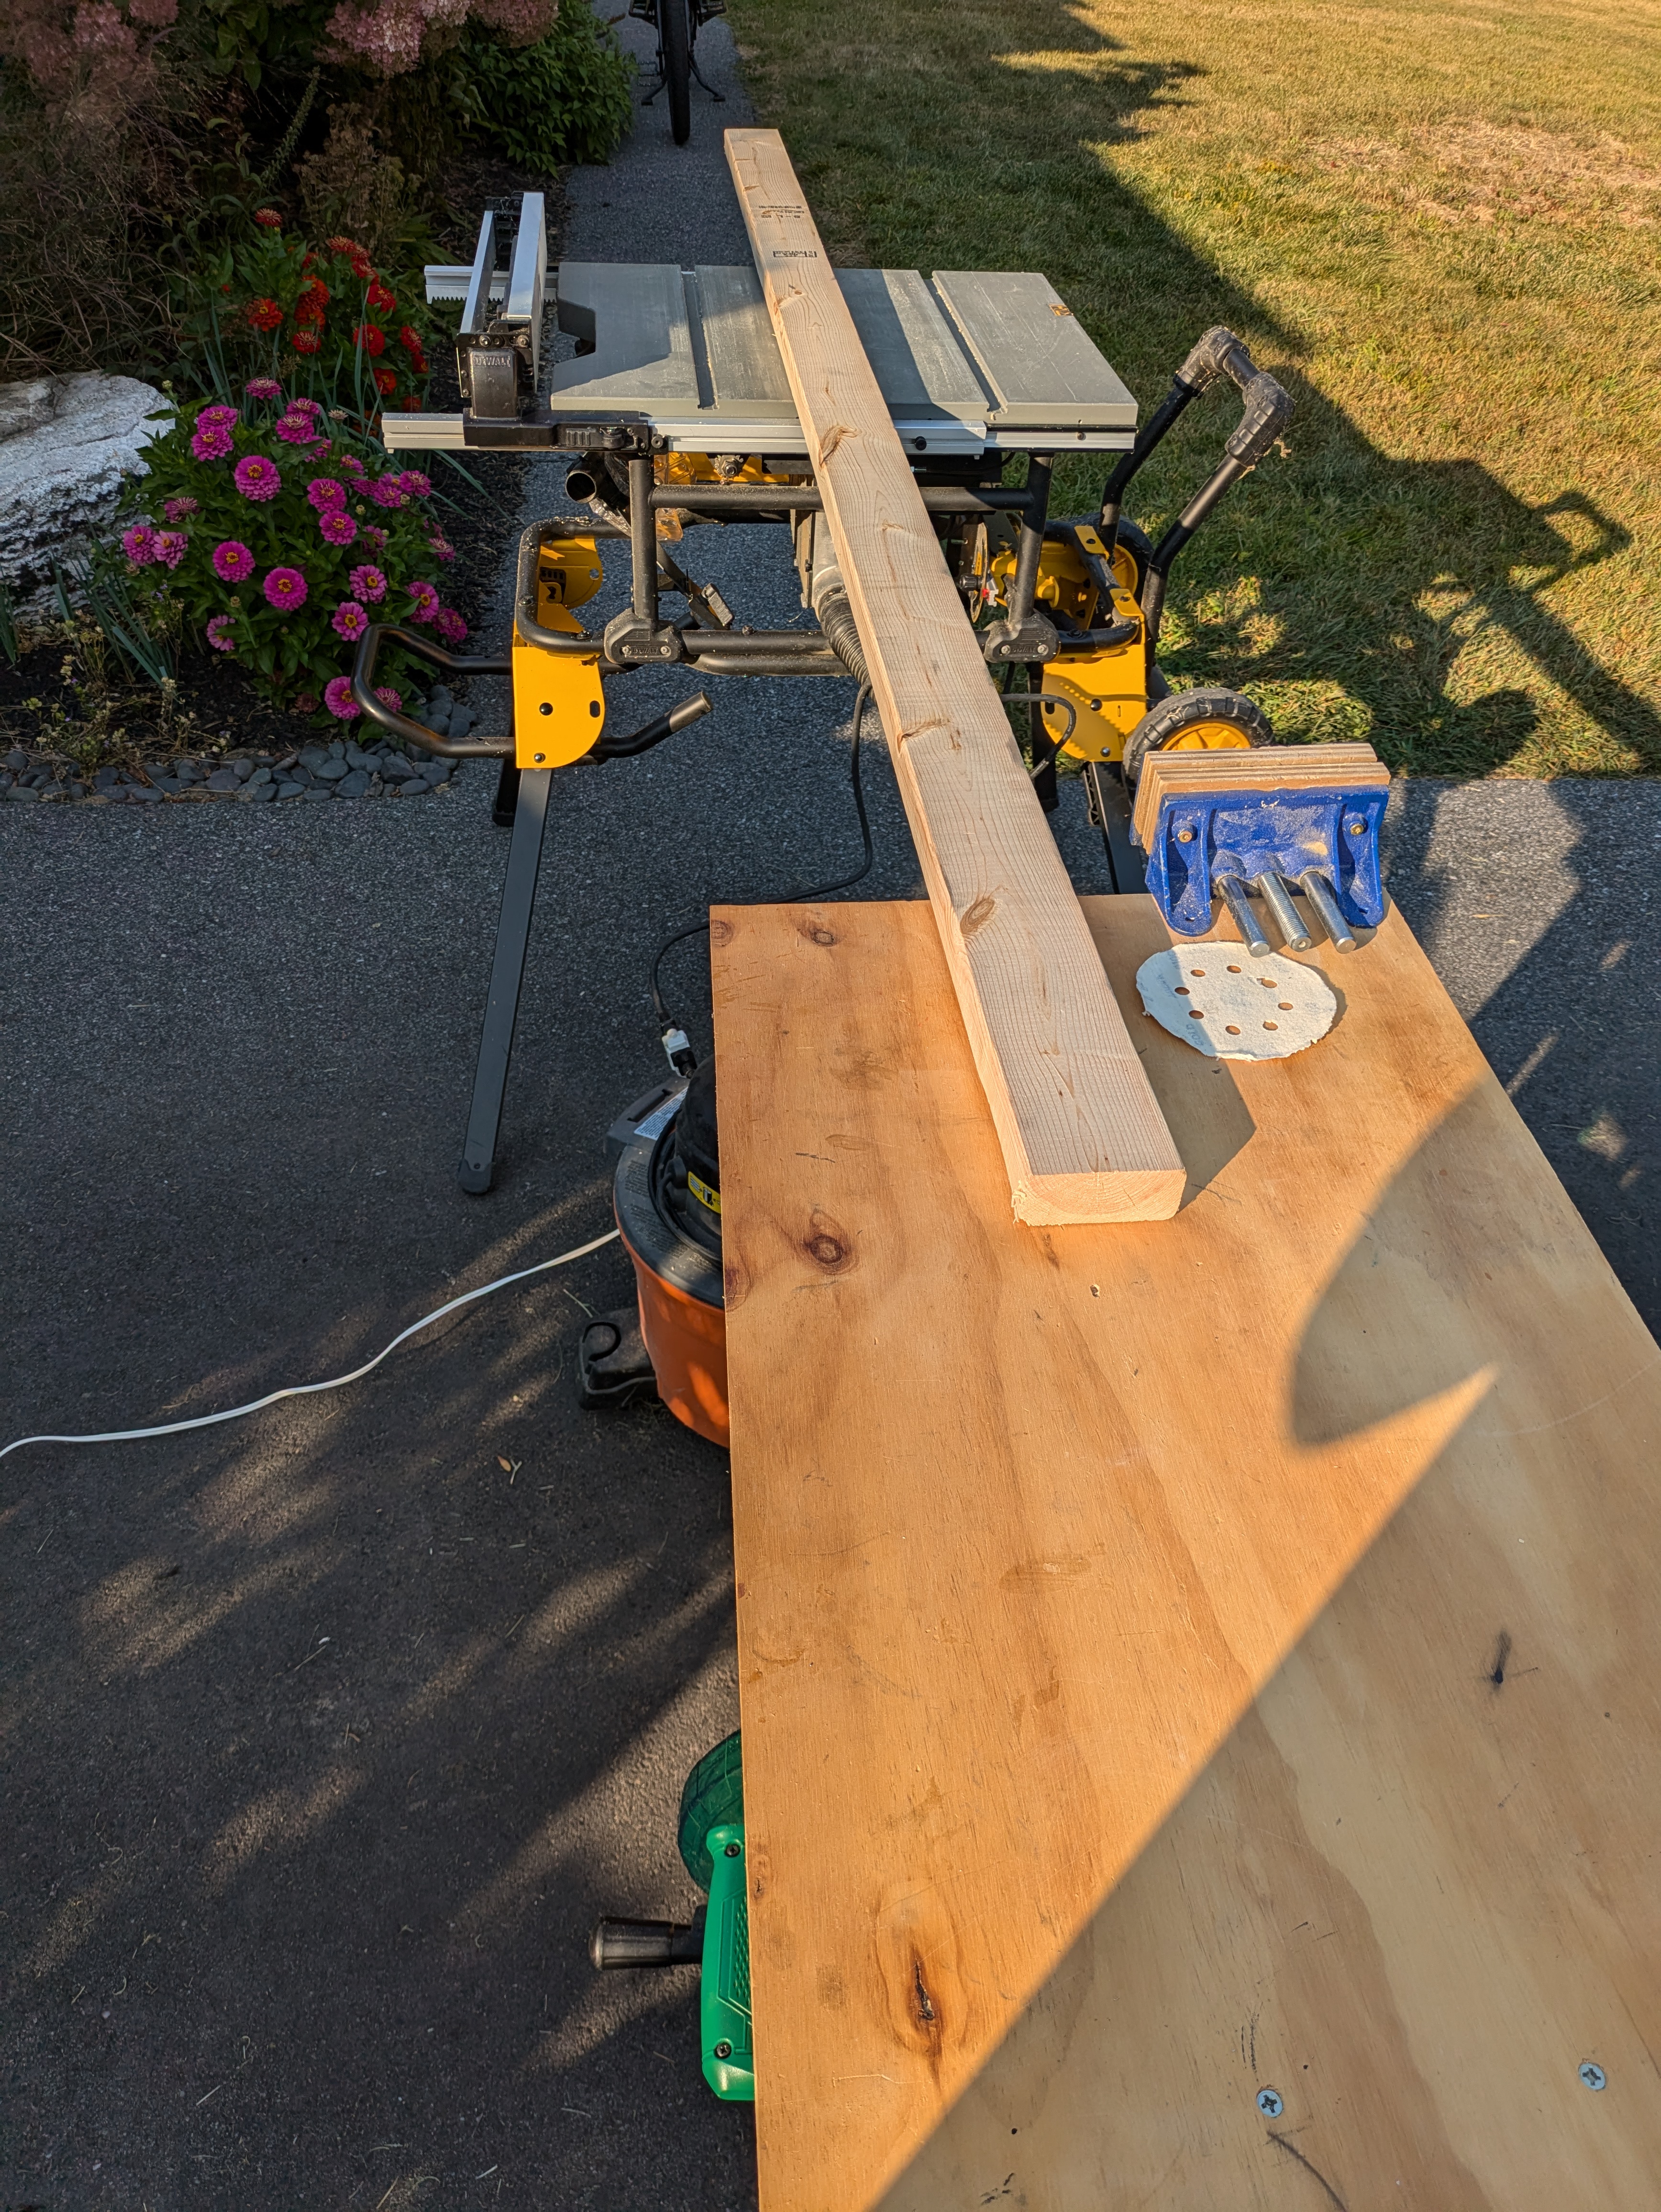
One reason I need to be quick is because of my constraints. I don’t have a deadline, but I want to make progress. My workshop is my driveway. I need to build outside. I need light to build. I work during the day. The time between work ending and the rest of my evening home life starting leaves me with about an hour after work each day.

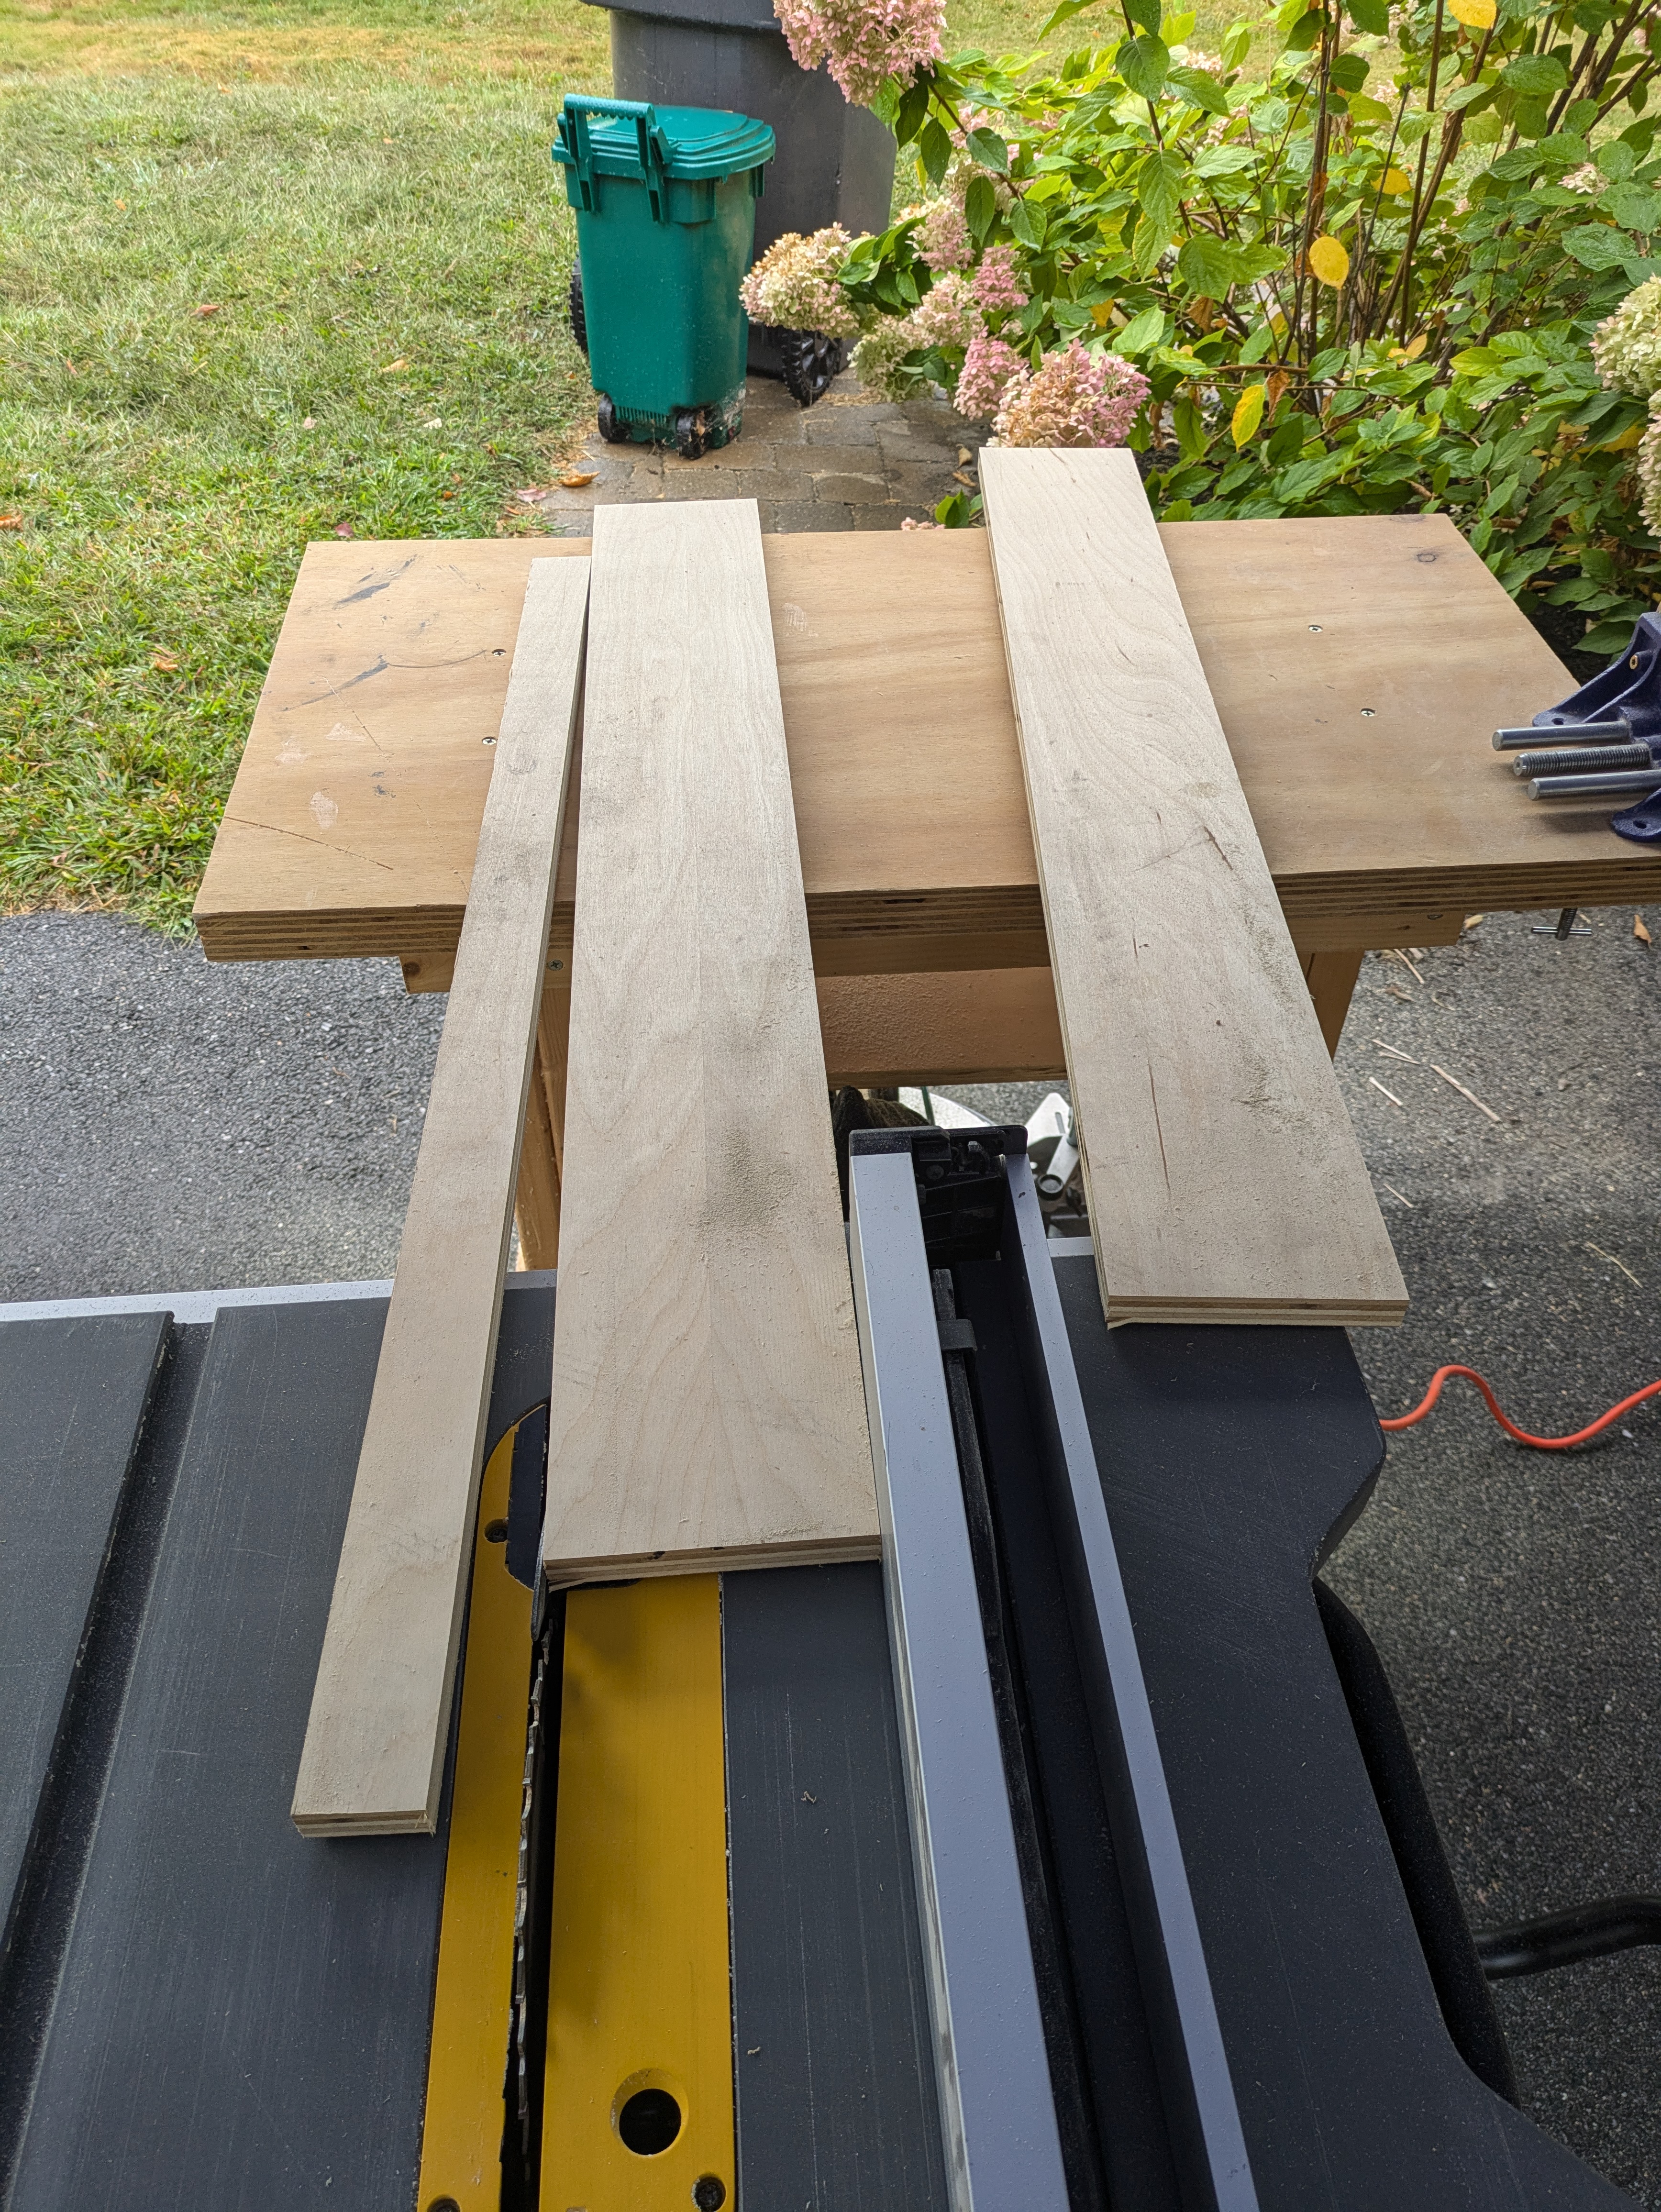
I purchase 2x4s, but I need 2x2s. And I don’t want the rounded edges of a 2x4. I start by ripping the side of one of the 2x4s the full length of the stud. That gives me a clean, straight edge.
Then I set my rip fence based on the thickness of the 2x4 and make another rip cut the length of the board. That gives me one 2x2. Doing that again, making sure to cut off the rounded edge, gives me my other. I repeat that for each of the 2x4s.
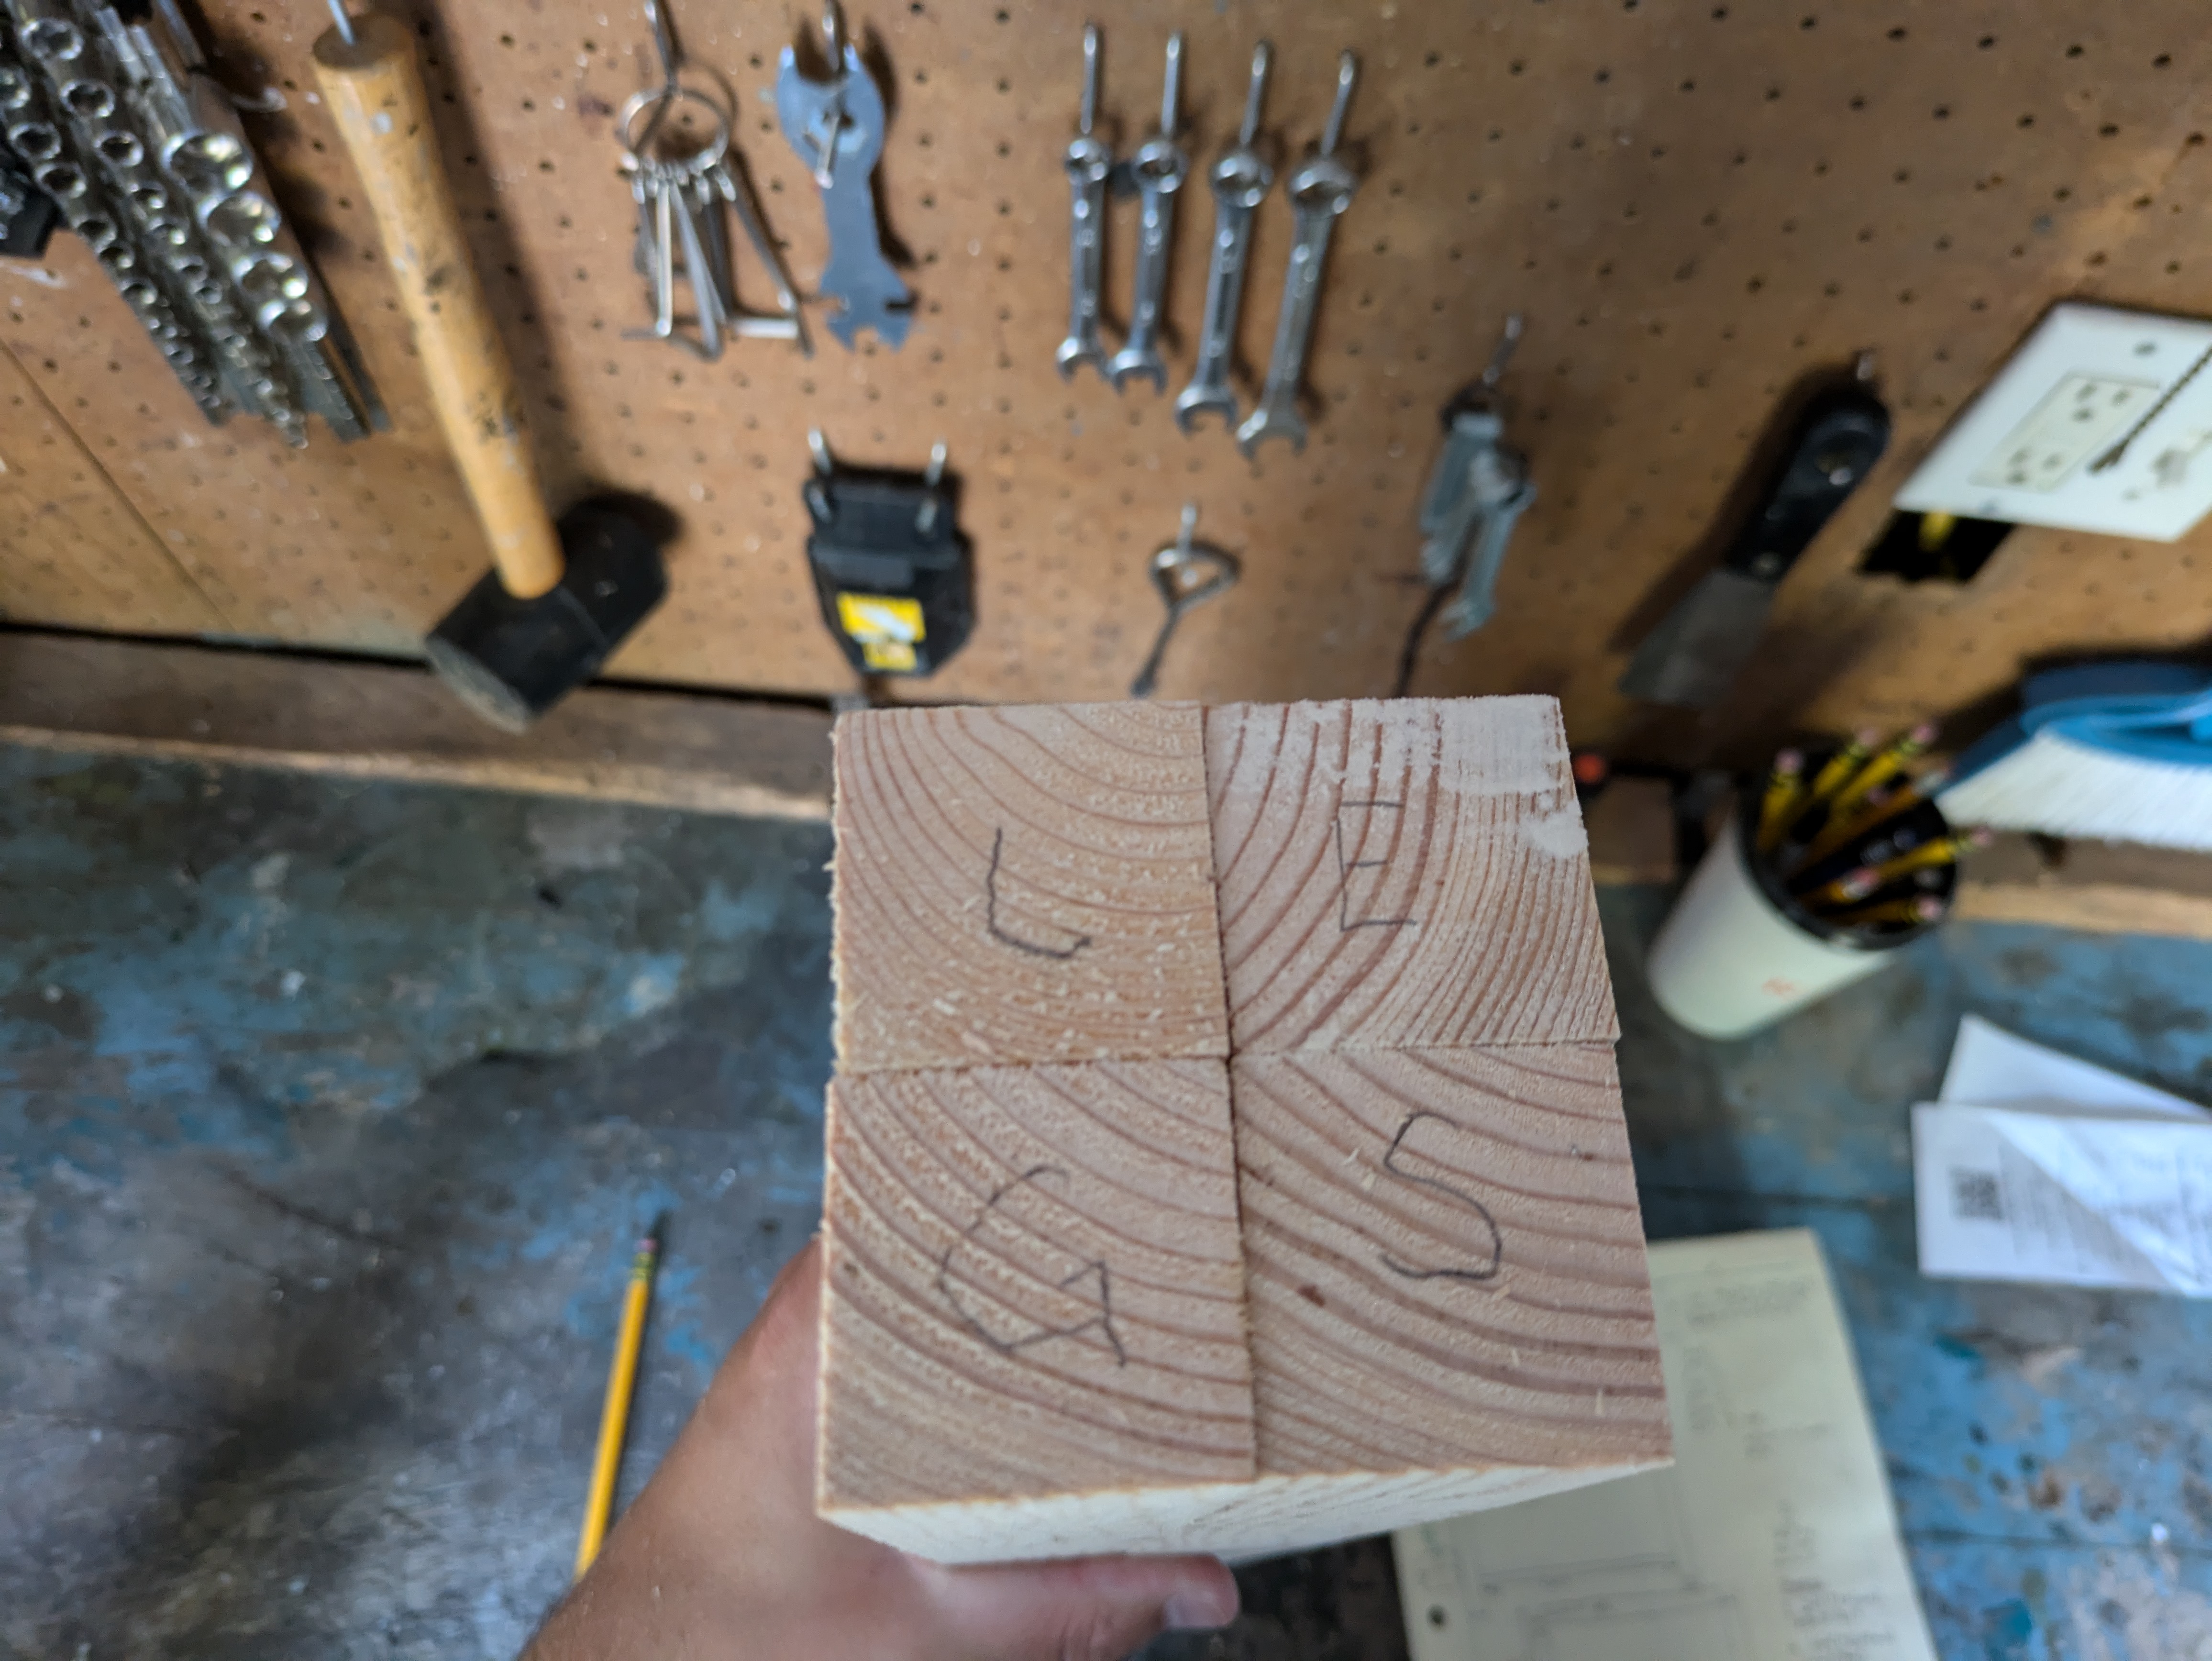
I then use my miter saw to cut the 2x2s to their height for the table legs. You know they’re legs because I’ve labeled them accordingly.
I cut down the front, back, and side support 2x2s the same way.
Cutting the top, sides, and drawer face 🔗
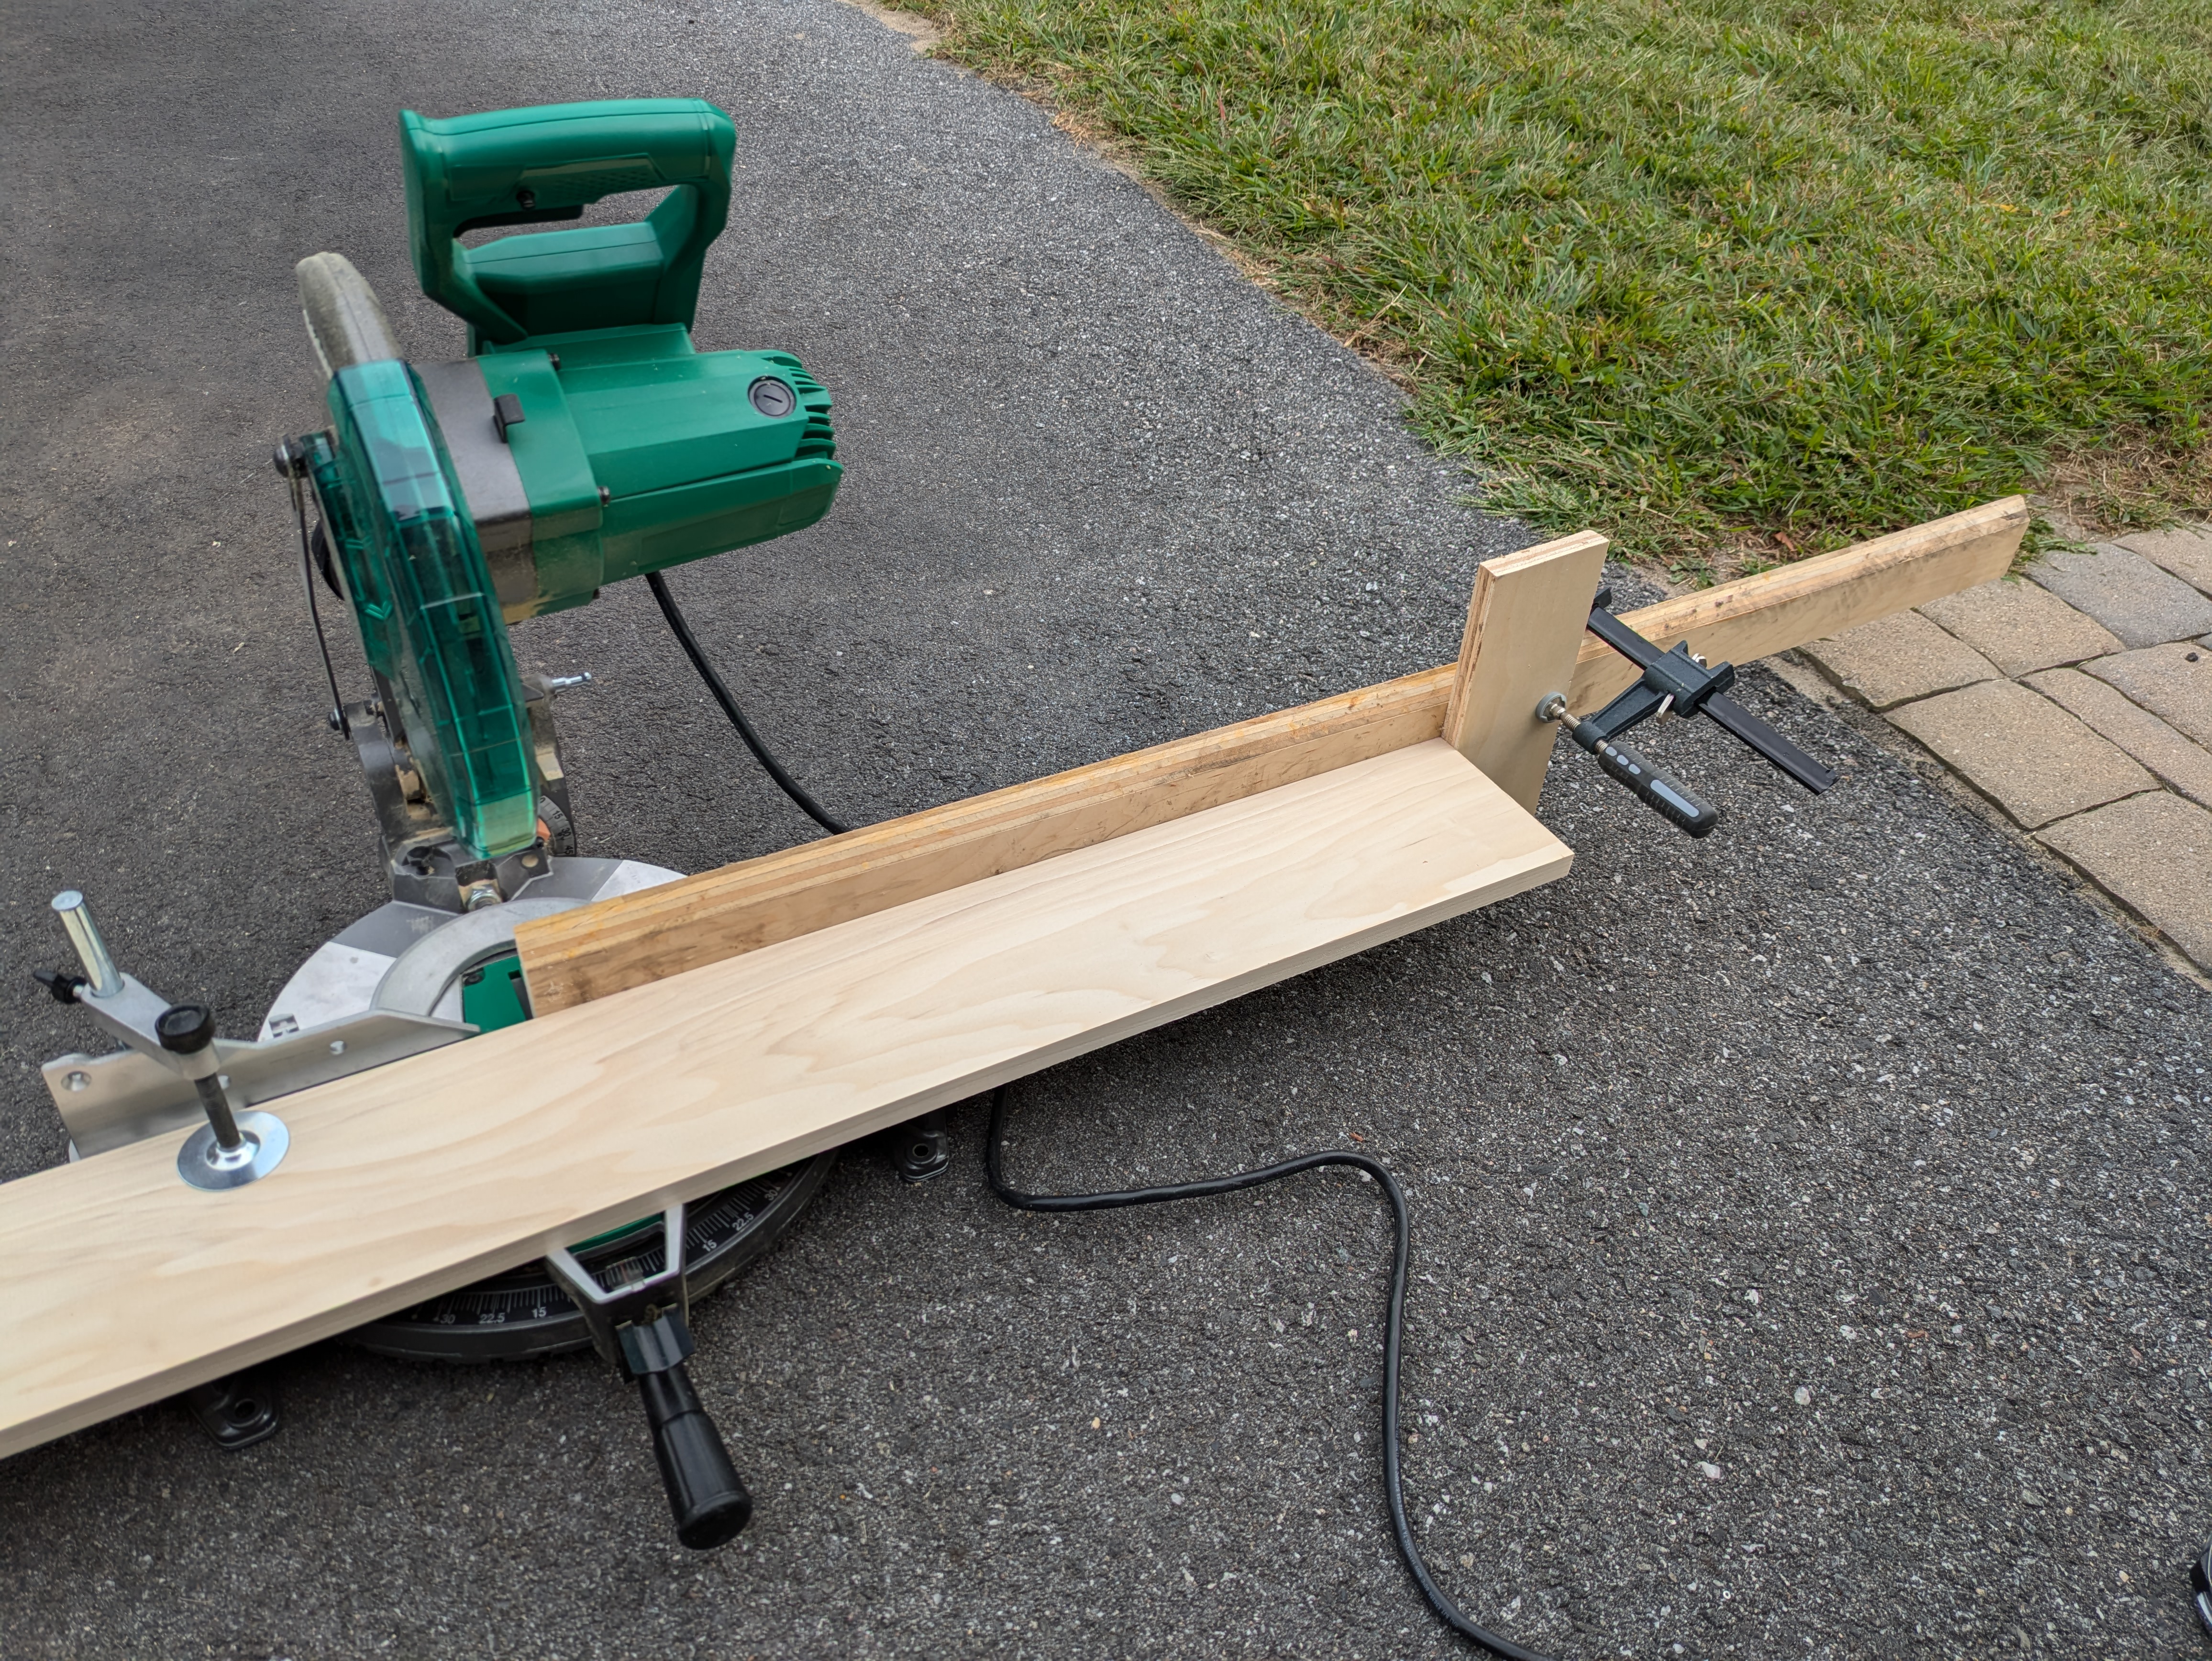
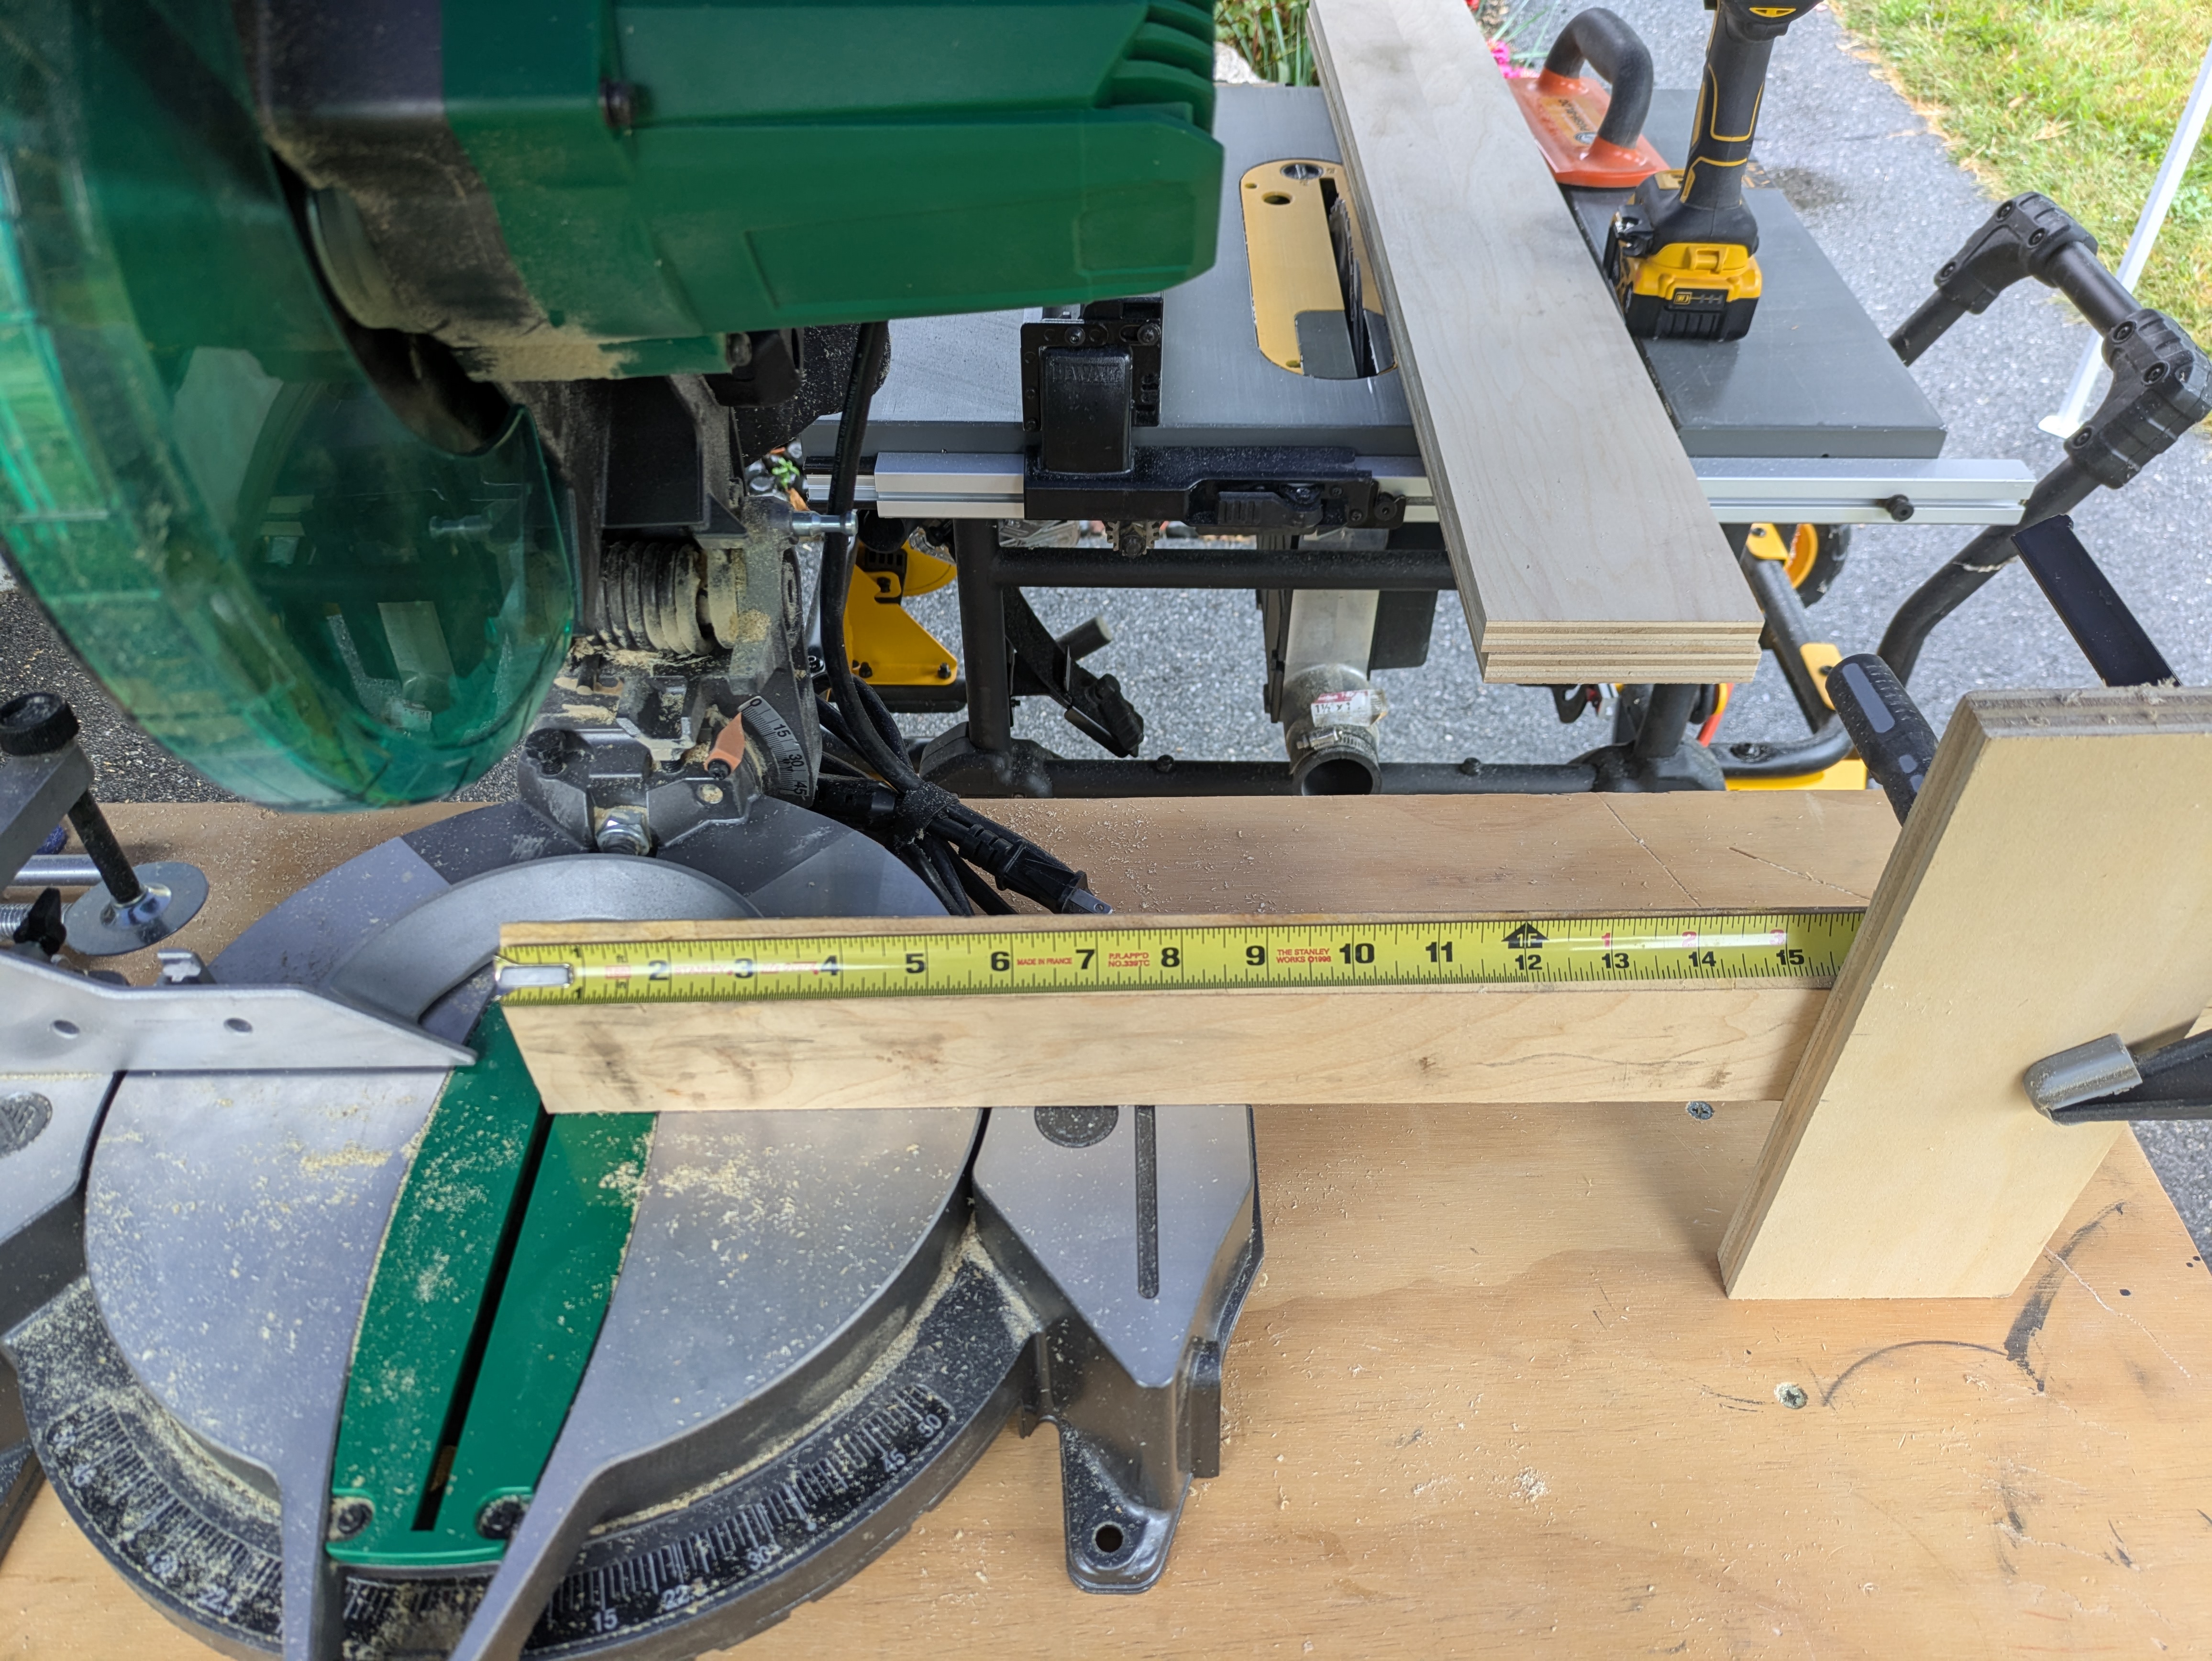
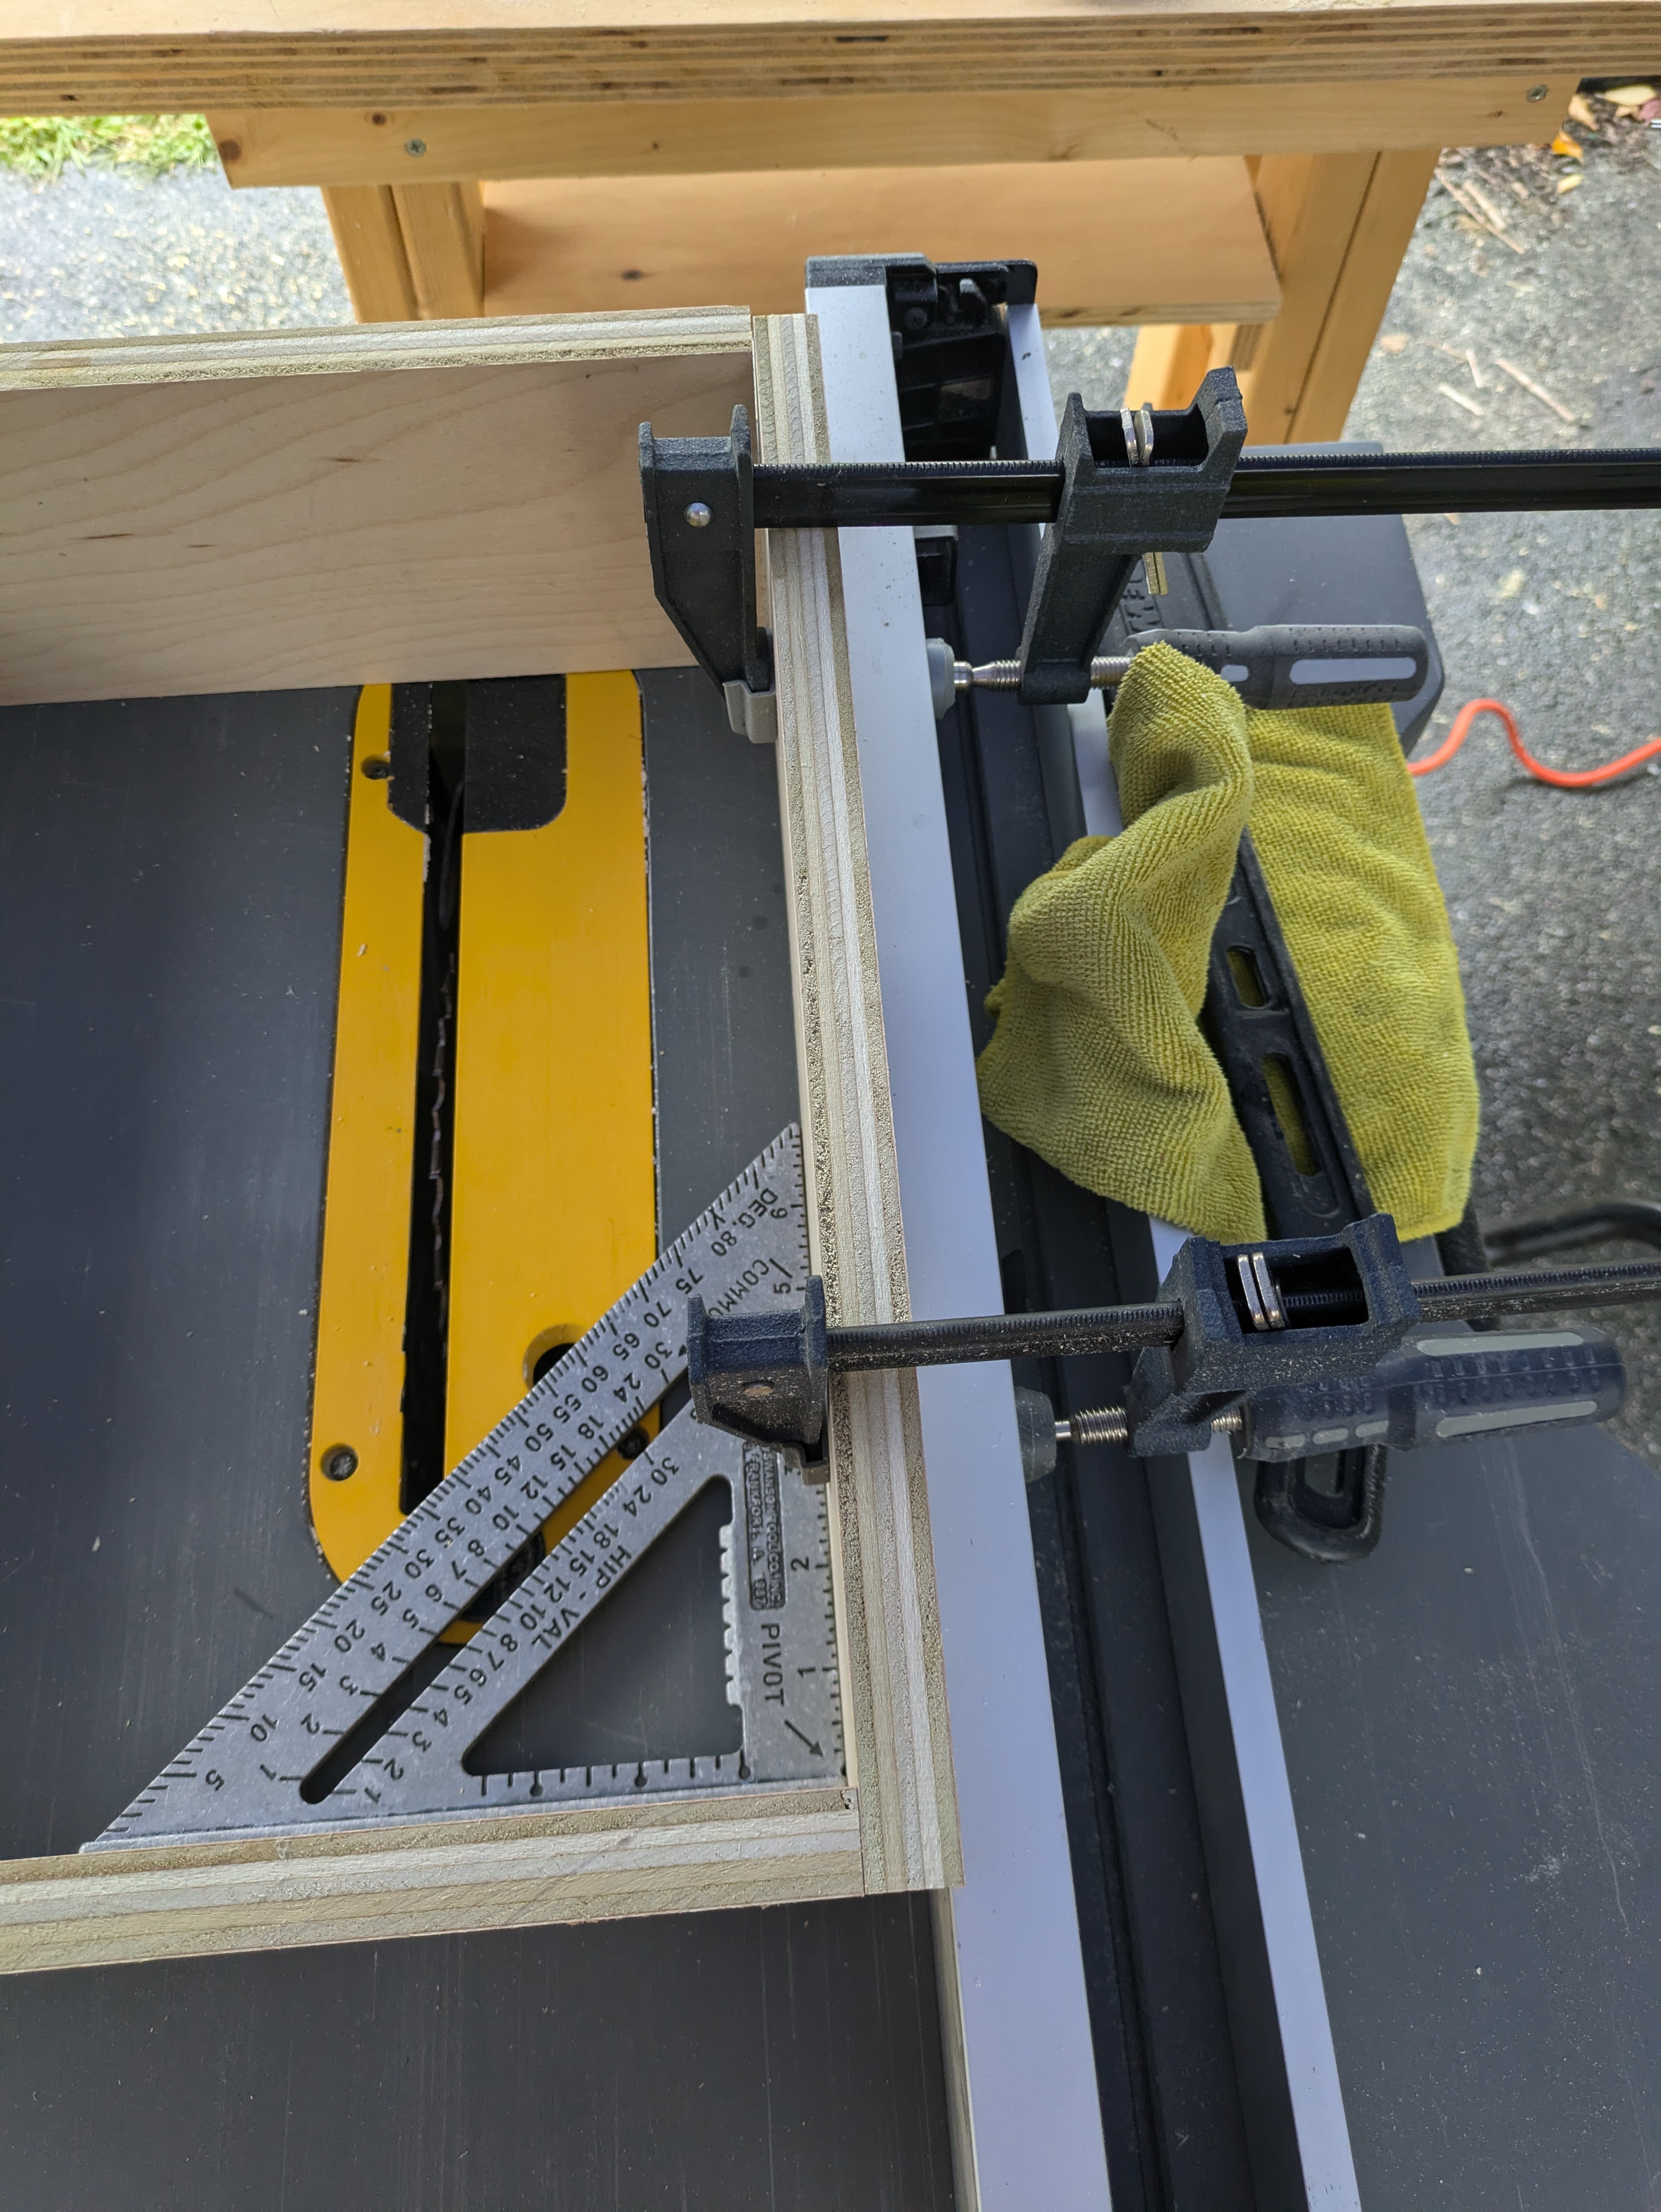
The poplar 1x6 boards need to get cut to length and I also use the miter saw to do that. To make repeatable cuts, I add an extension fence to my small miter saw. That is a fancy way of saying I screwed a board to the miter saw. And then clamp another piece of wood the distance I want to cut.
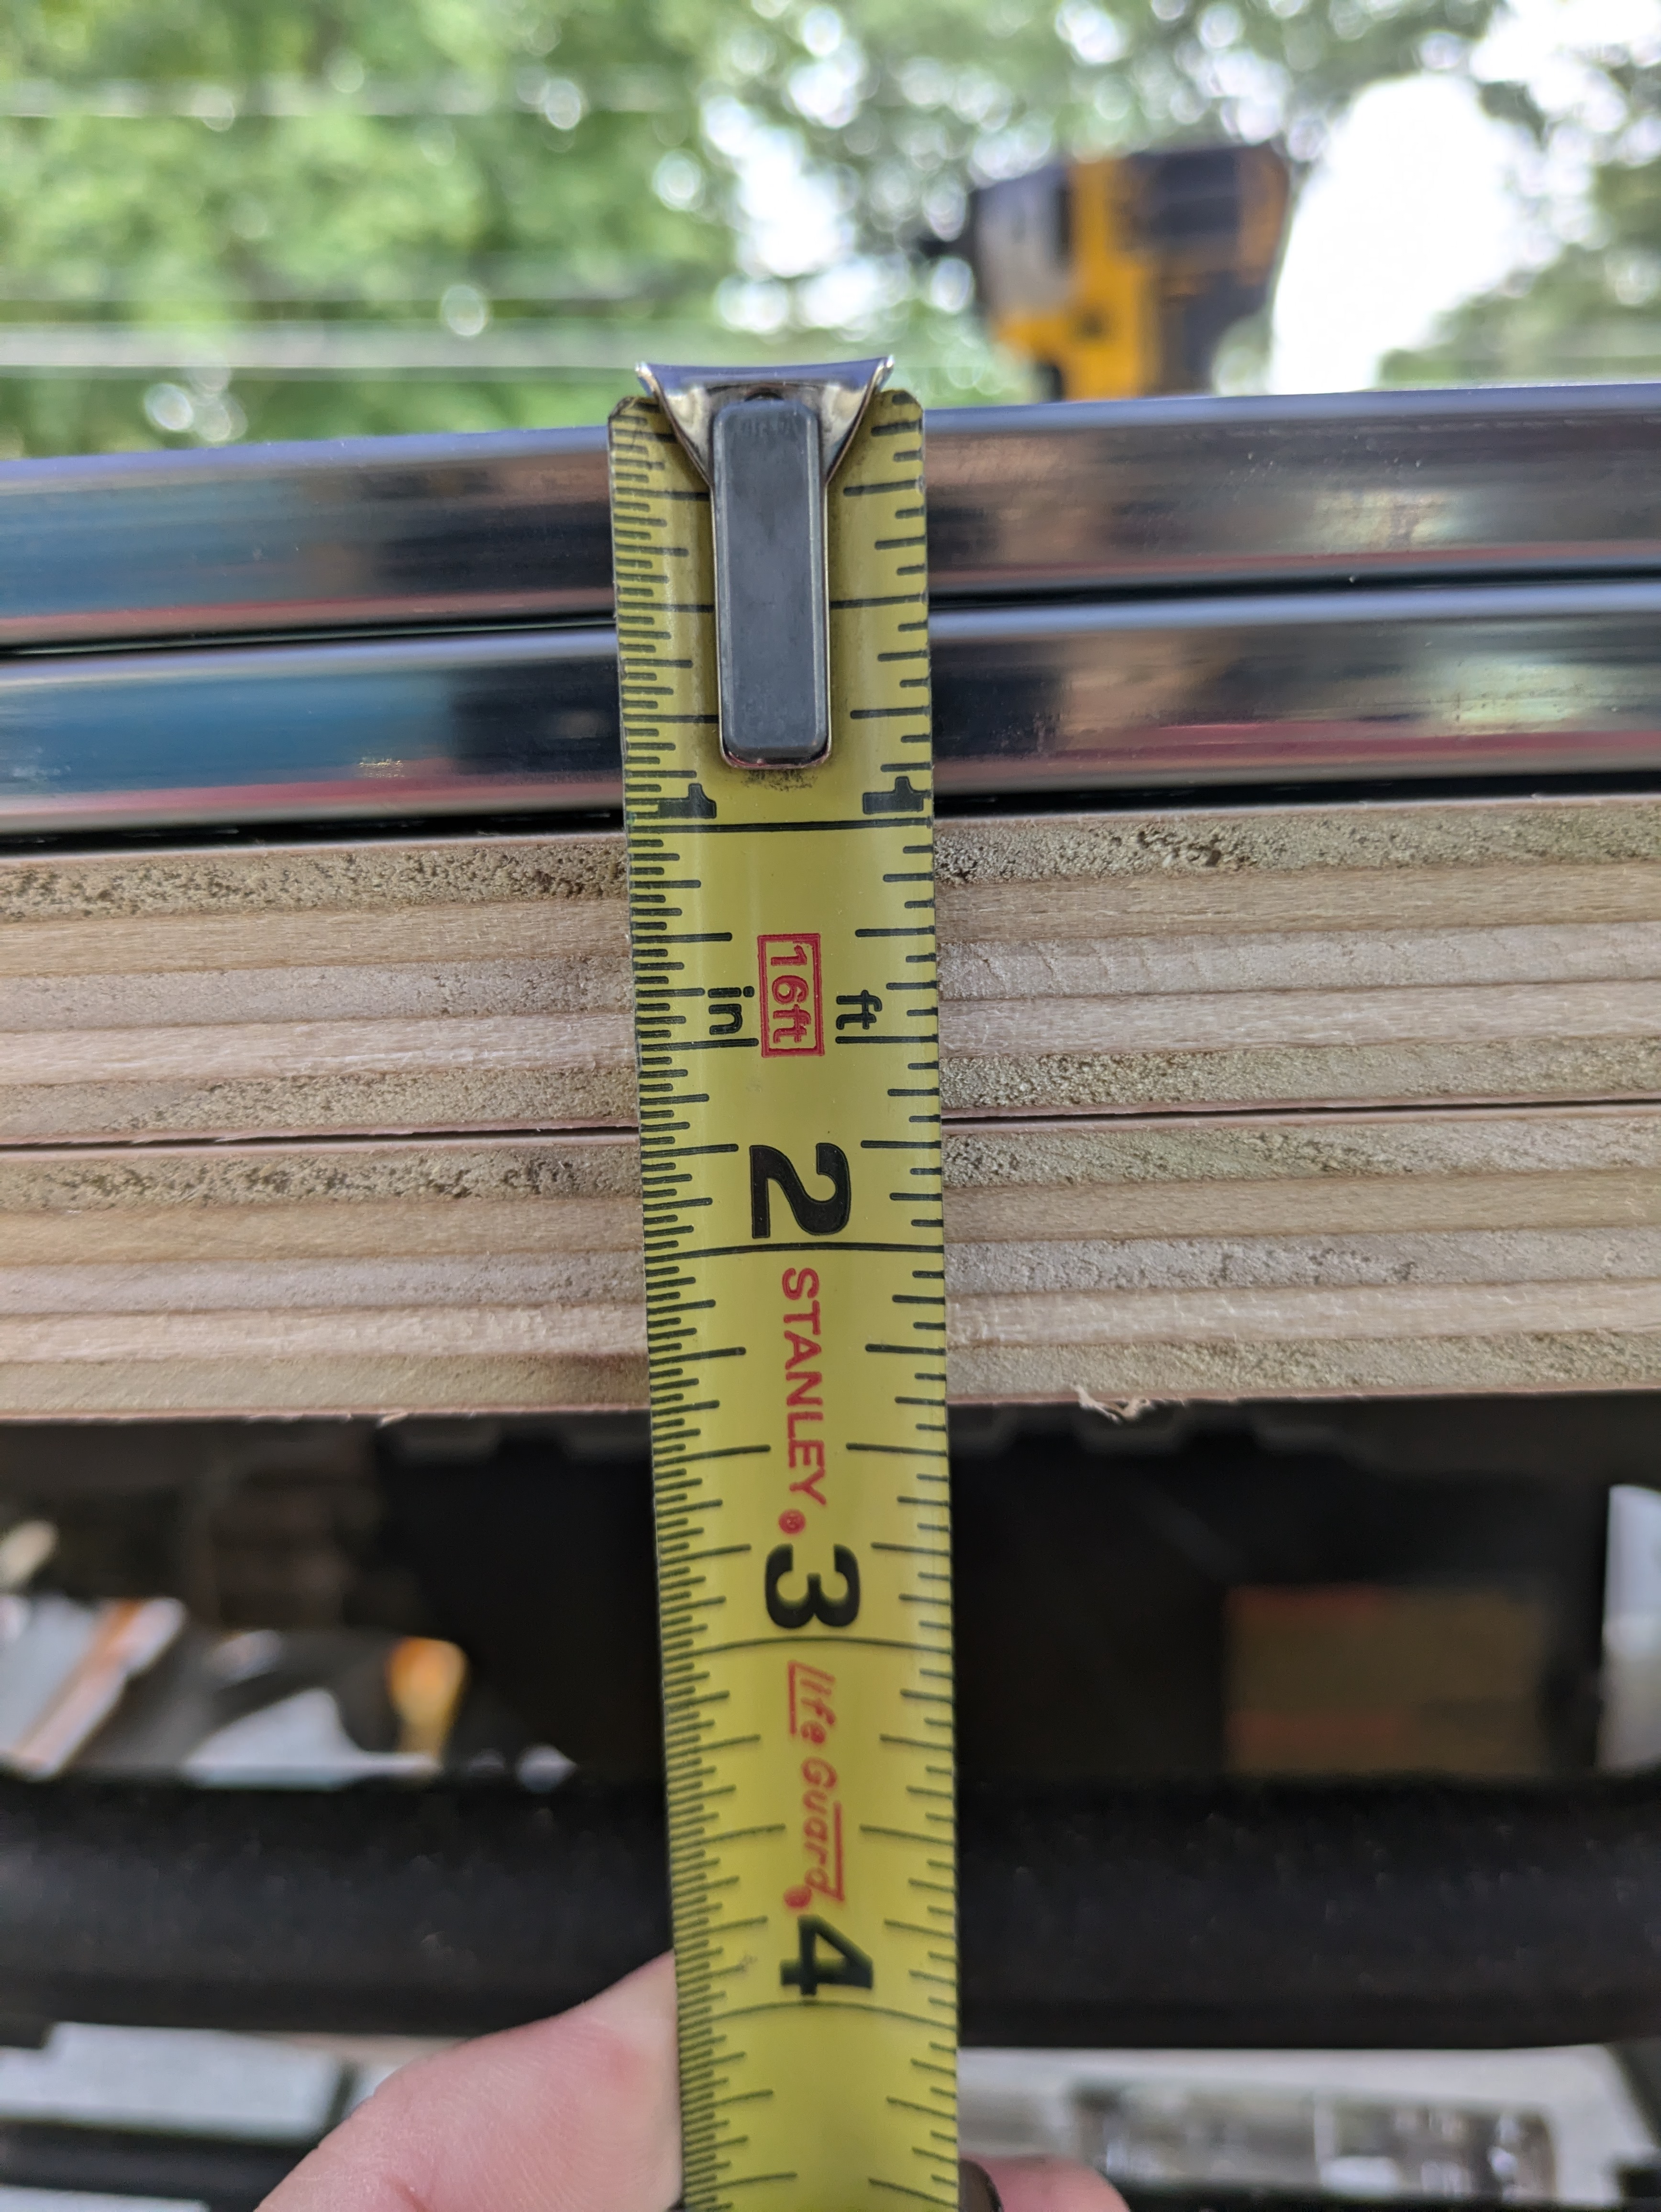
Even though I have plans with dimensions, it’s not as important that I meet those exact dimensions. What is more important is that everything relatively is the same size. So, if something is supposed to be 17", it’s not as problematic if it’s actually 16+7/8". As long as every other piece that’s supposed to be 17" is the same actual size, we’re good.
The fence helps ensure that each of my pieces of that dimension are the same size, even if it’s a little off.
Unfortunately with the 1x6 and the fence, my miter saw blade isn’t big enough to cut the entire 1x6. So I need to cut (roughly) half of it, flip it over, then cut the rest. Without the fence, I could get the entire 1x6 cut on the miter saw. But, that’s the cost I paid for repeatability.
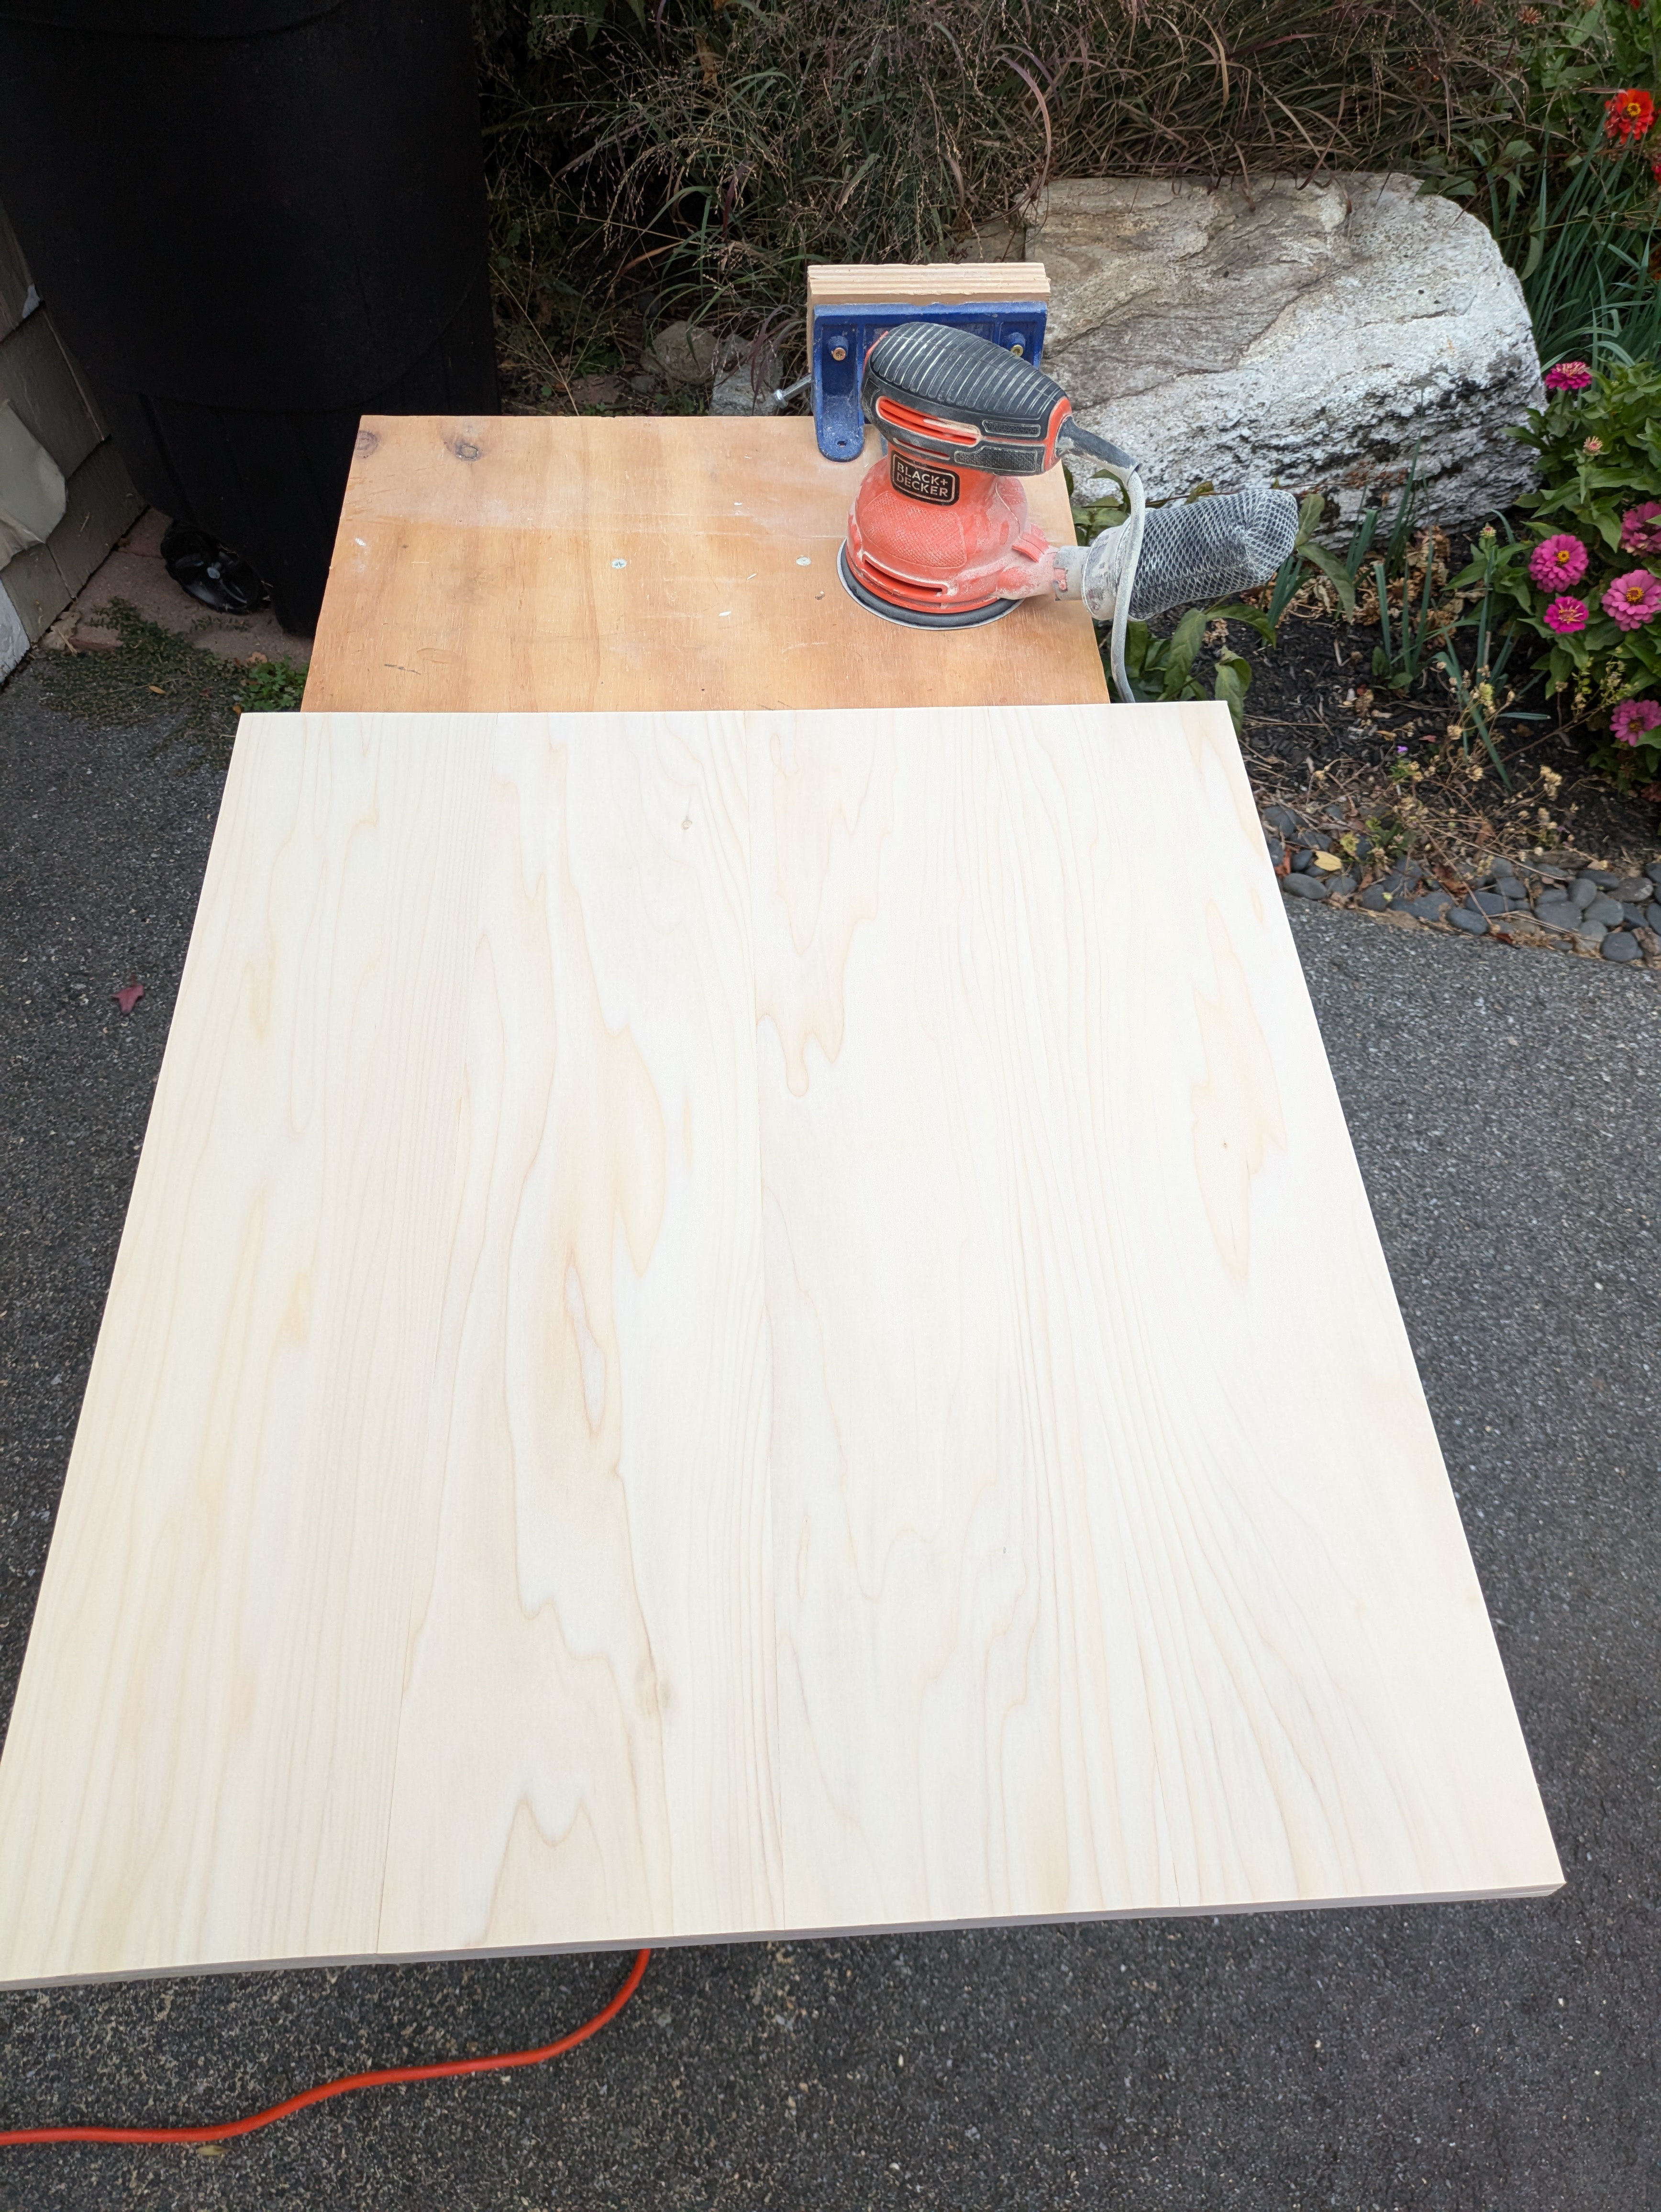
Sanding, Part 1 🔗
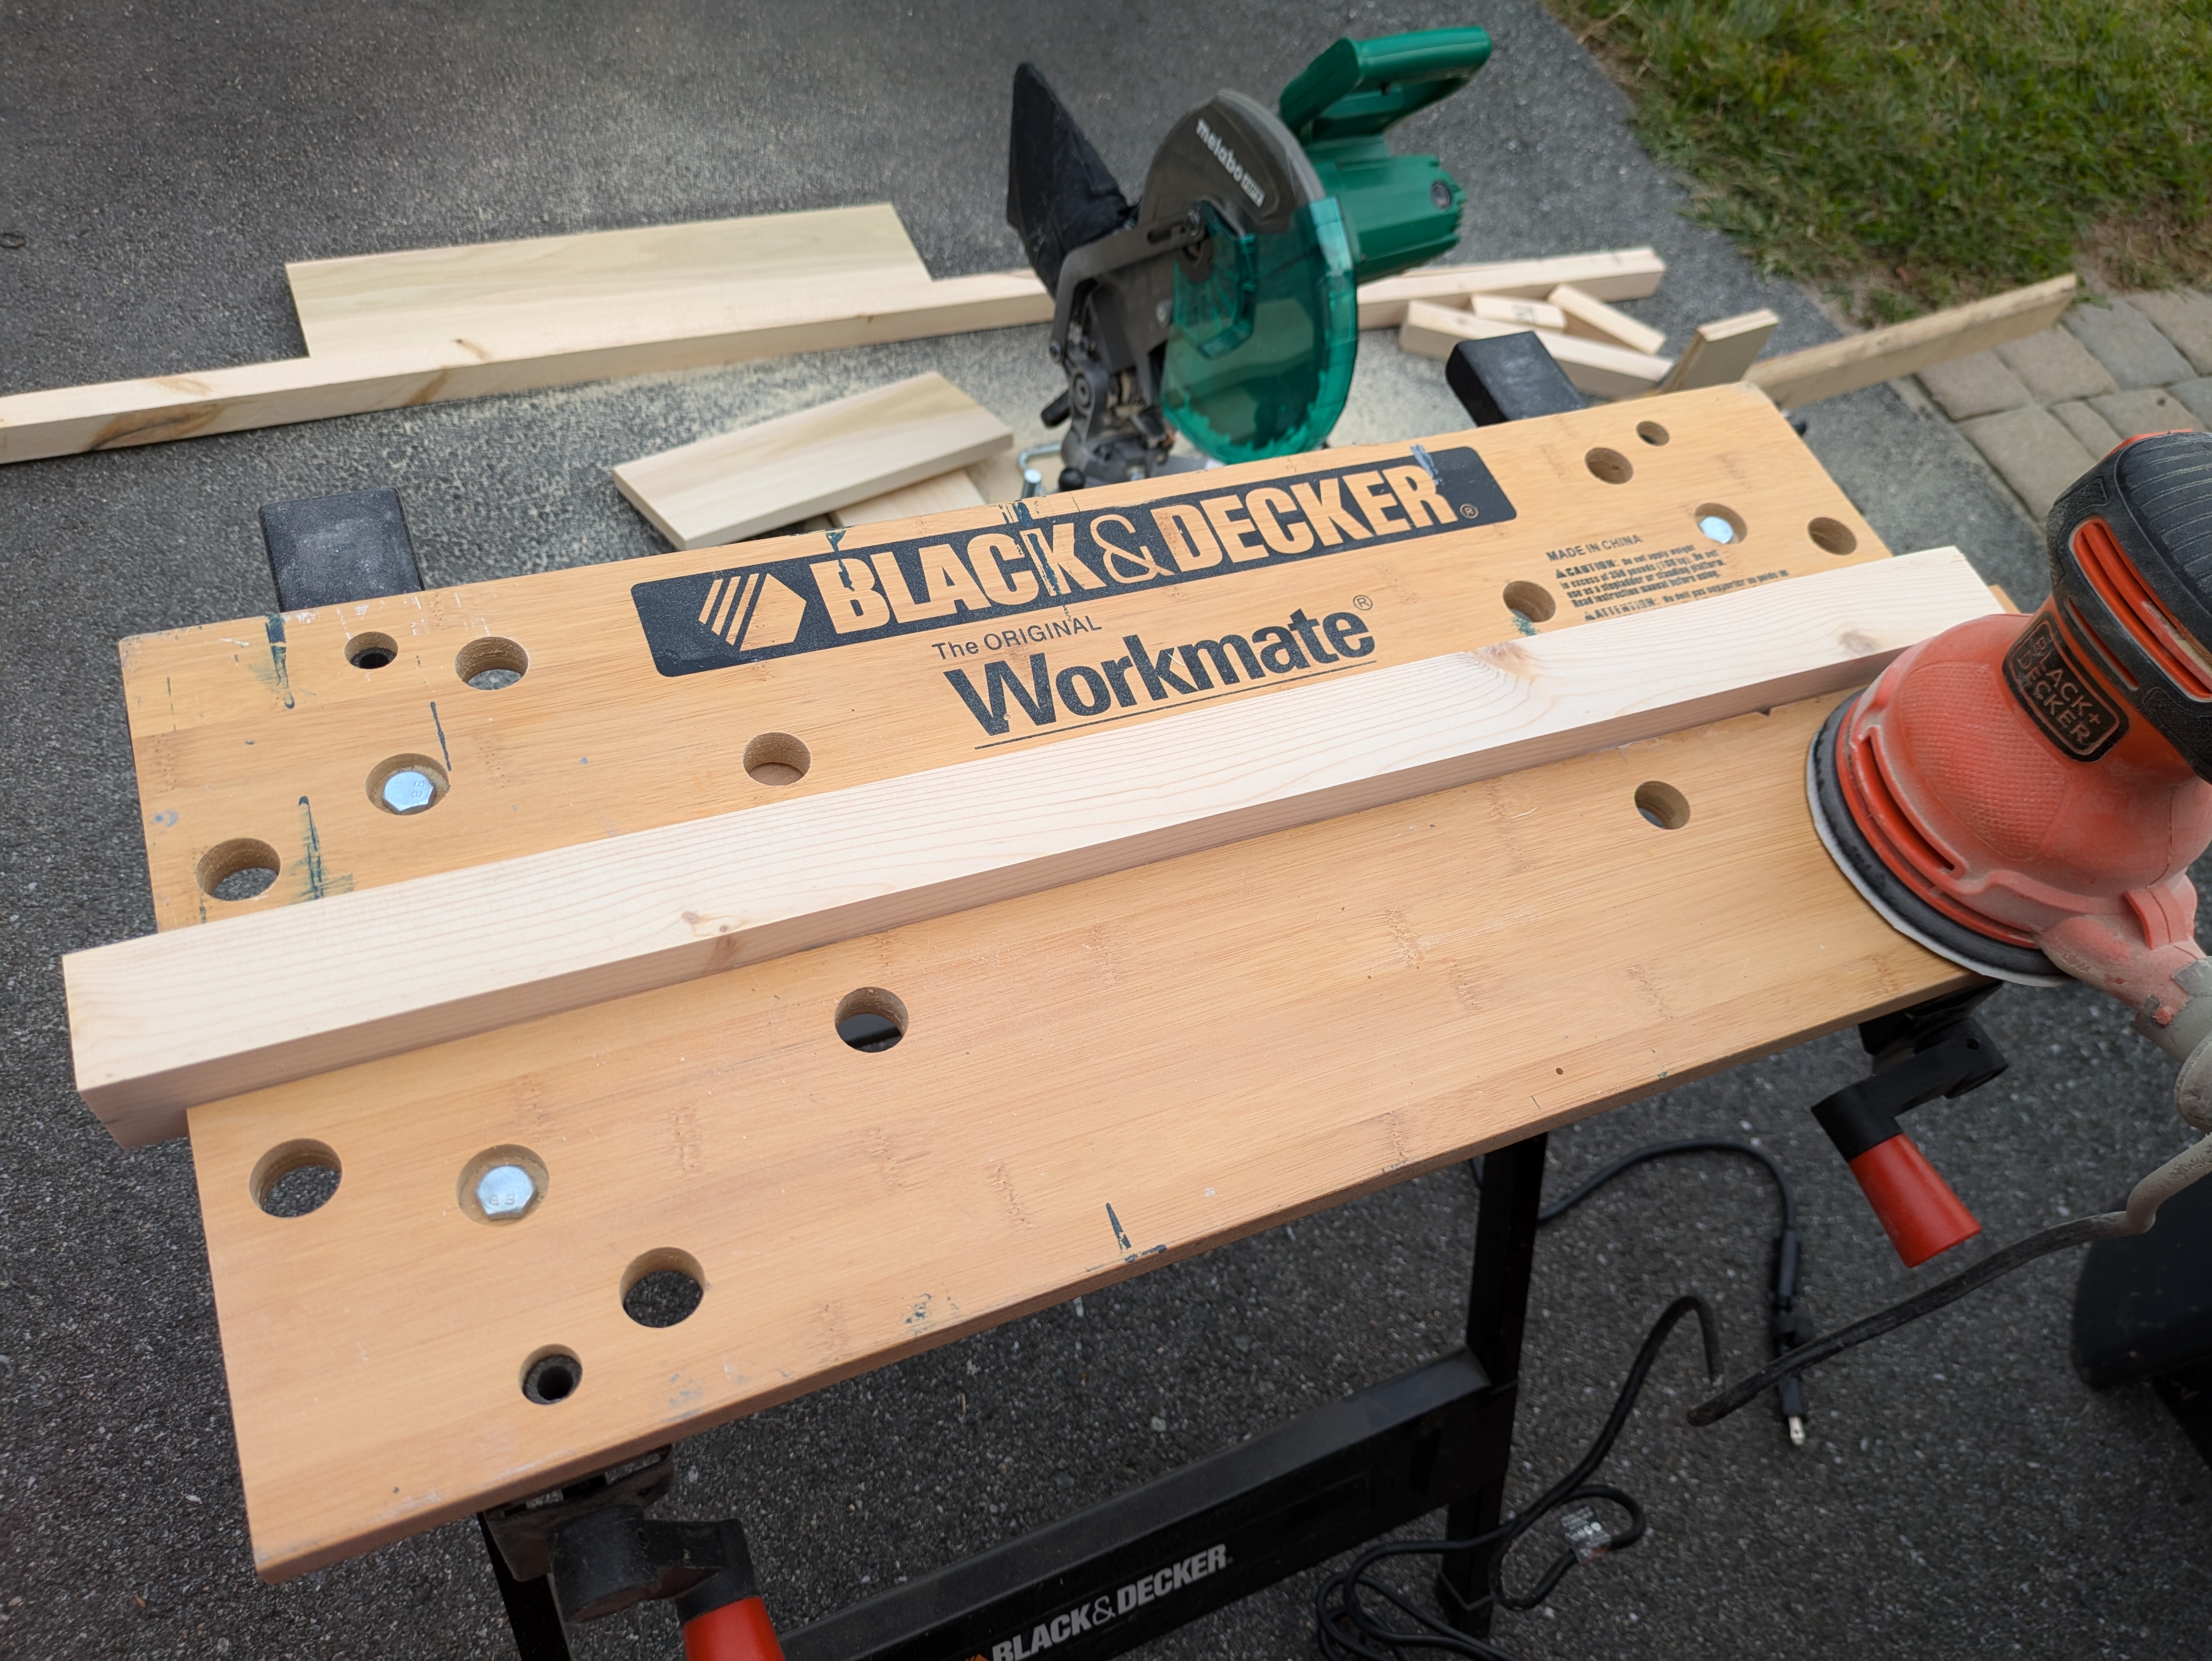
There’s always a lot of sanding with projects. I start preemptively sanding everything. That’ll make it easier to ensure I get everything sanded at least a little. Once it’s put together, it may be hard to reach a corner or some other bit. By doing it now, I’m getting a start on a smooth surface everywhere.
I use my workmate to lock in the 2x2" pieces. That way they don’t move around as much when sanding, given they’re pretty slender.
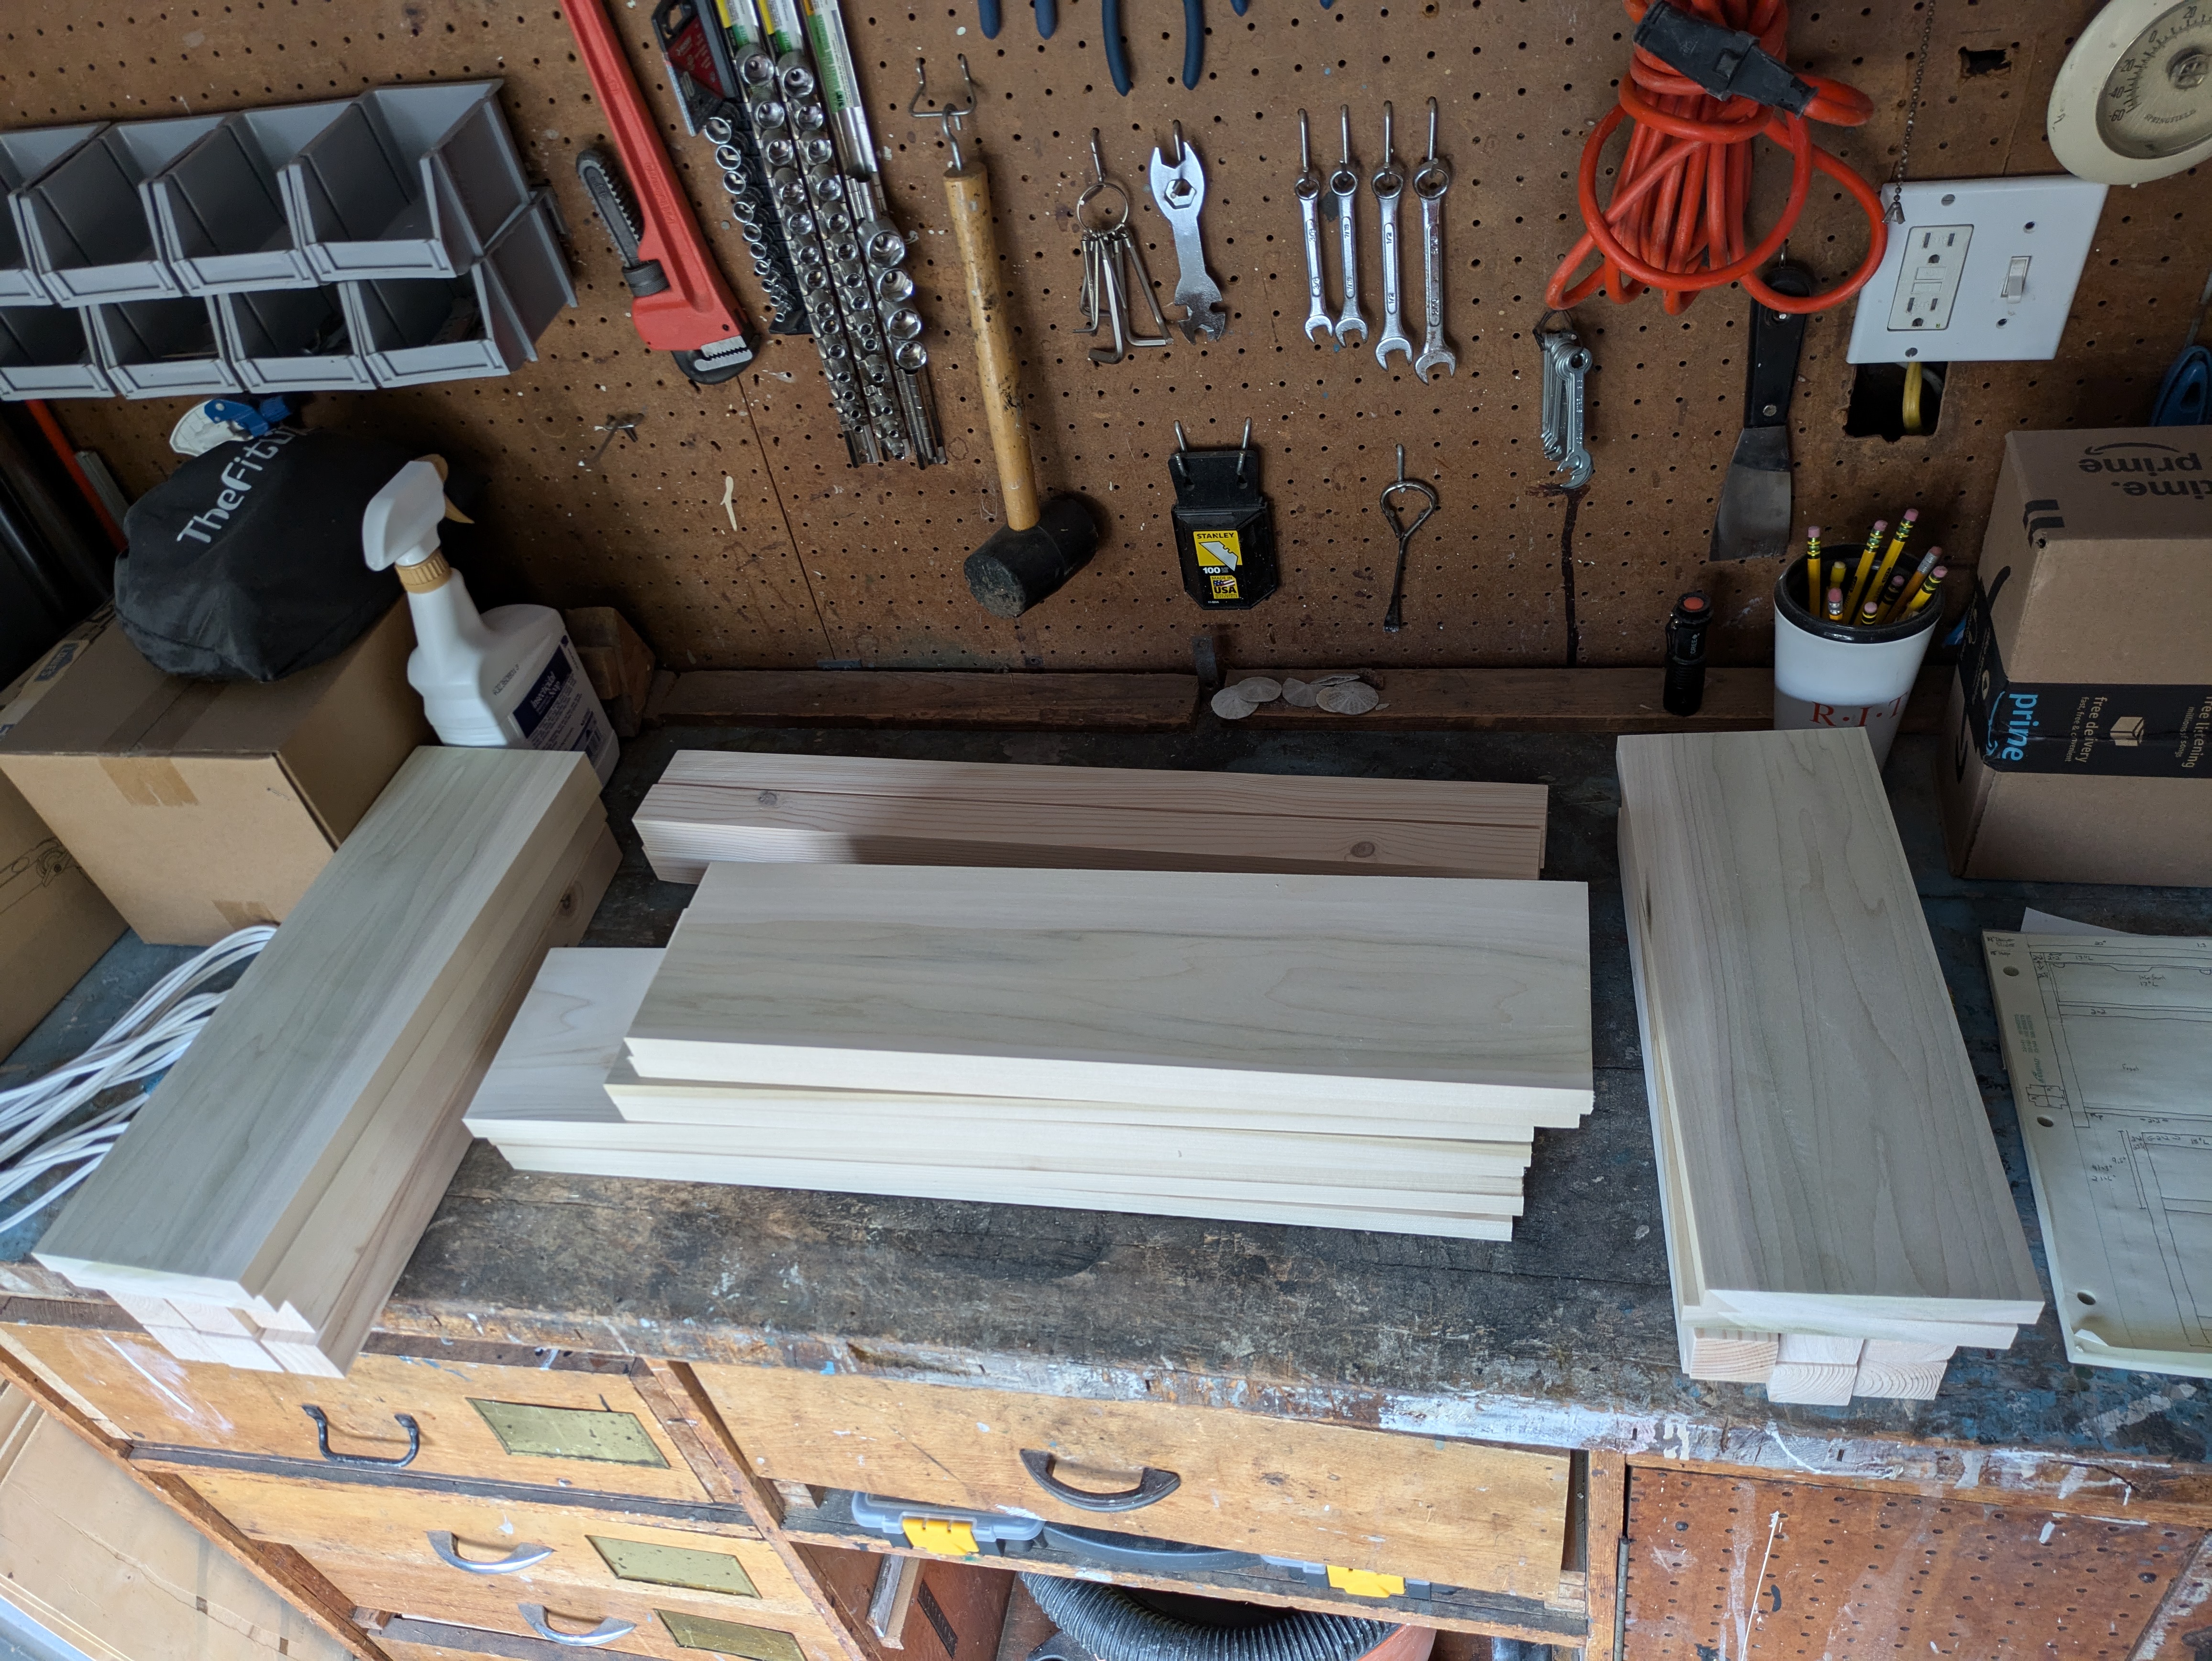
After that, I have all my pieces cut and sanded.
Side Construction 🔗
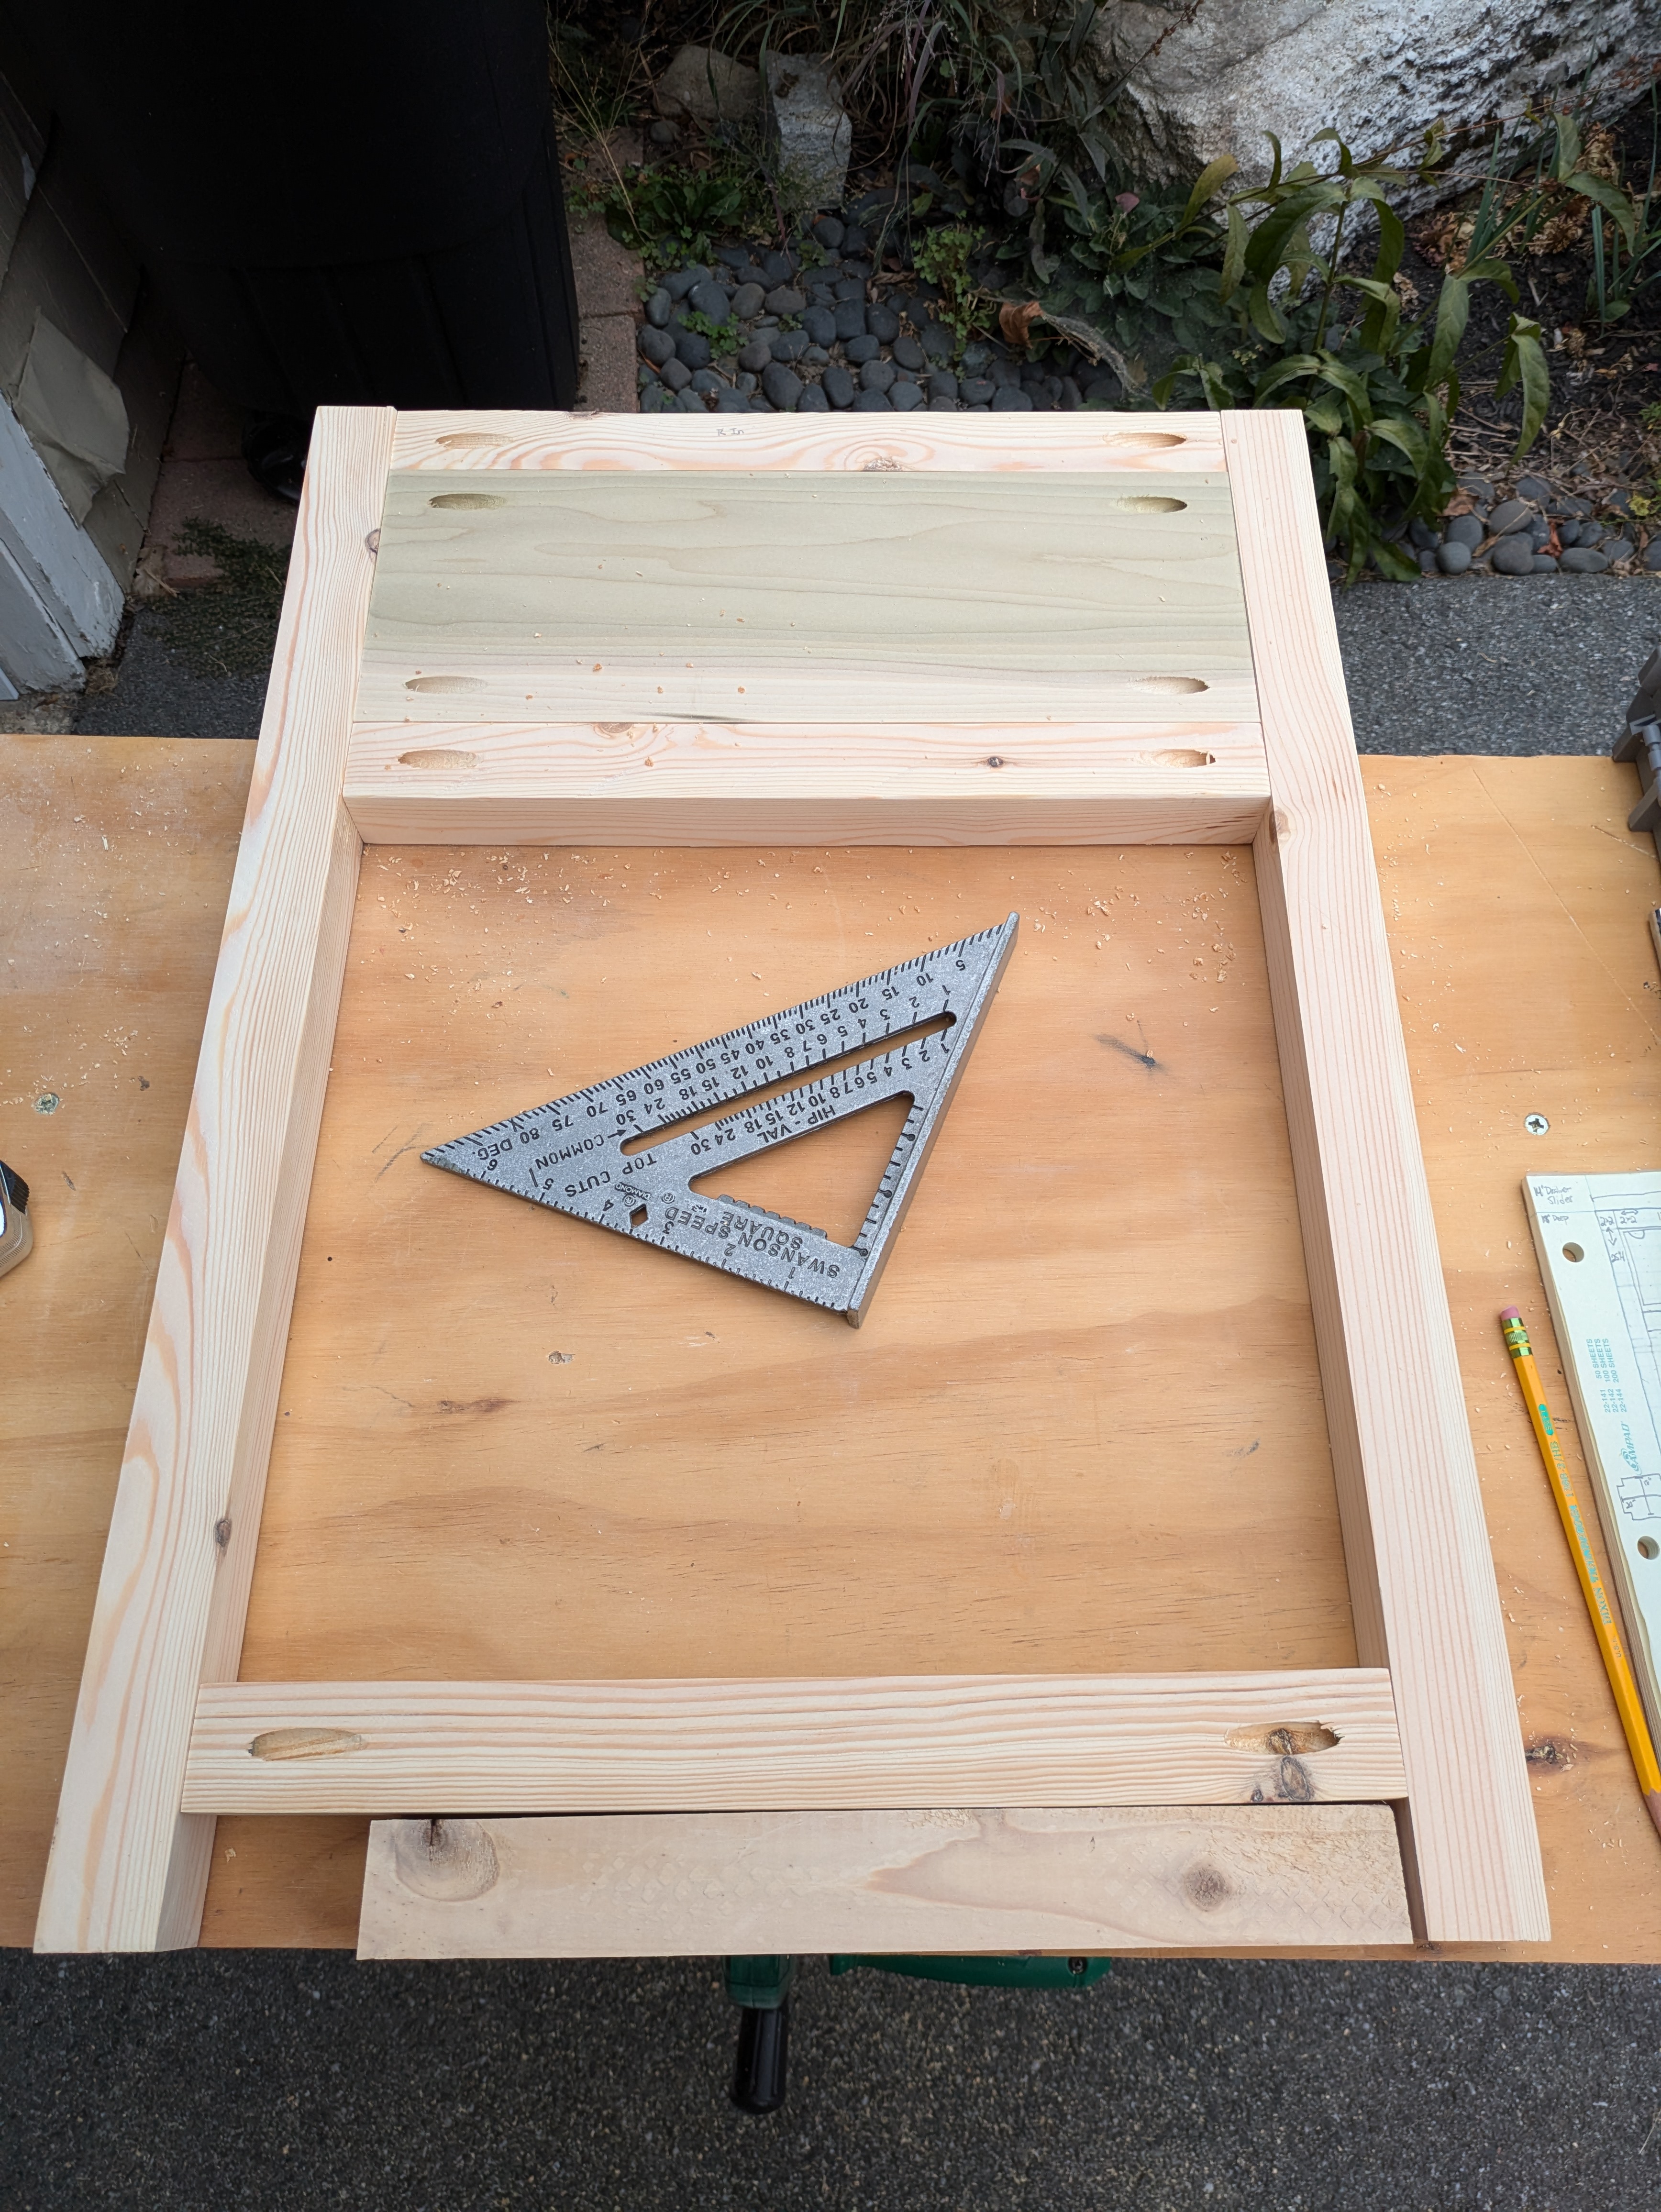
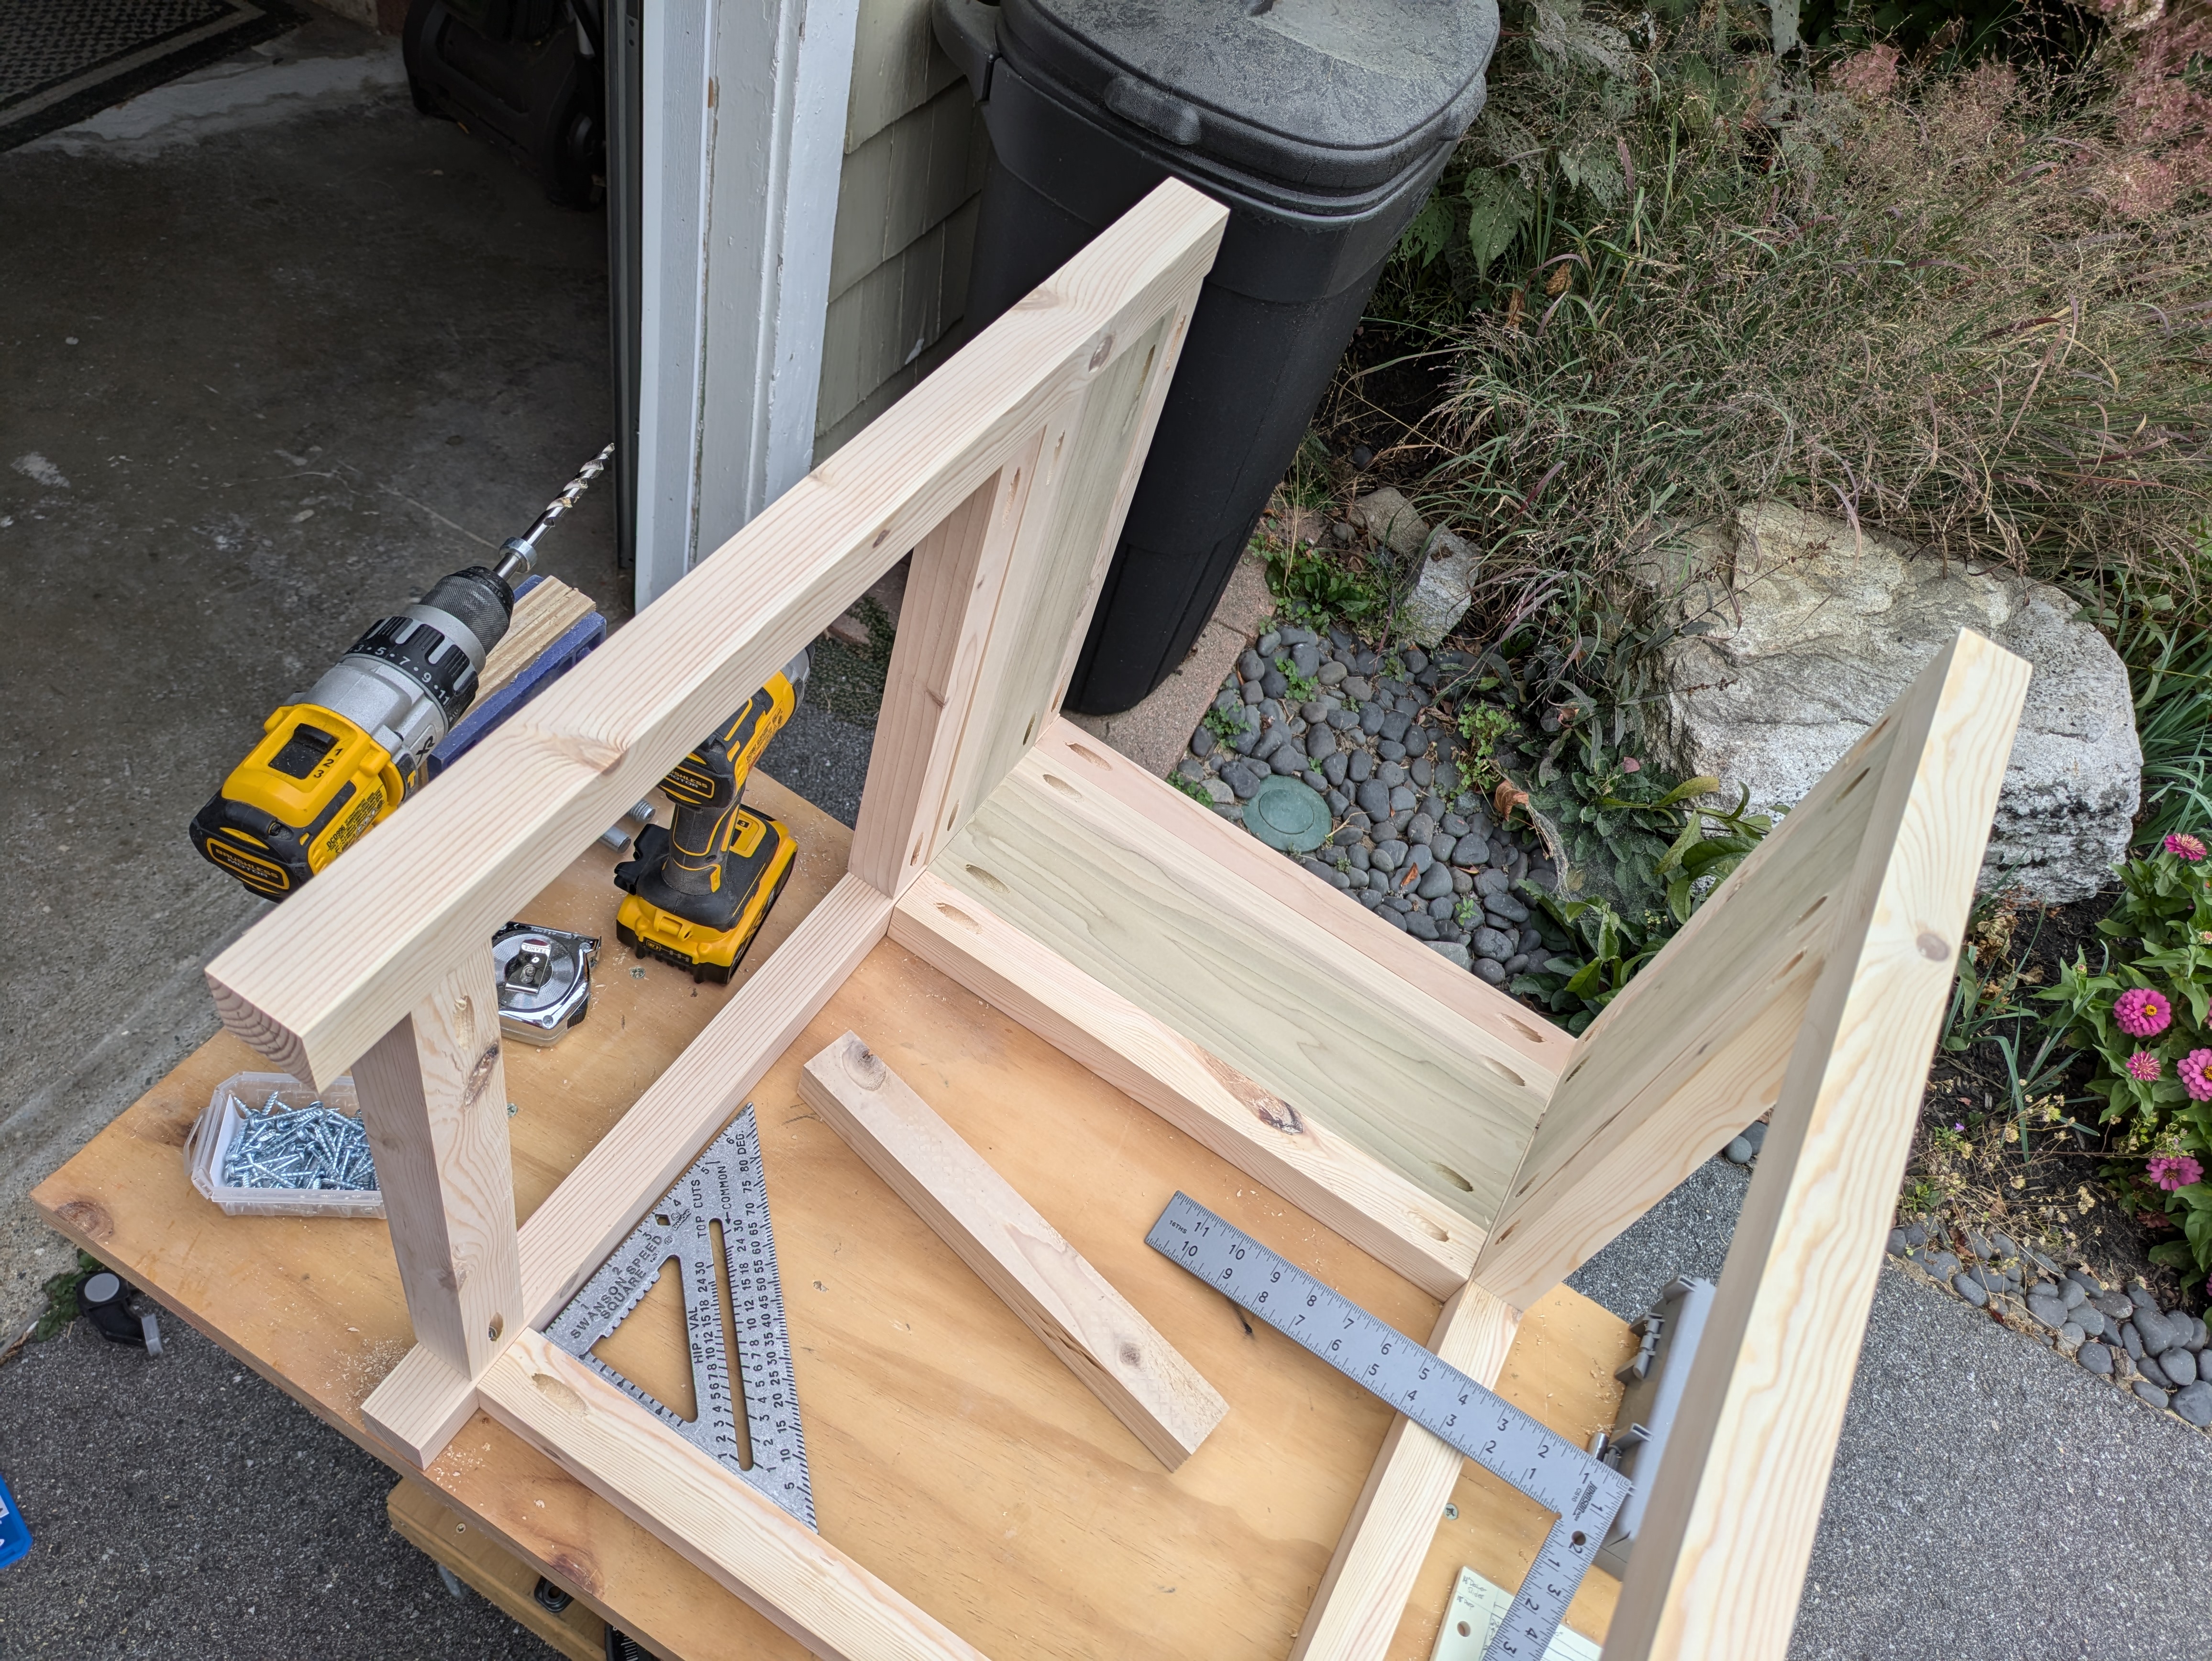
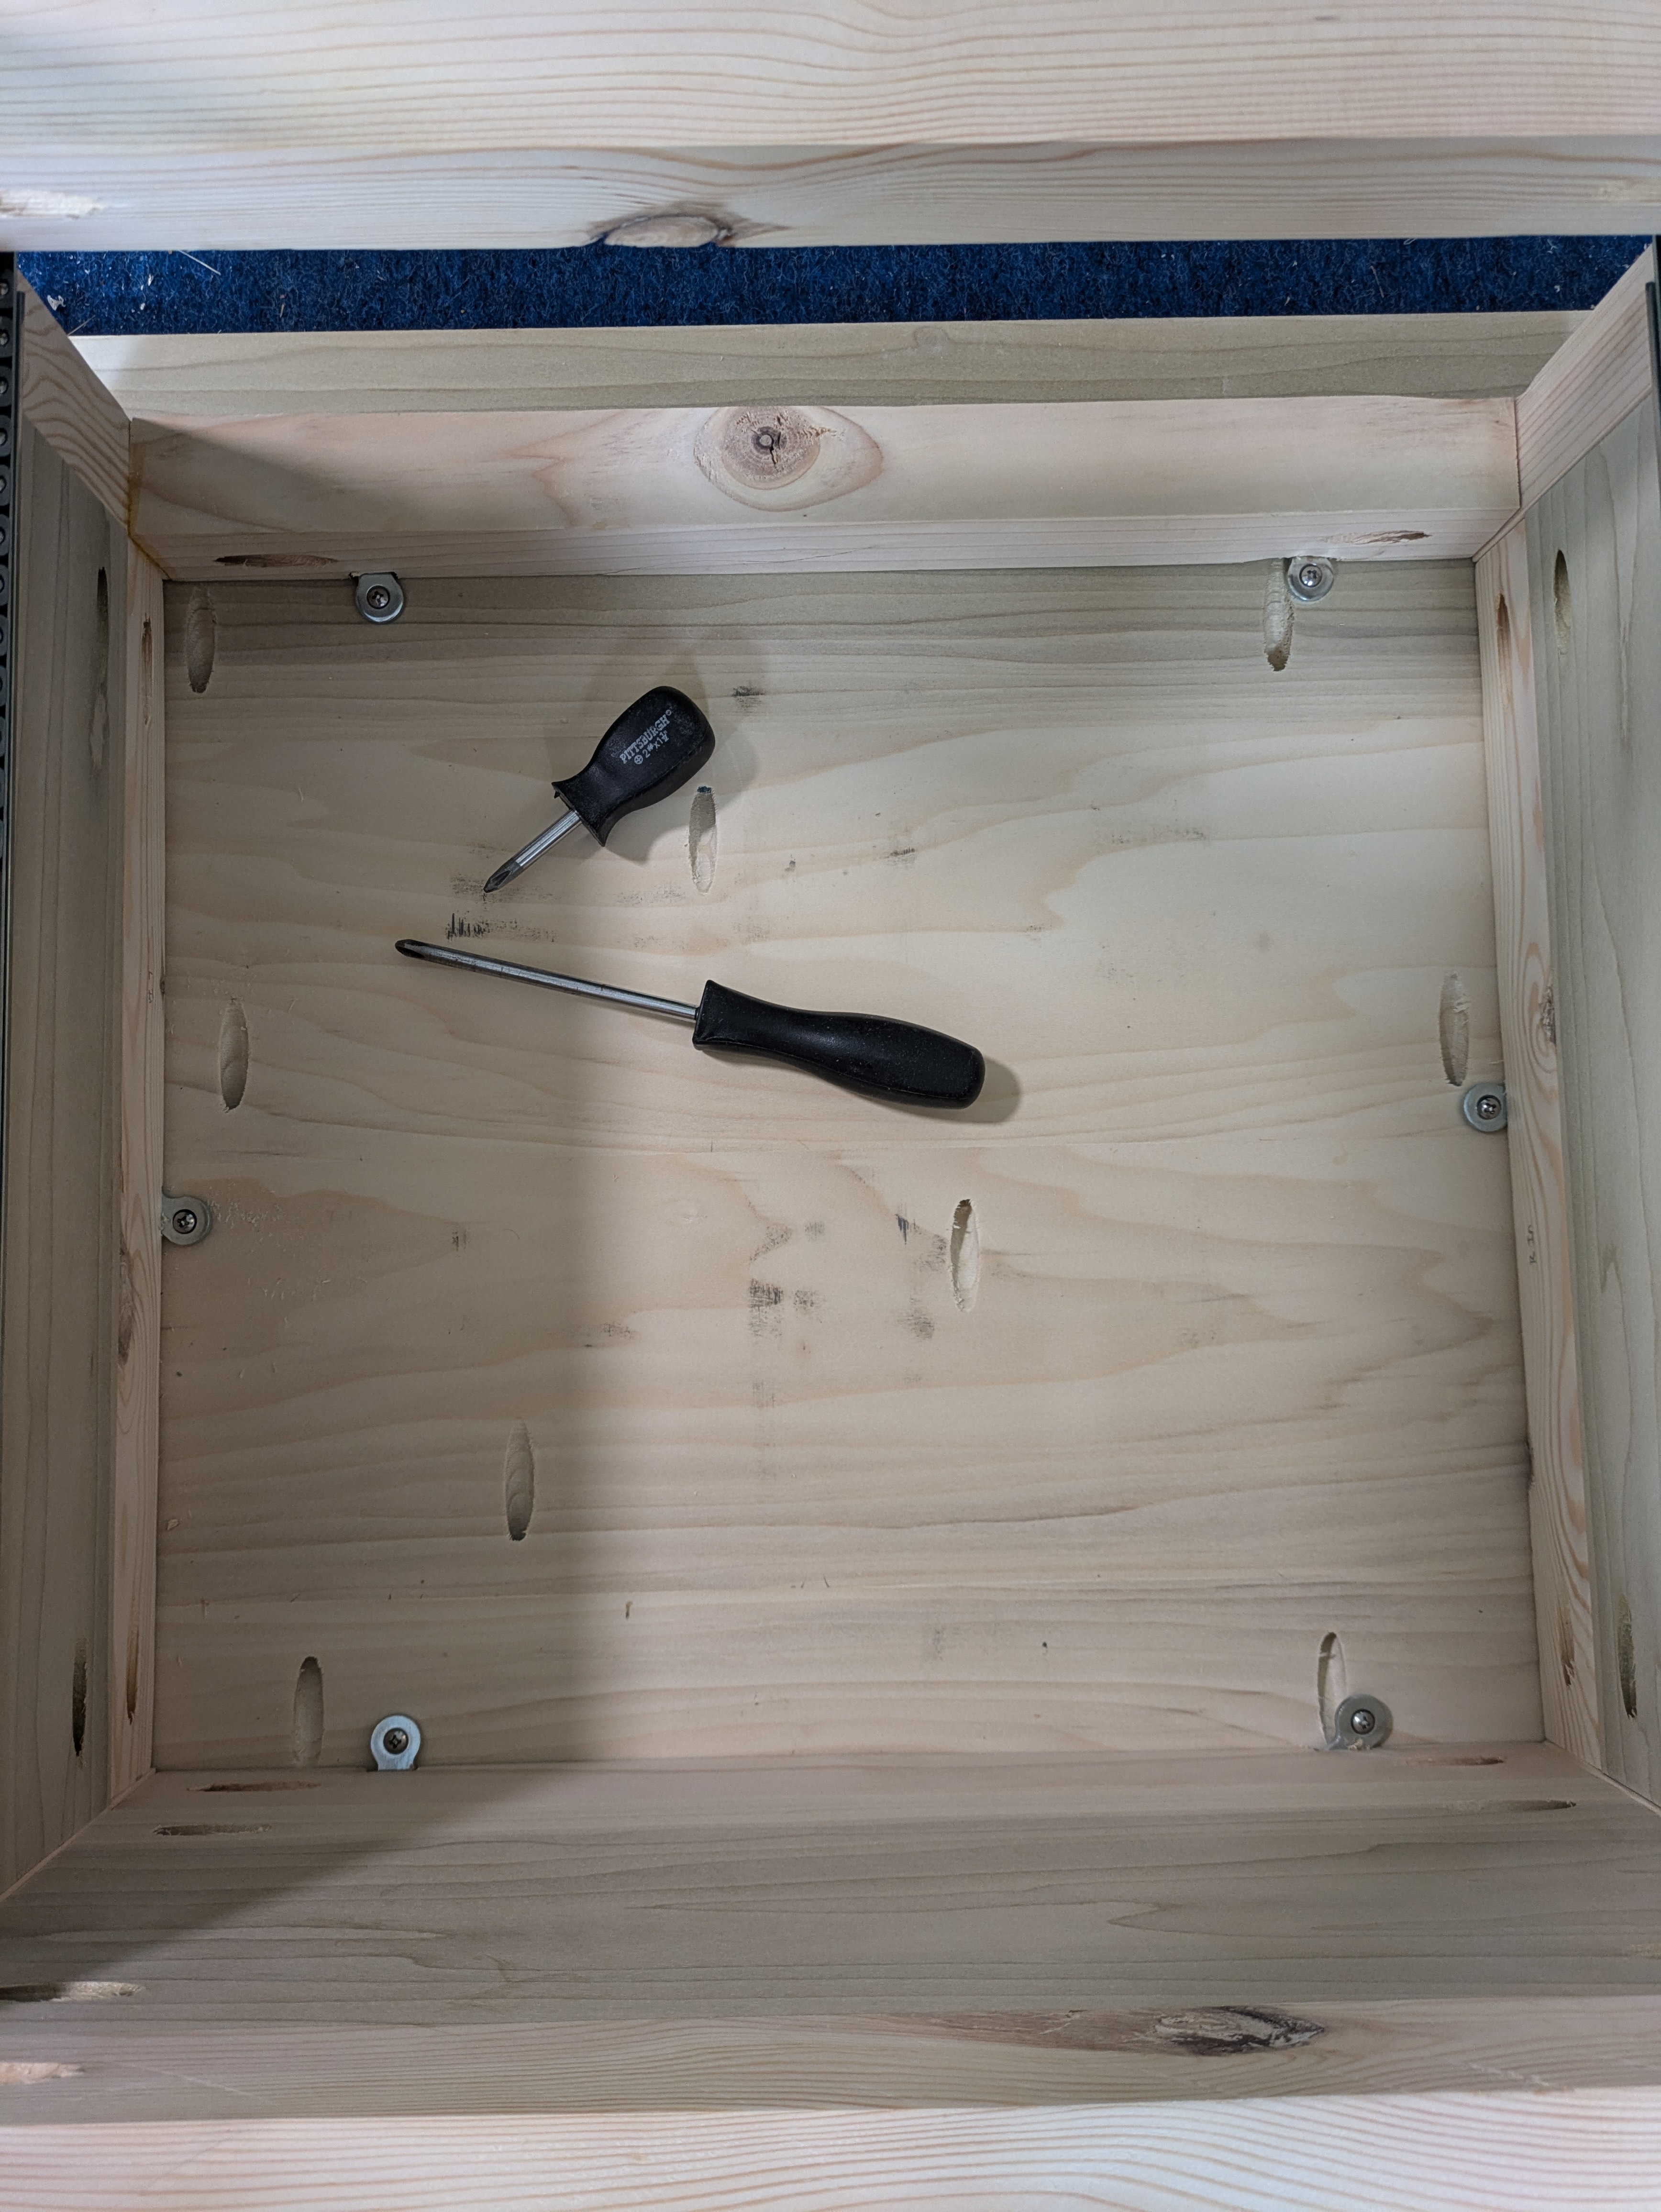
Now I can finally start putting anything together. I start with the sides. I drill pocket holes in the side supports and line one up against the legs. I use my speed square to give some sense of roughly installing it square. Then pocket screws go in the pocket holes, connecting the side support to the leg.

The sides next have a piece of poplar that will cover the drawer. I attach that to the legs with pocket screws as well. I prop up a piece of poplar below it, because it is half the thickness as the 2x2 side support. Then I add another 2x2 below it. This is kind of acting as trim, or a decorative piece. It doesn’t add too much structure. But I like the symmetry.
The 2x2 at the bottom is helpful for giving some structure towards the bottom. It’s also for supporting the shelf that’ll sit on top of it.
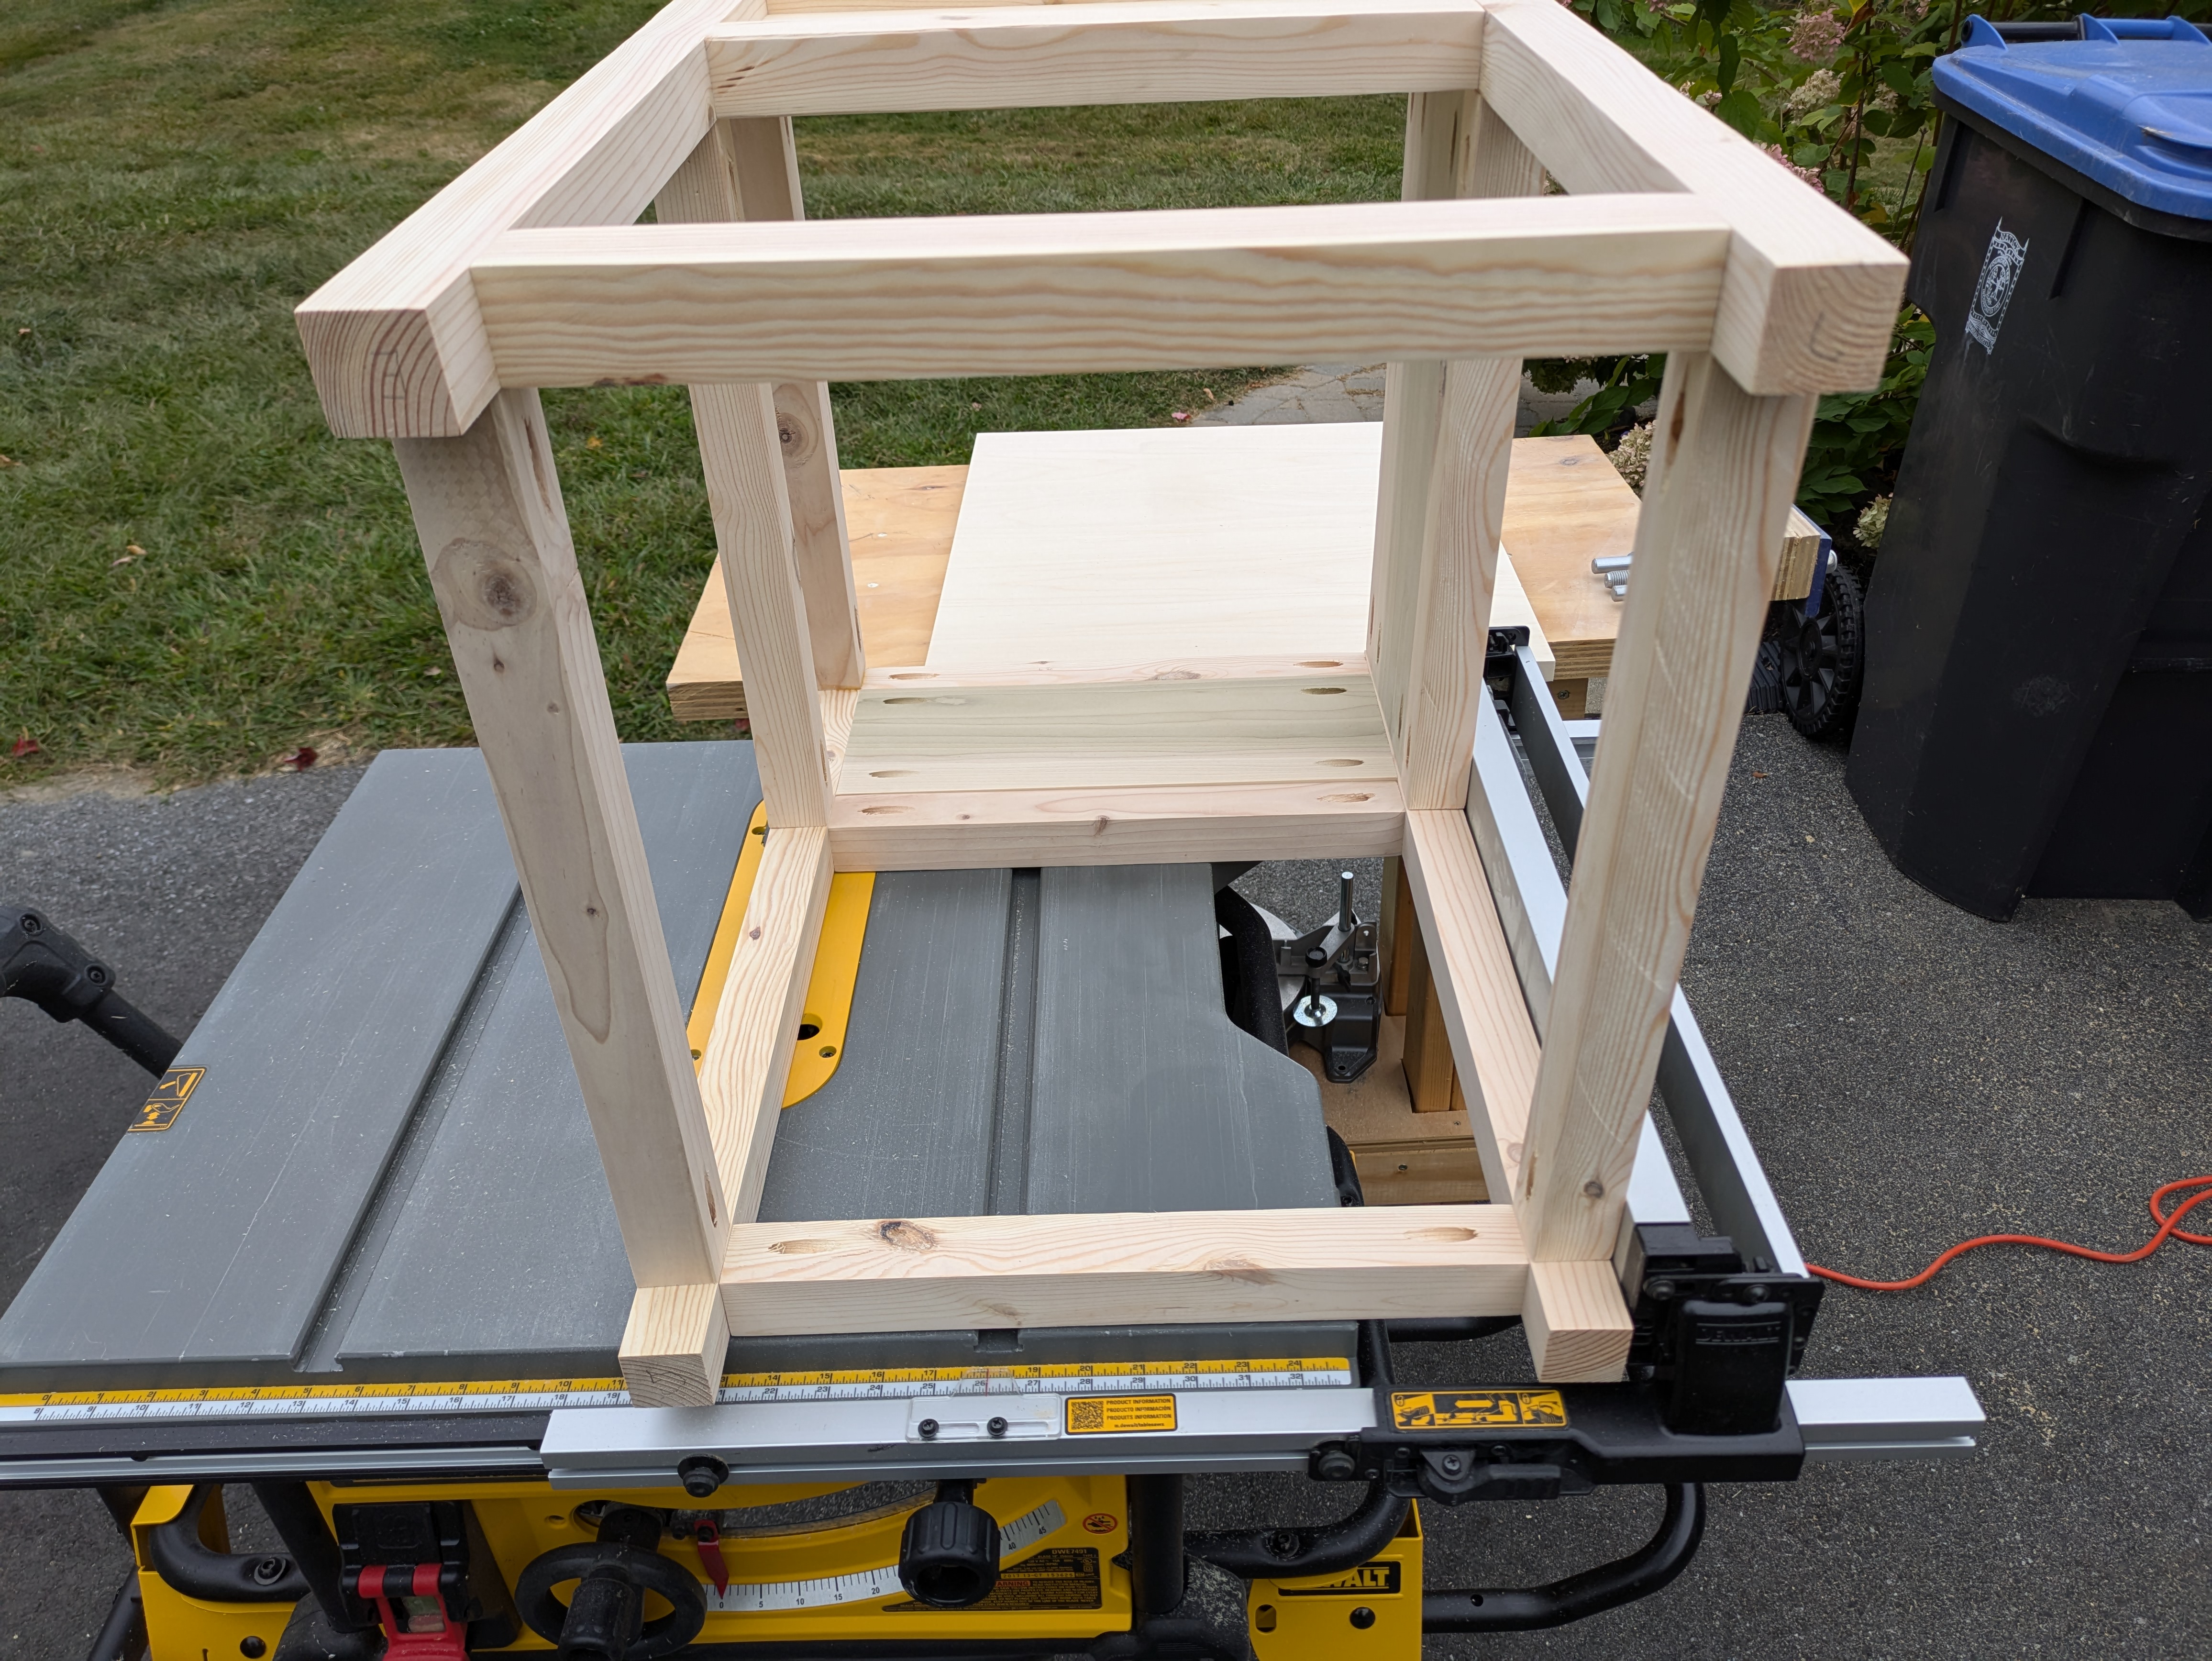
Back Construction 🔗
The back mirrors the look of either side, with a 2x2, 1x6, 2x2, and bottom 2x2. I hold the sides up with clamps while attaching the back rails to each side assembly.
Front Construction 🔗
The front has the 2x2s of the side and back. However, there is no 1x6 here. The drawer face will take that space eventually.
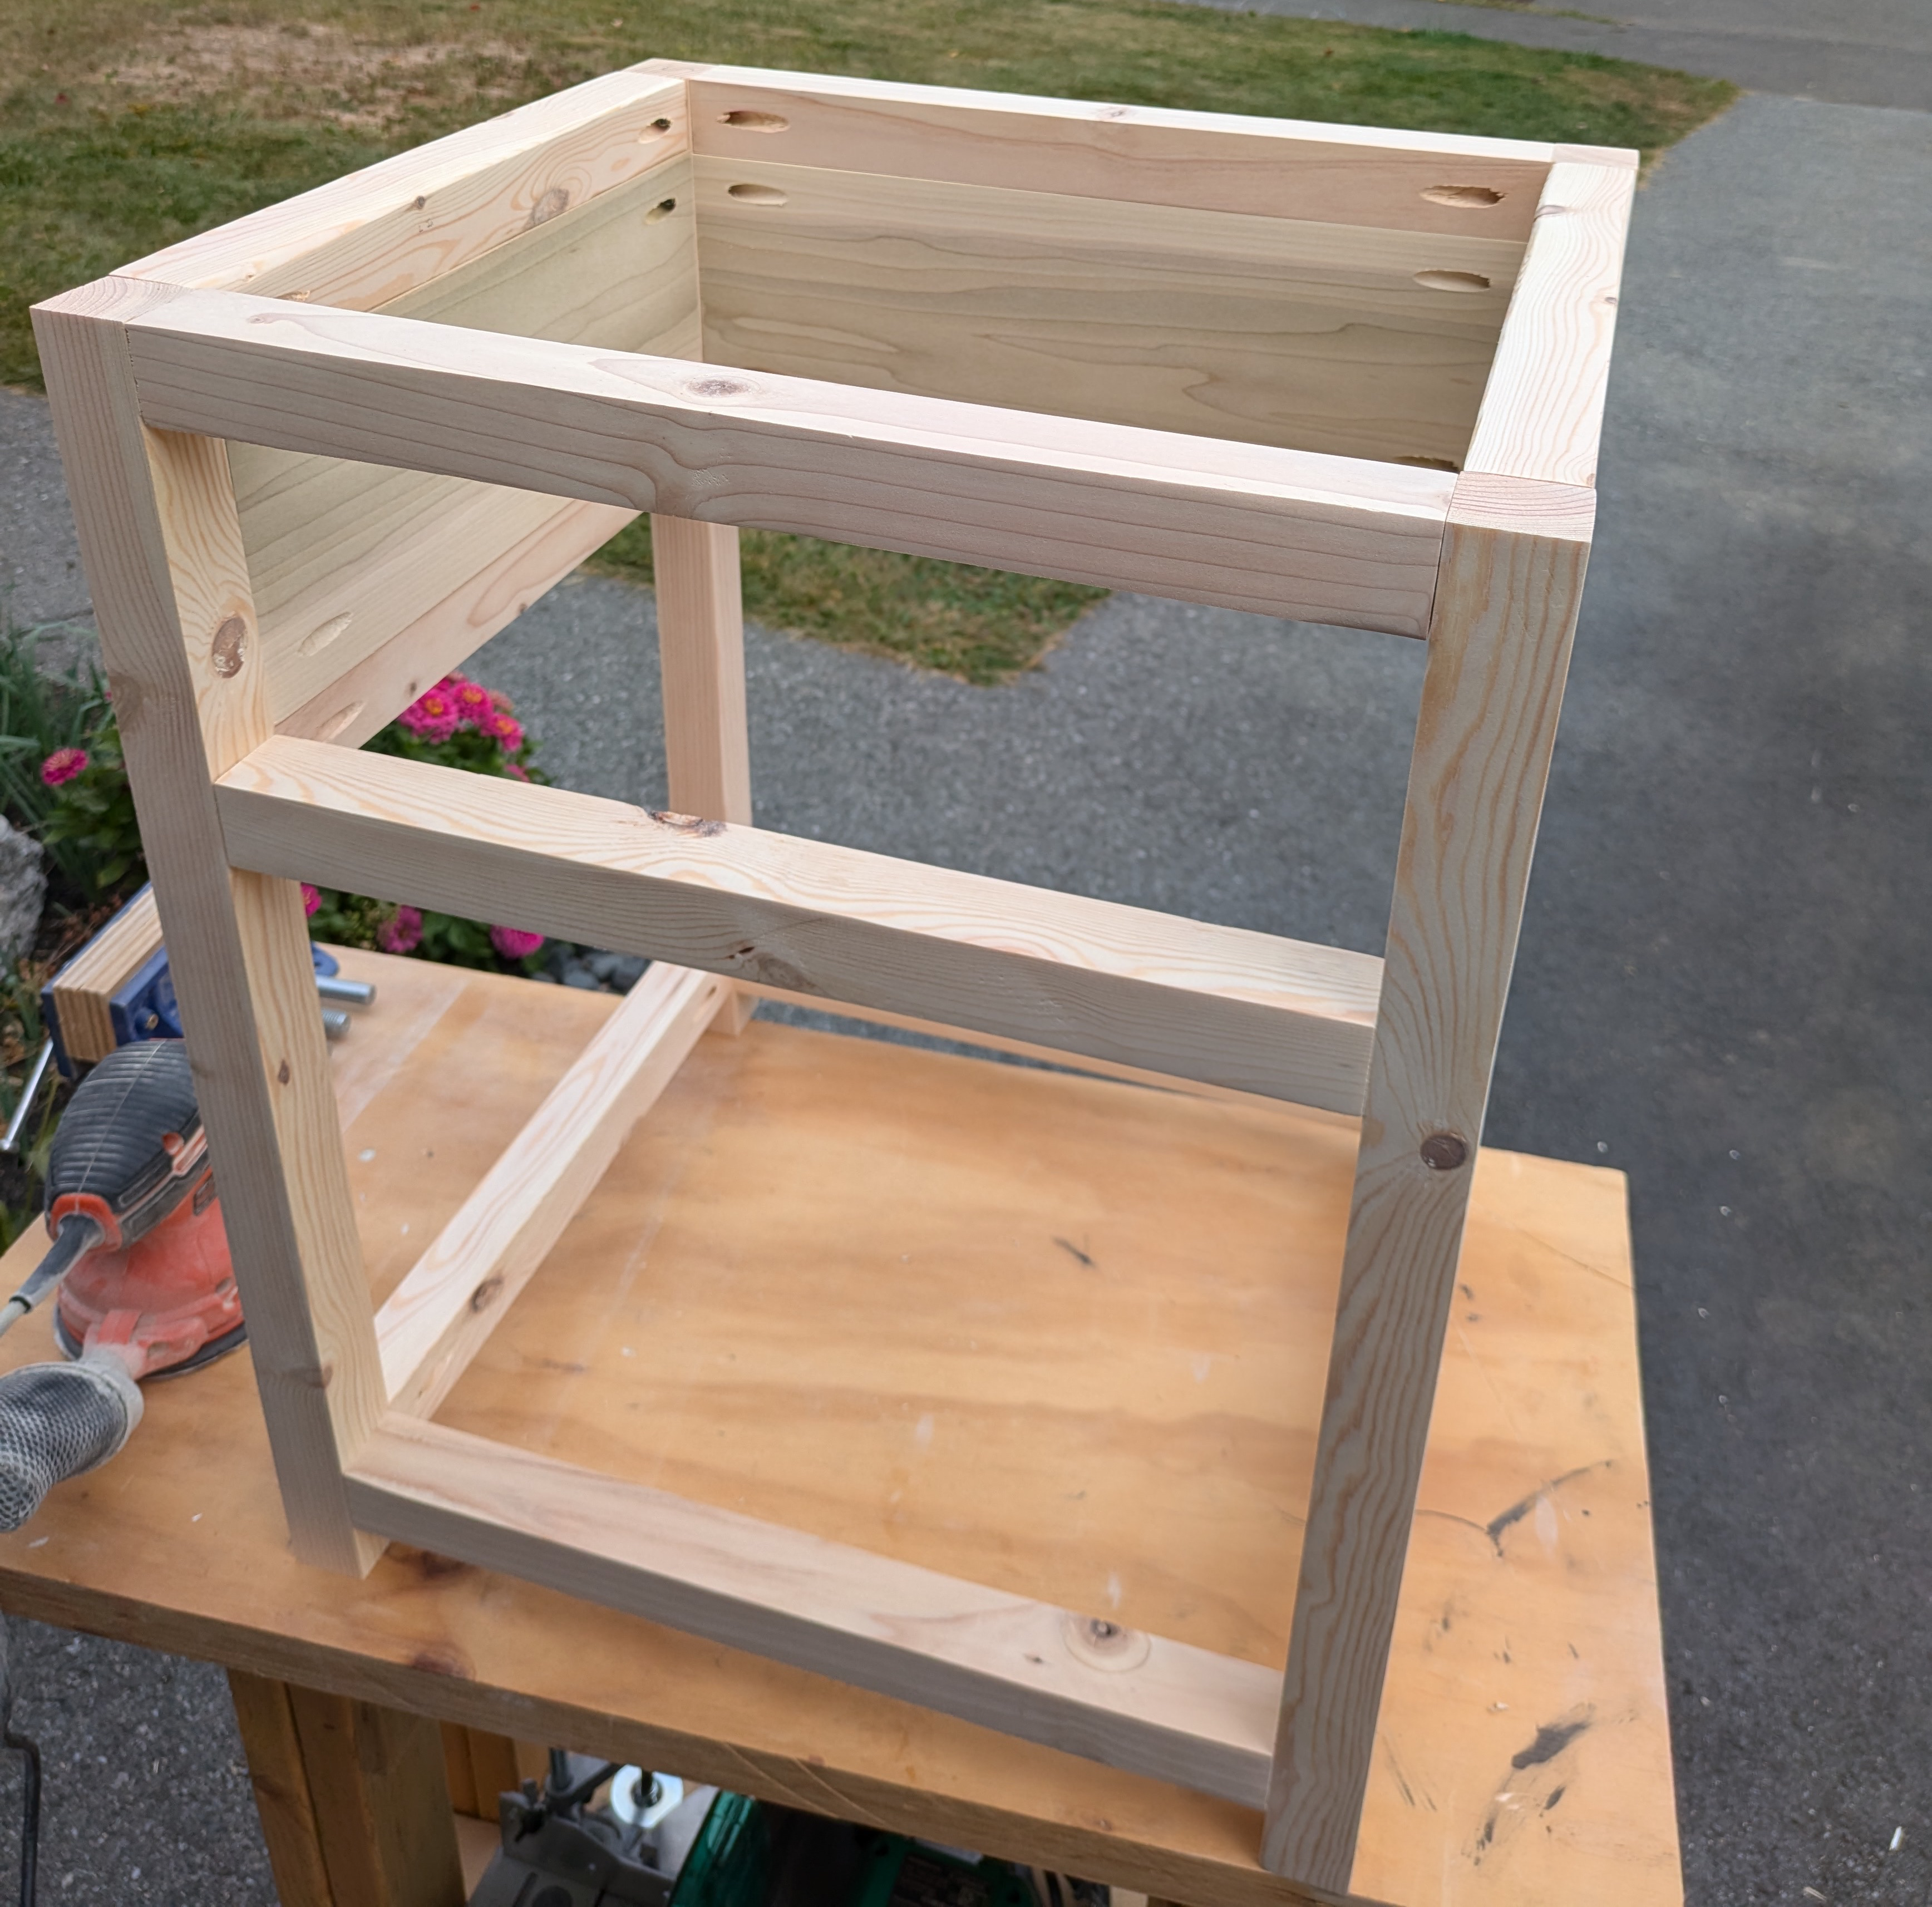
Table Top 🔗
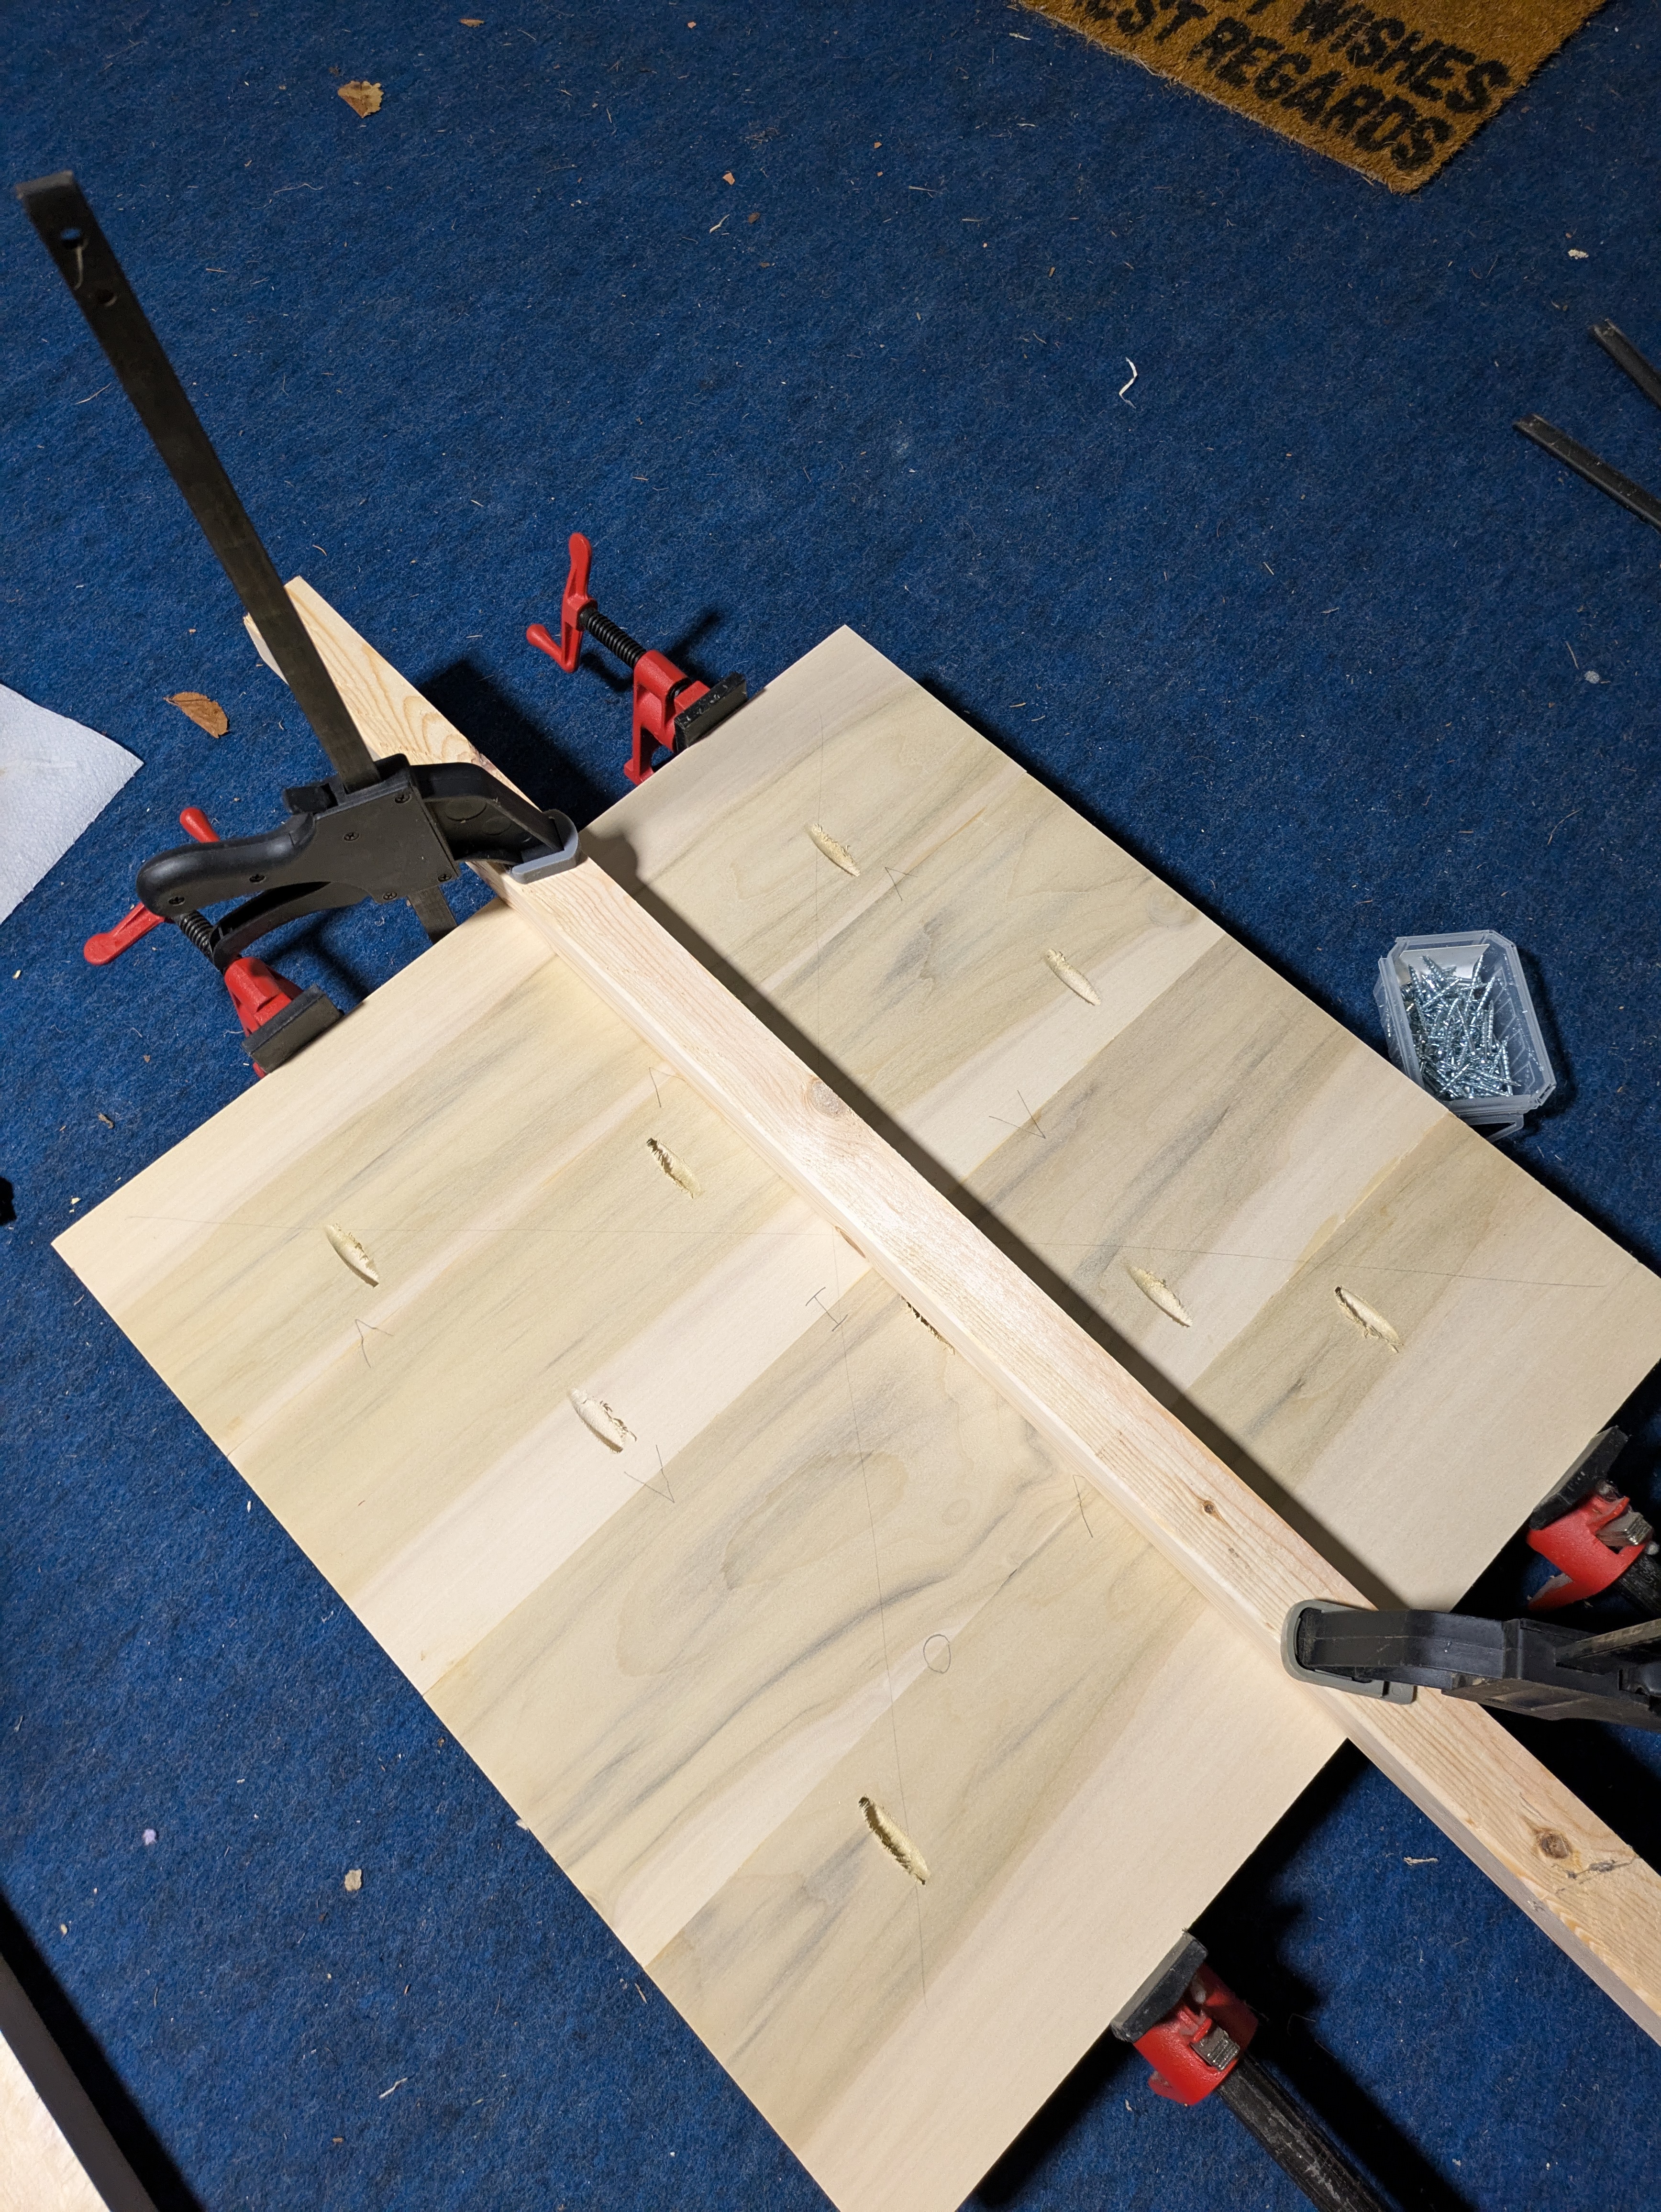
The top of the table is going to be 4 1x6 boards joined together. I first inspect the boards to see which side I want to be on the top. I don’t attempt to do any grain matching or anything. That wouldn’t have worked out well anyway and also, this is getting painted.
Once I have that figured out, I flip all the boards over and start marking up the bottom side. That gives me reference points across the boards. Where lines match between boards tells me I’m gluing them together at the right position.

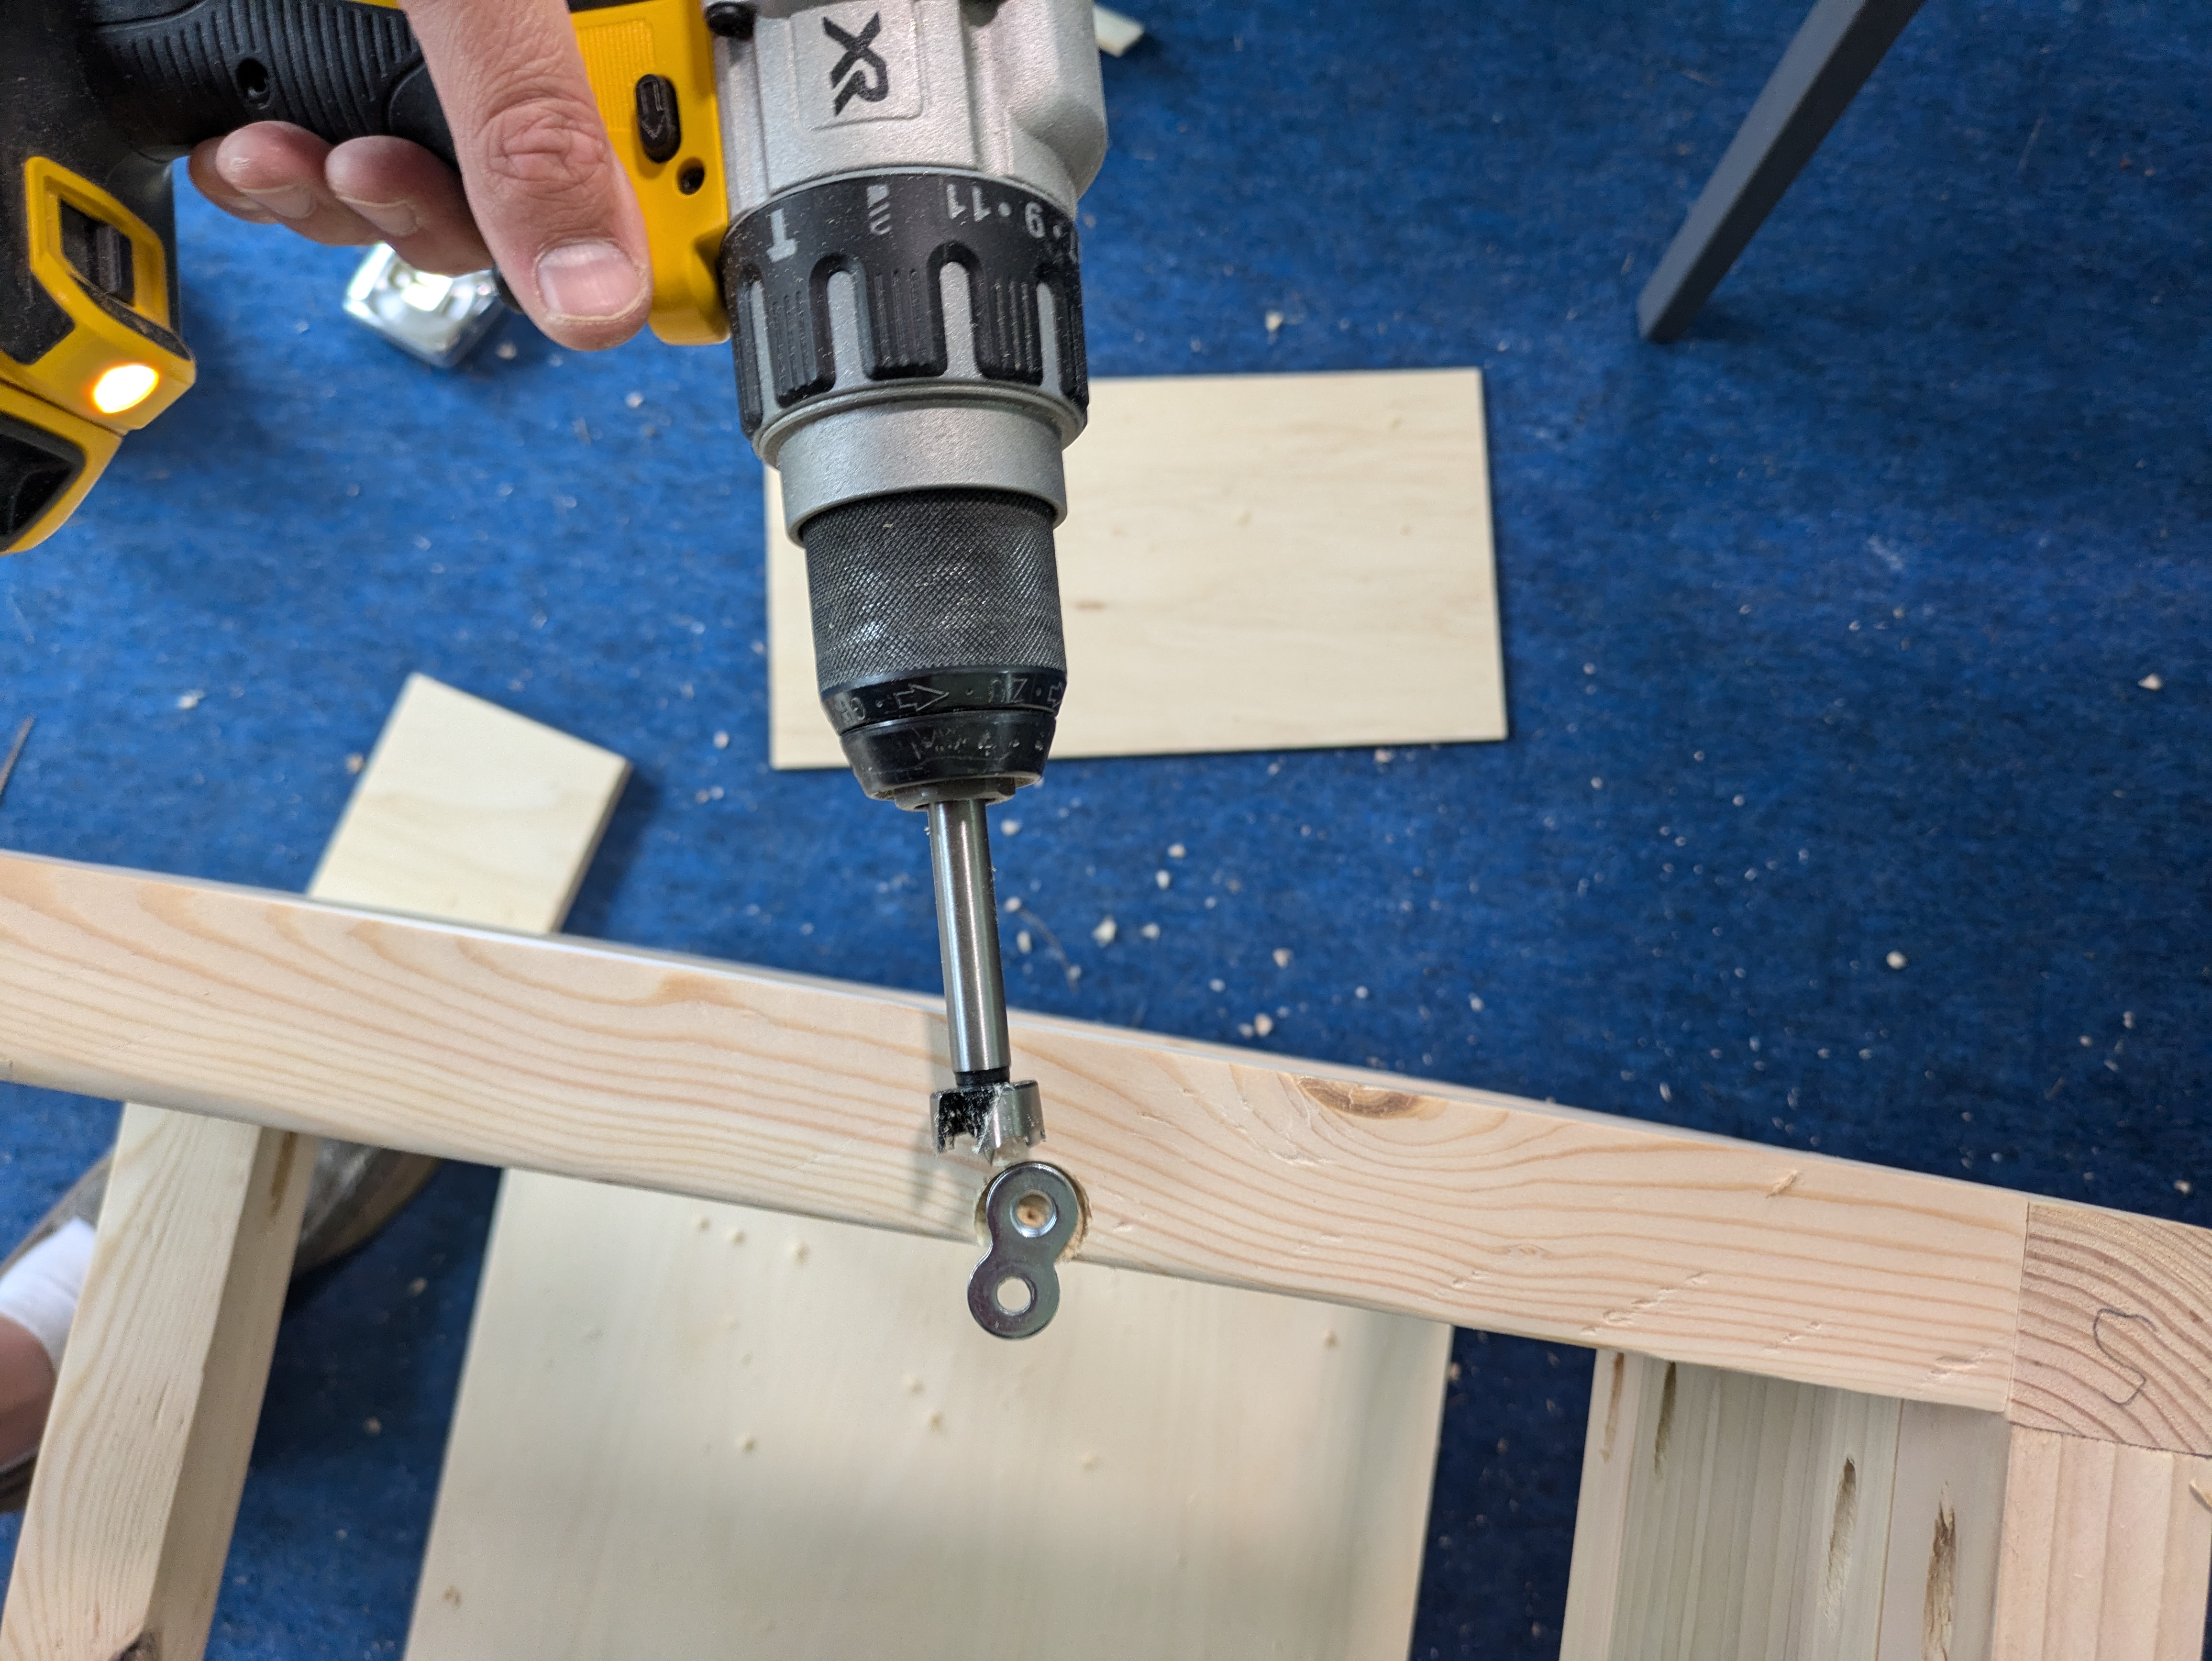
I could only glue the boards, but I also attach them with pocket screws. I could have chosen one or the other, but I chose both. This gives me a chance to document how to make the pocket holes. There’s a special jig that attaches to the end of the board. And then I have a drill bit with a collar on it so it stops at a particular depth. I use that to drill into the jig, which leaves the angled holes on the face of the board.
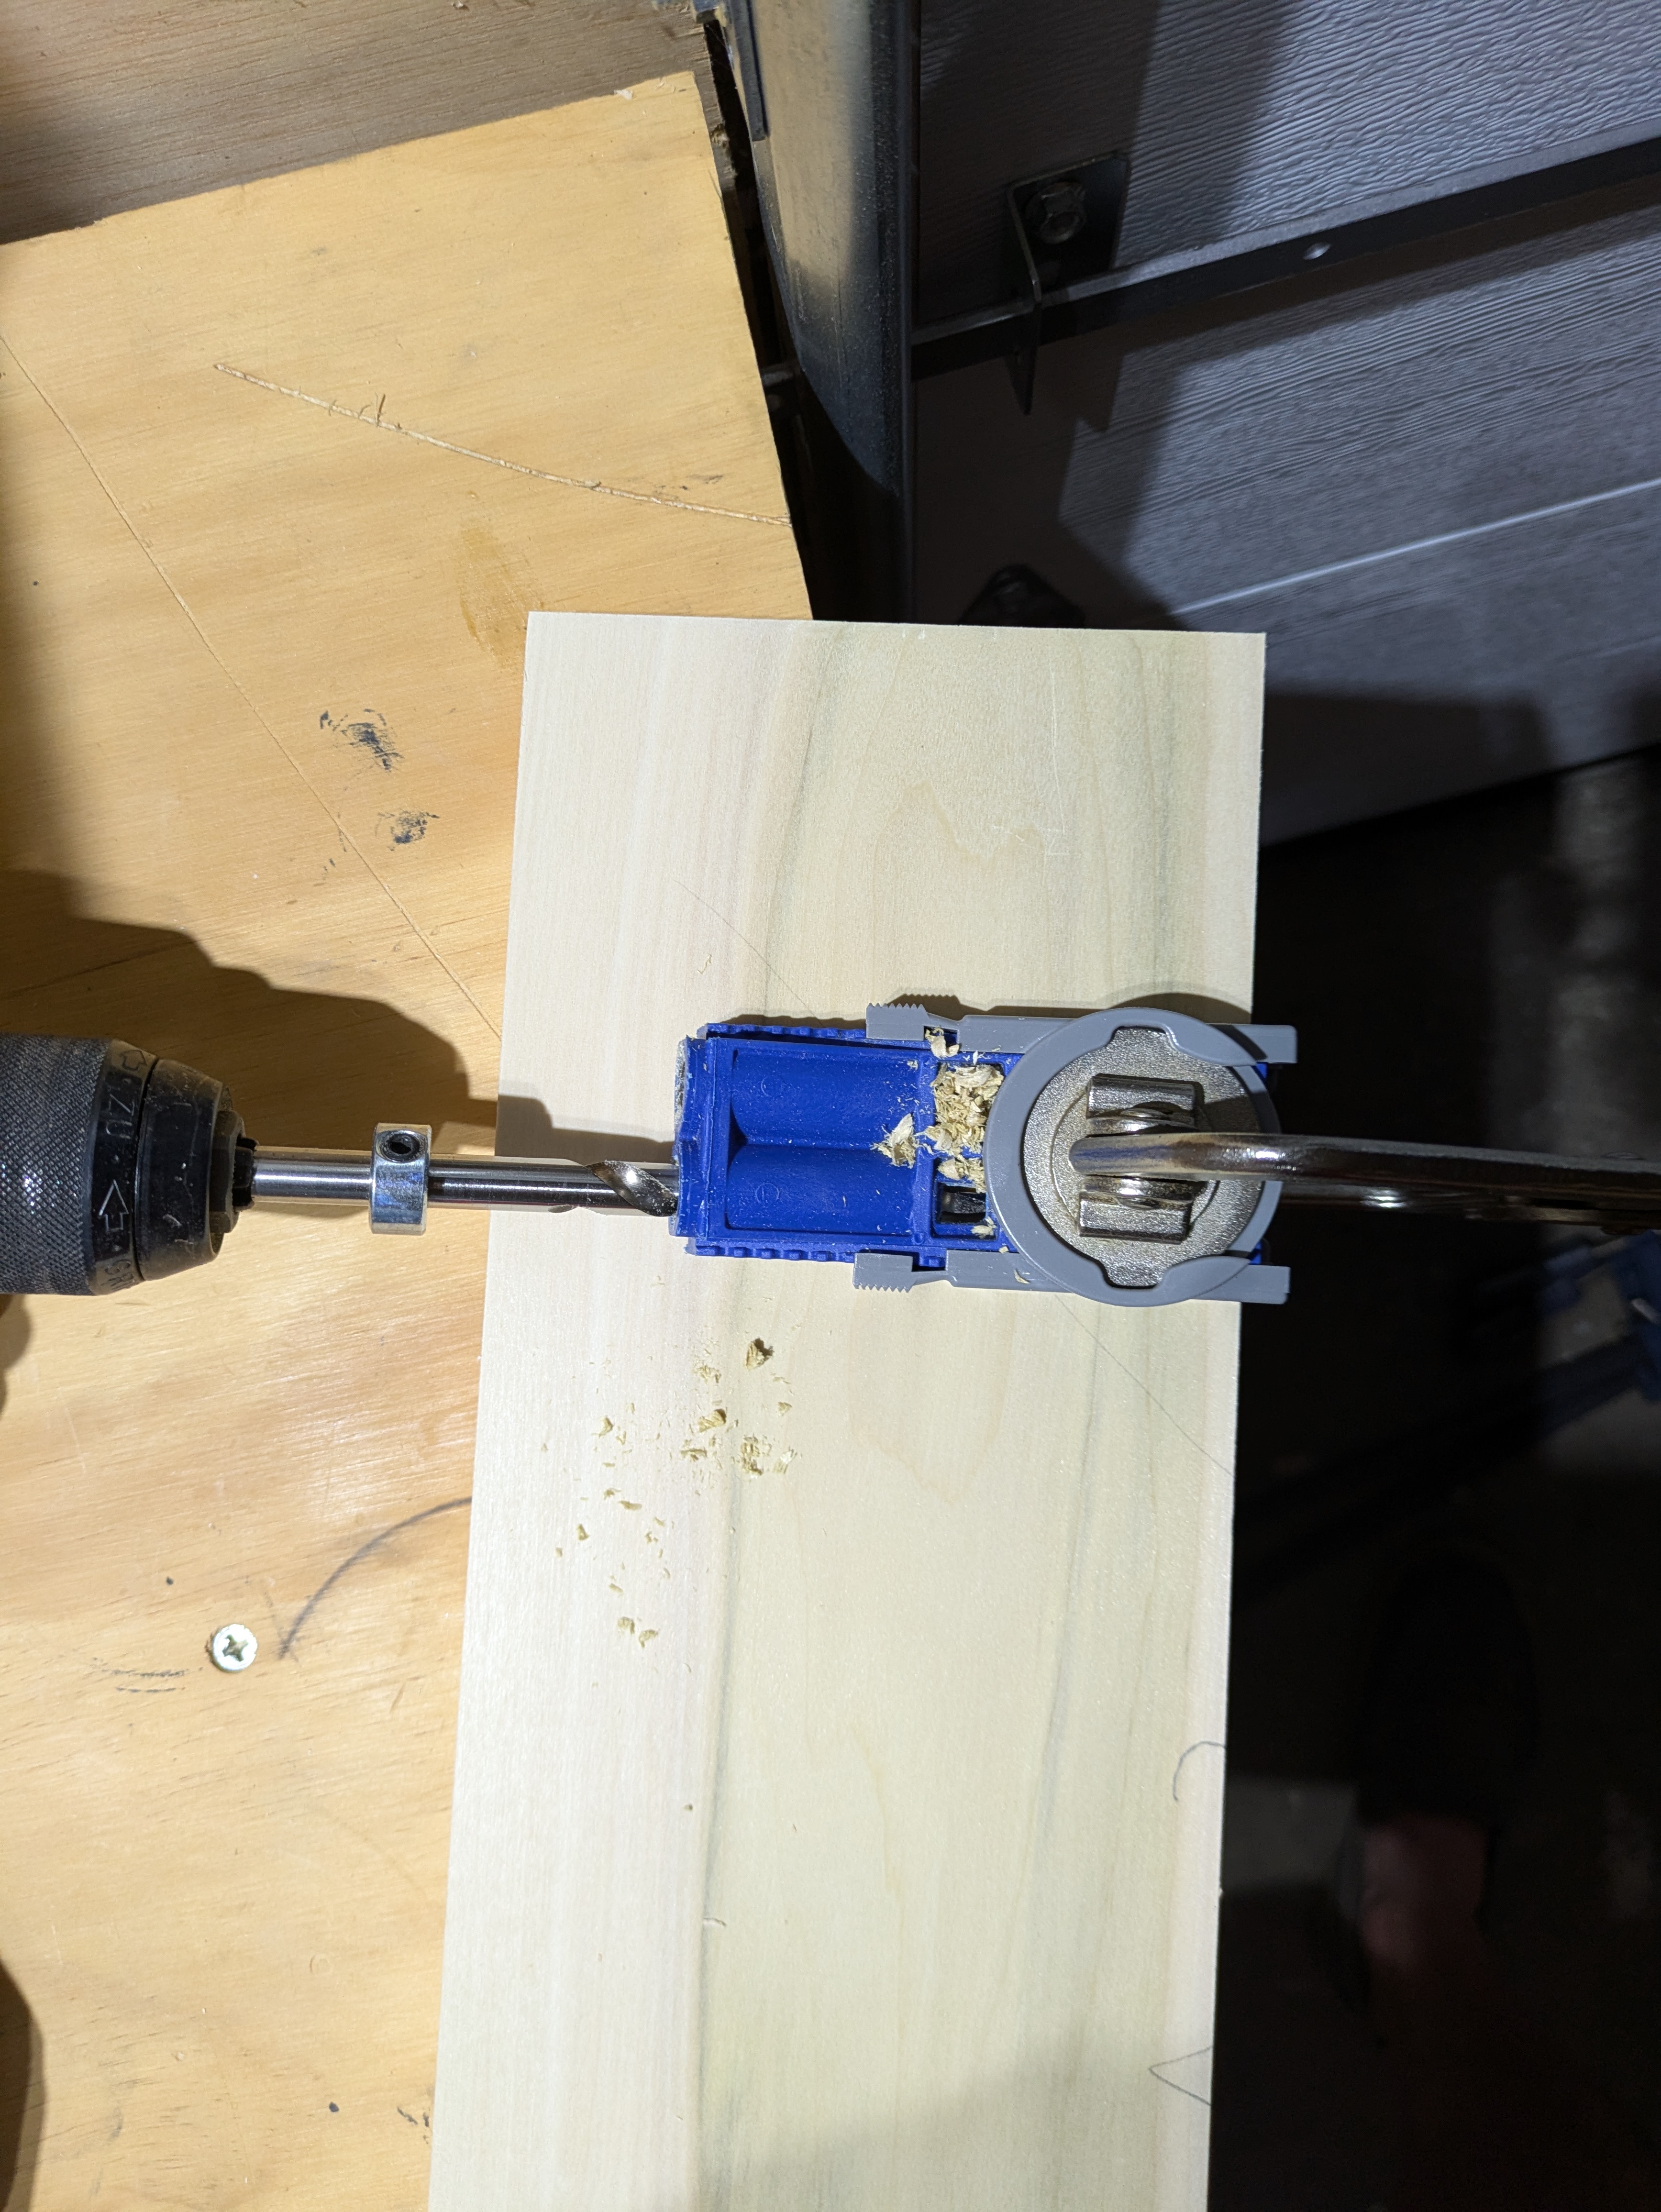
I use special pocket screws, inserted into the pocket hole, to attach the board to the other board.
In the case of this table top, I first apply glue before screwing the boards together. I use my two pipe clamps to keep pressure on everything. And use a spare 2x2 on the top to try to keep the top surface flat and level. I don’t have a planer. Any adjustments I make here for boards being higher or lower than the board next to them will require sanding.
Speaking of sanding, I sand down the top to get the excess glue that squeezed out and try to get a flat surface.
I left the top in the clamps for a day. Given the screws, it’s much longer than necessary, but I had other things to do anyway, like work.
While I was already sanding, I sanded everything once again.
Bottom Shelf 🔗
I still have the bottom shelf to deal with. This was constructed the same way as the table top. However, I need to cut it down to match the dimensions of the table. I could measure, but again, the actual measurement isn’t what matters. It’s how it matches relative to the other items. So, I take the table, place it on my table saw, set one end of the table against the blade, and push the fence against the other end. That gives me the exact width of the table.
I use that to cut down the shelf to that same width. I repeat the process to get the depth.
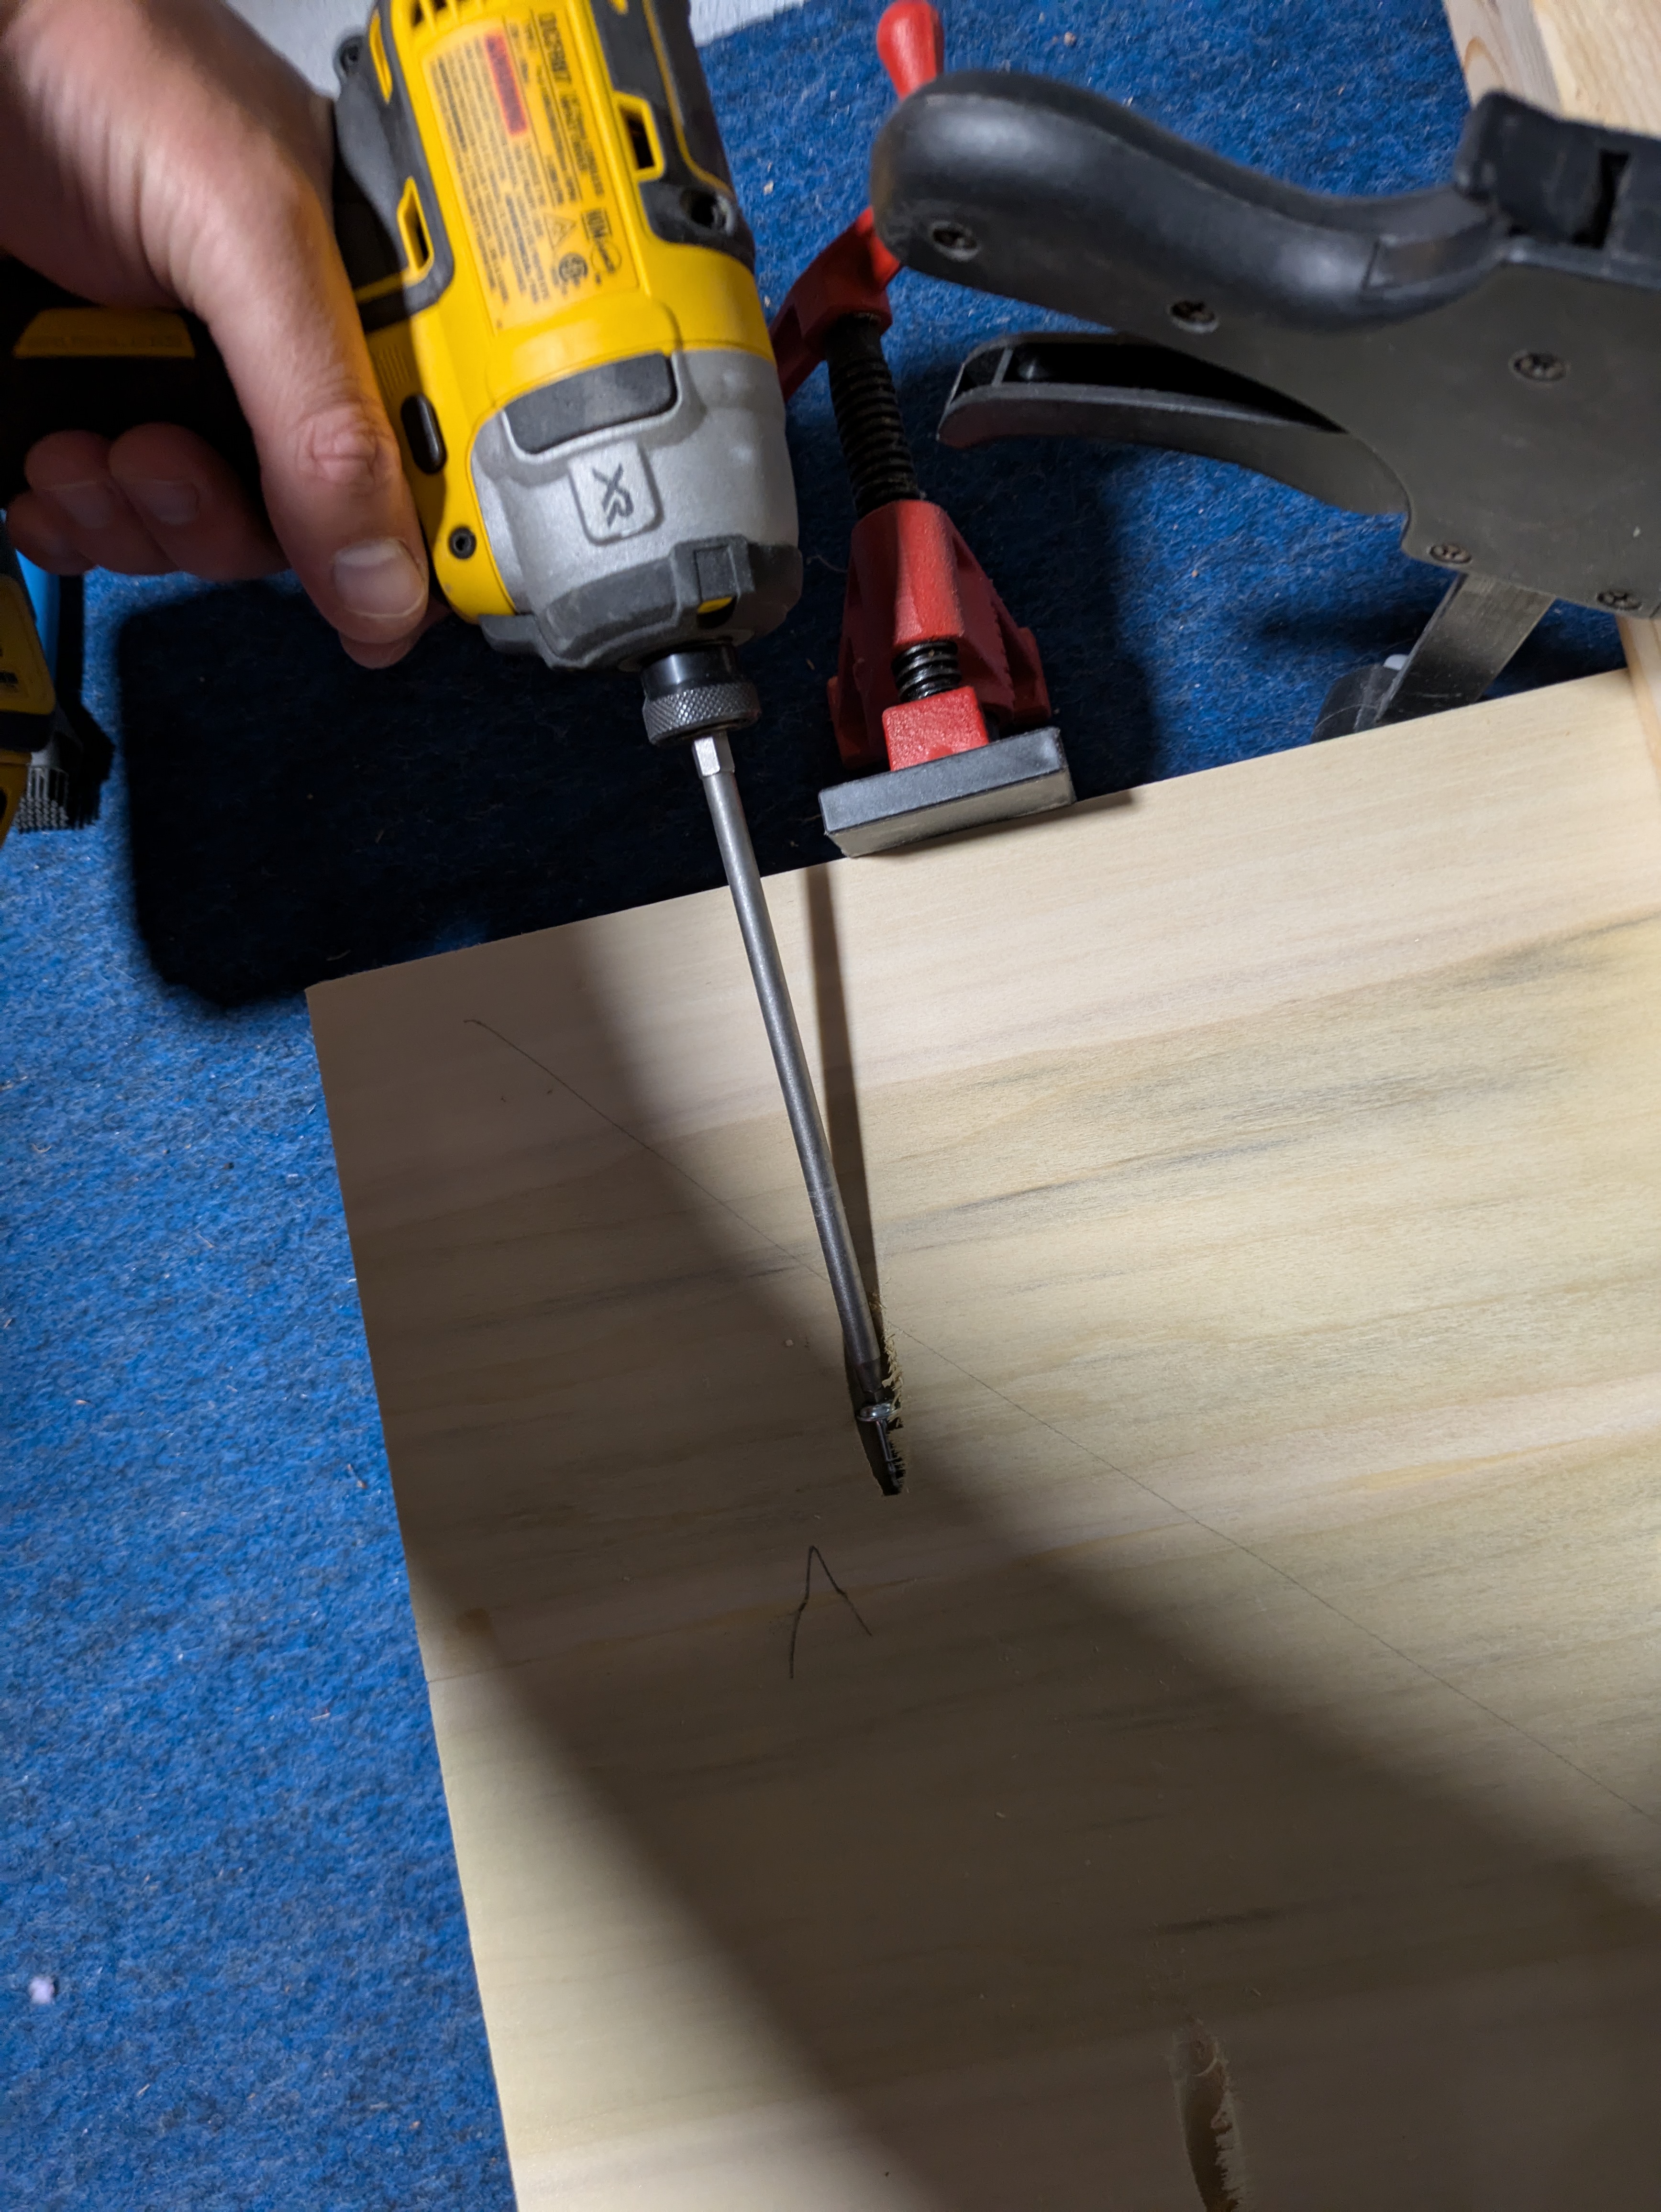
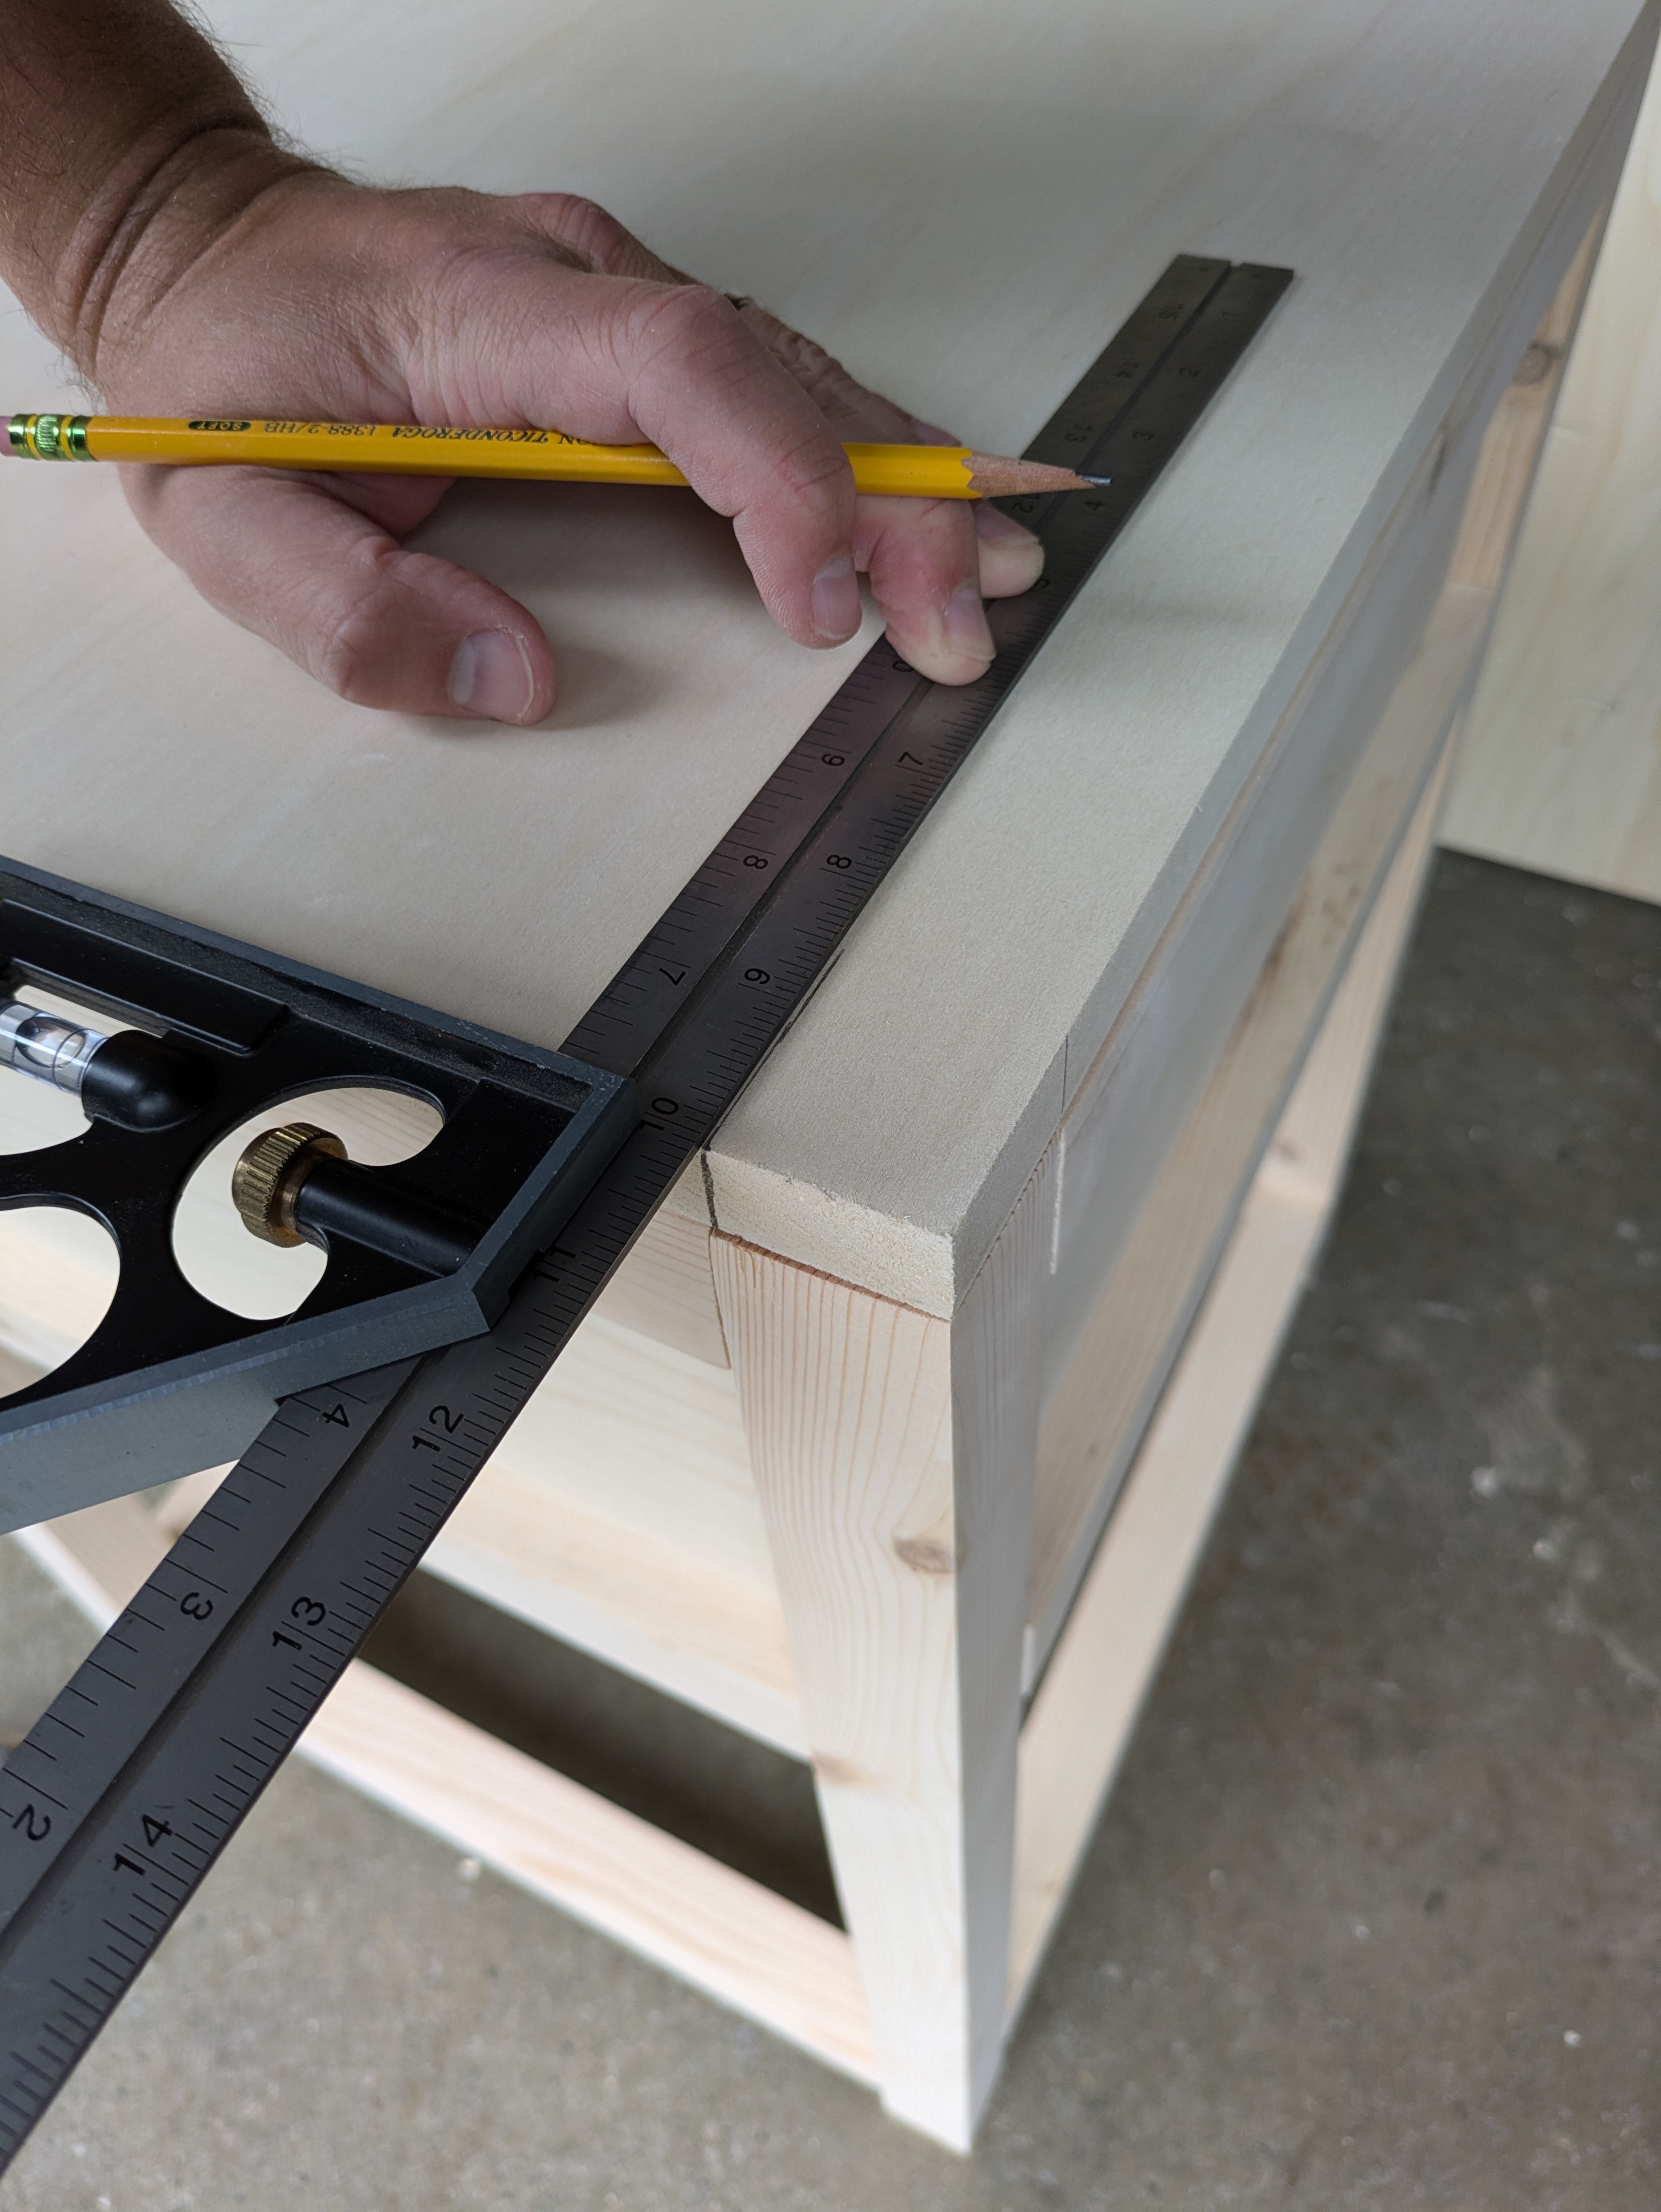
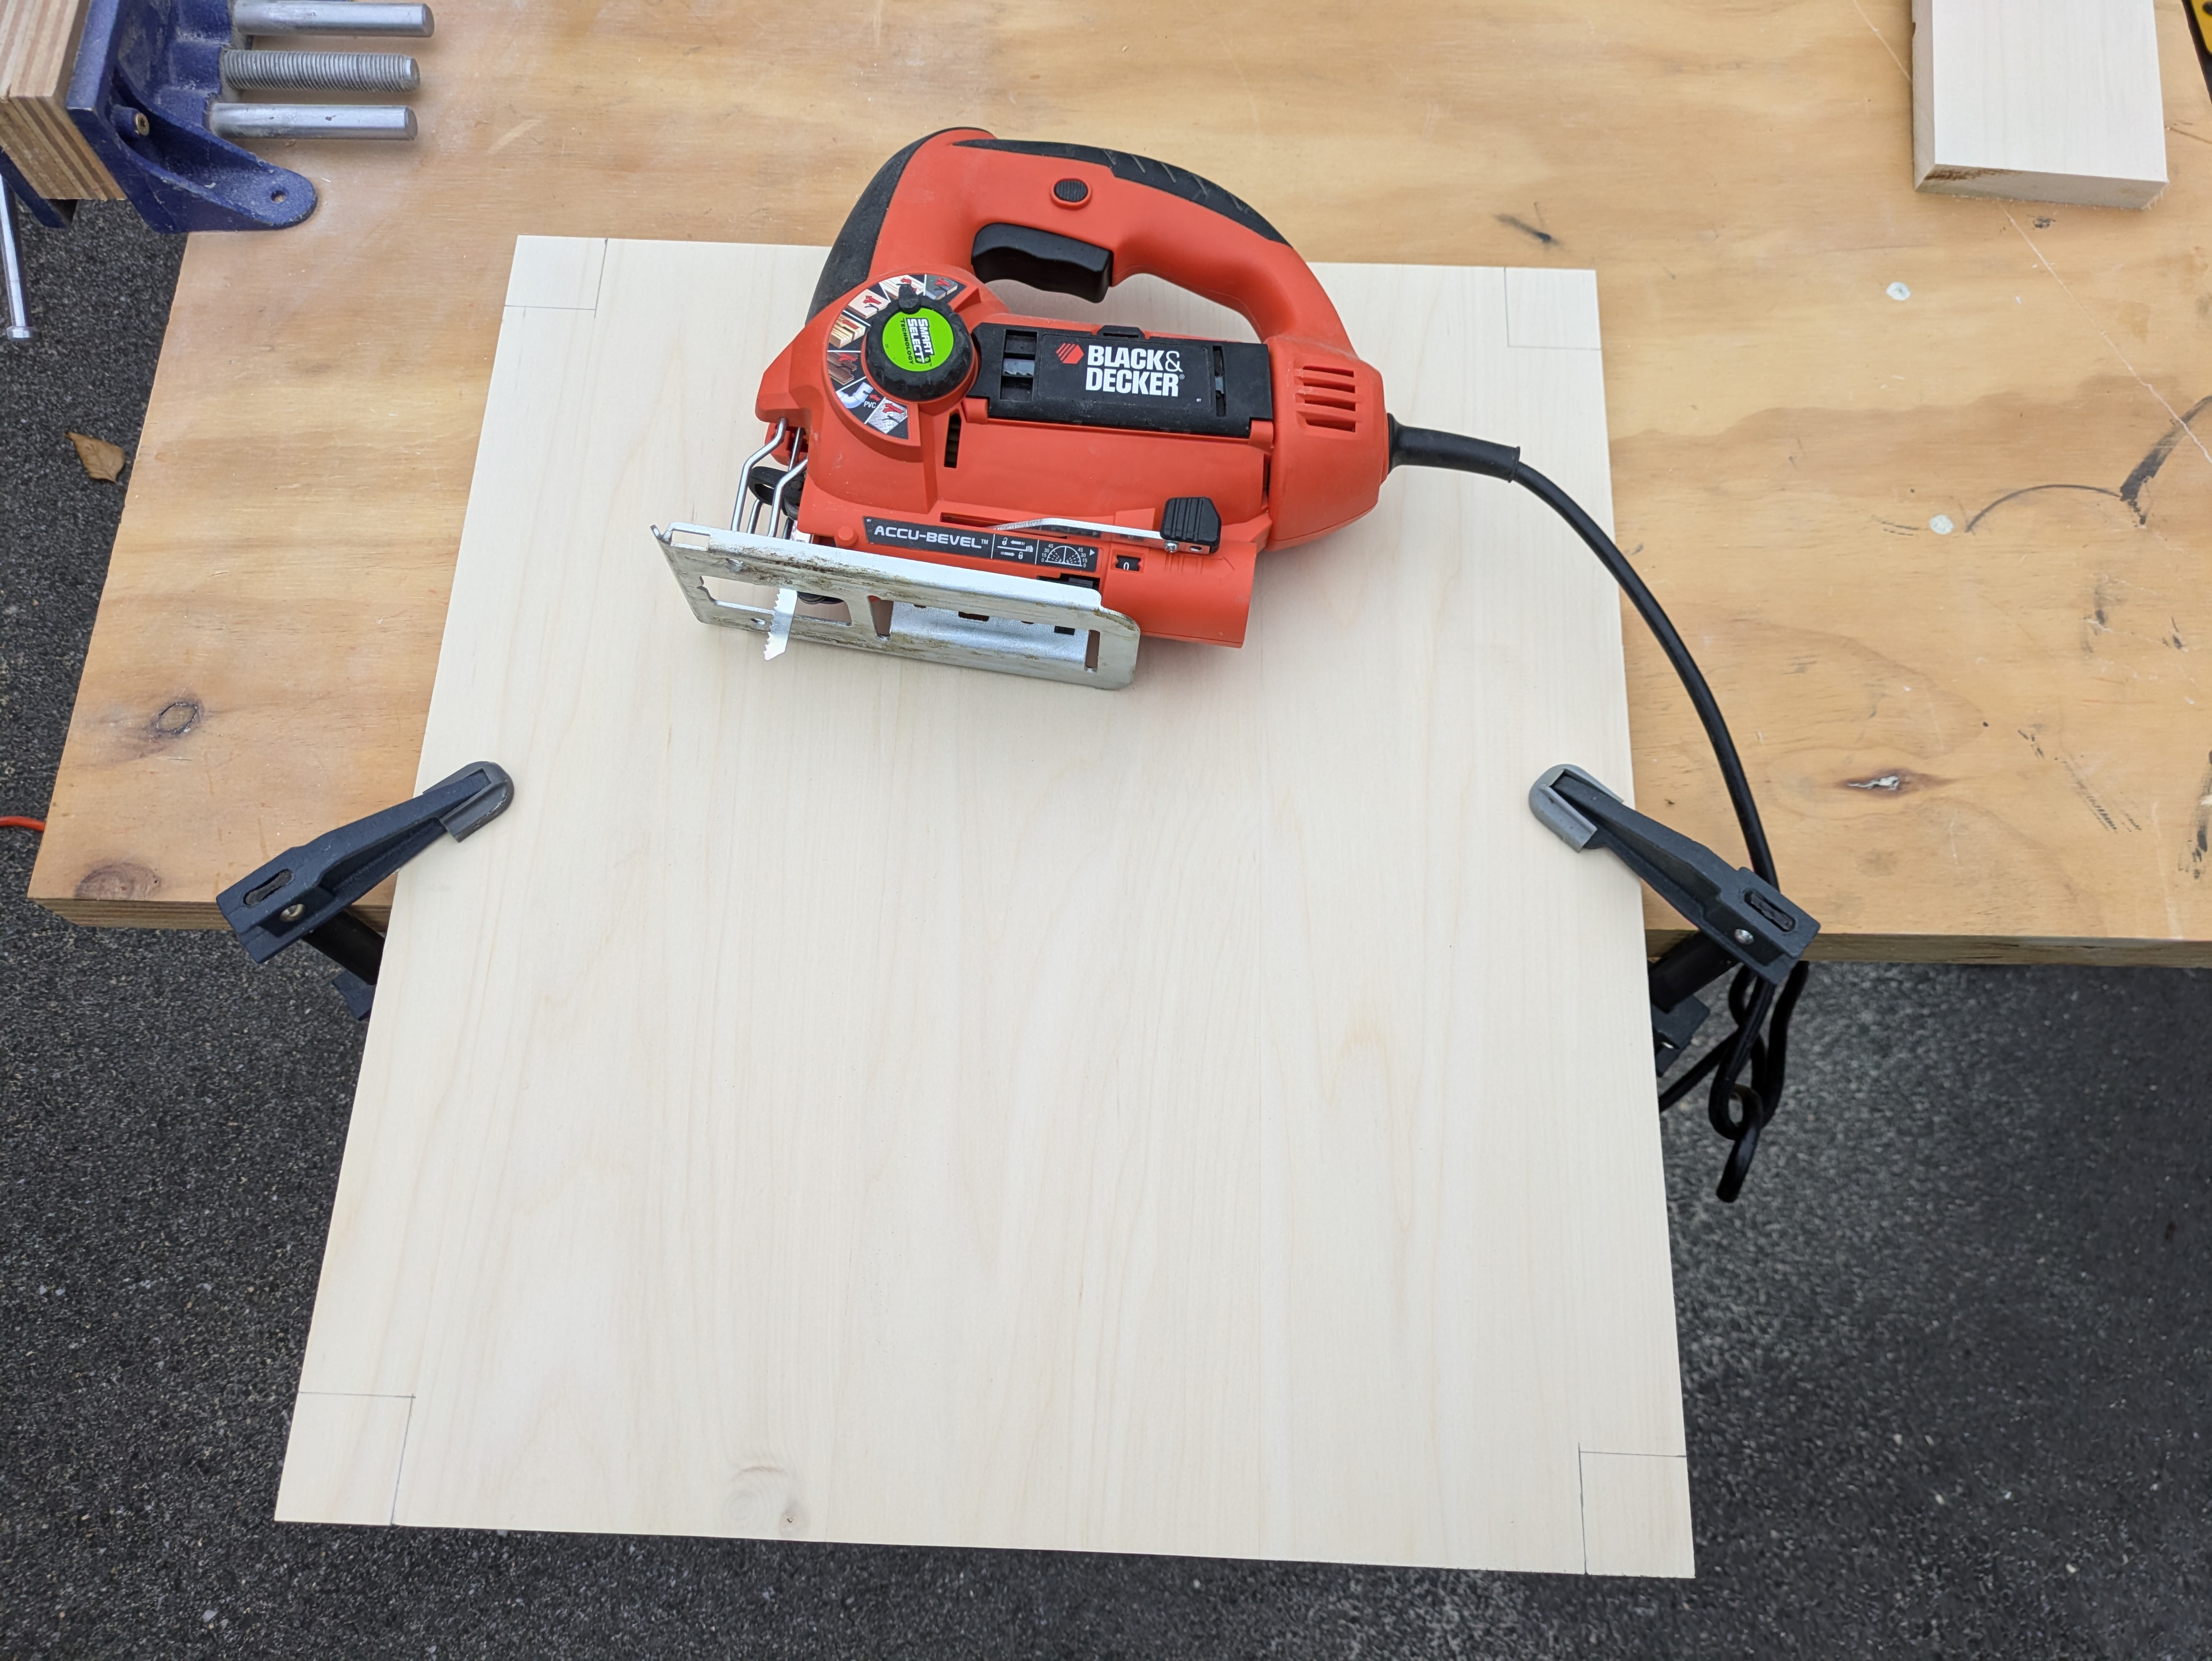
The shelf needs to fit inside the table legs, so I need to cut out the corners. To get these measurements, I place the shelf on the top of the table and draw lines where the legs meet the shelf.
I then extend the lines to the top and join them together with my pencil. That gives me the rectangles I need to remove from the corners.
I use a jigsaw to cut out these ends. Using the straight blade will give me a precise end. If I used the table saw, then the circular blade would need to cut through too much material on one side to get to the appropriate length. Plus, it would be tough to manage.
Sometimes, you do need to use the right tool for the job.
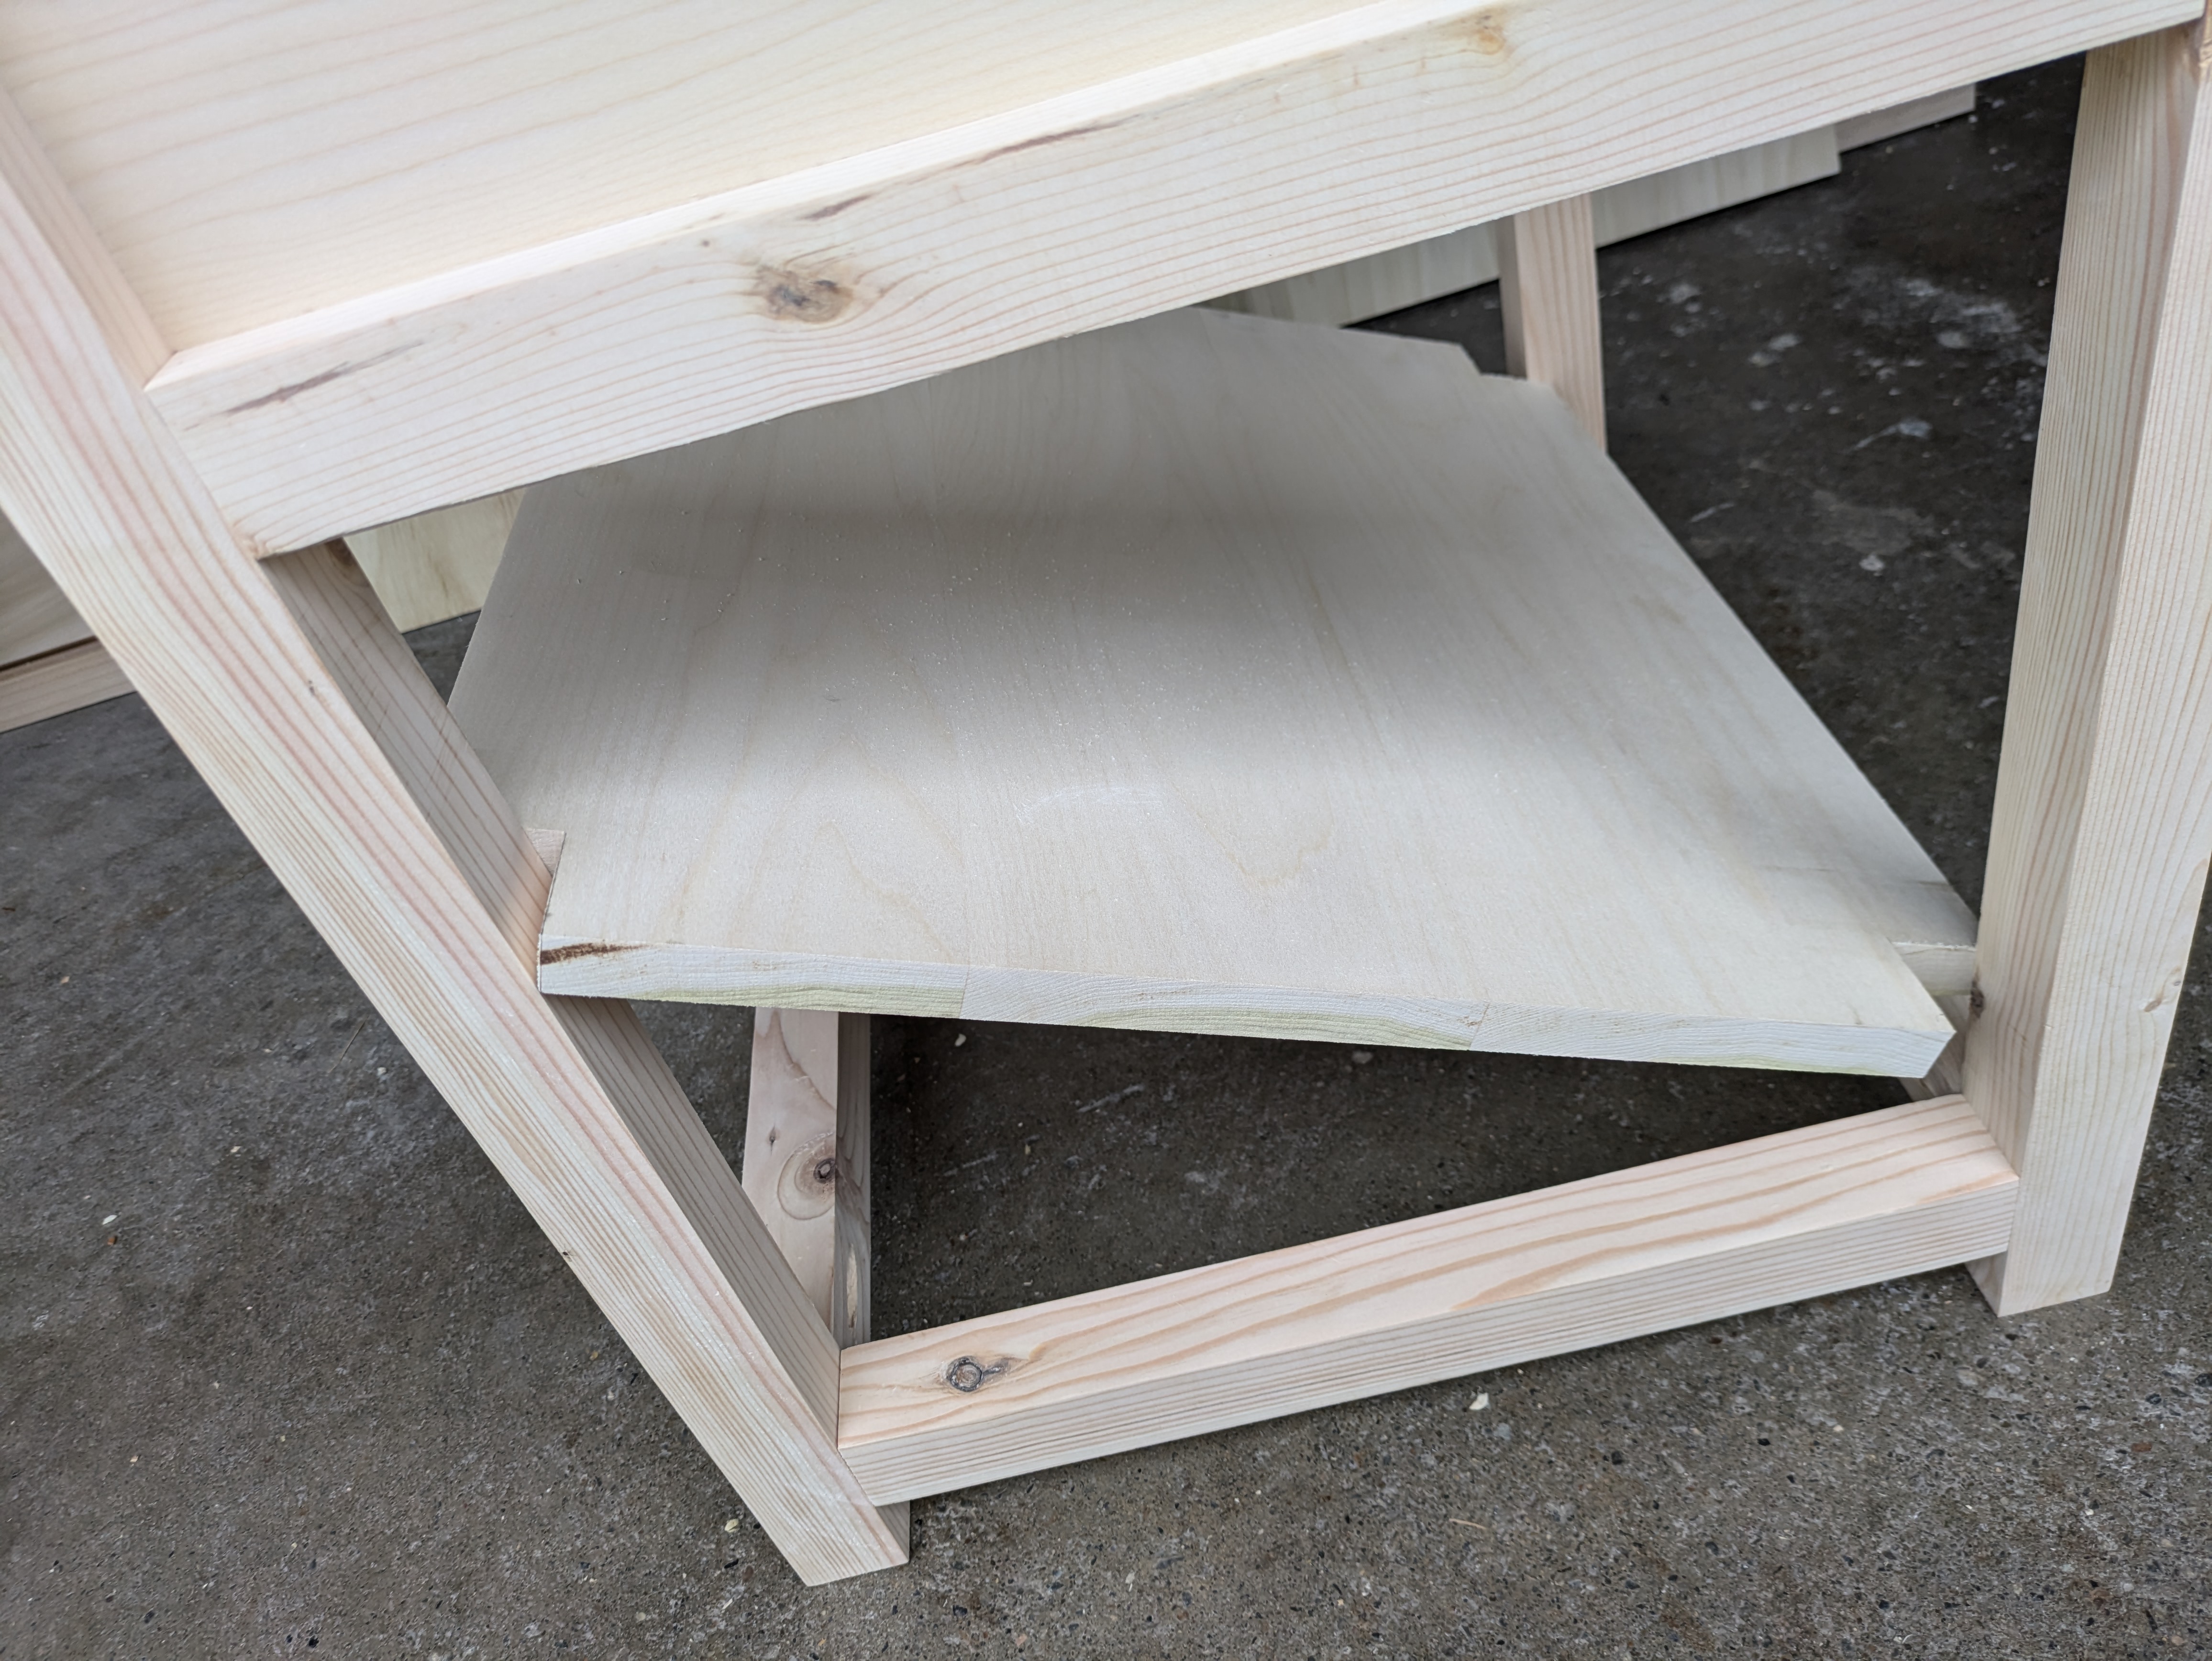
With that, I can fit the shelf in the table. As you can see, I initially cut too little and the shelf wouldn’t fit. That is on purpose. It’s a lot easier to remove more wood than it is to add it back. I continue shaving more off until it fits snugly.
Drawer Box 🔗
Drawers have been difficult for me to get right. Every piece I build that has drawers has some problem with the drawer. They’re not quite square and they catch at some point. I measure wrong and they end up too short, so I need to shim out the drawer slides. Whatever the problem is, the commonality is that me and drawers don’t get along. As much as I like things having drawers. So, here I go - building another drawer.
I start by getting my 3/4" plywood and cutting it to the height of my drawer - 5". It’s a bit tall, but I figure if it ends up being too tall I can cut it down. I rip the plywood to that height on the table saw.
Then it’s back to the miter saw with my extension fence to cut the two sides of the drawer. My fence is from an extra french cleat I have. That lets me use the angled cut on the top to lay my tape measure across so I can still see it while setting the stop block. That wasn’t intentional, but was a nice surprise that I totally meant to do in retrospect (I didn’t).
The width of the box is what I’m most concerned with. I’m going to use pocket screws to connect the drawer box. The two sides will run the full depth, and the front and back will be inside of them. The two drawer slides + the thickness of two pieces of plywood + the front/back piece I’m cutting == the space inside the table.
I grab the slides and pieces of plywood to measure how thick that all is. Then I subtract that from the space inside the table, and that is the distance I cut my front and back to. I again intentionally cut everything a little long. I try to shove it in the table, and then cut a little more until it is a comfortable fit.
Then I need to put the box together. I clamp one side to the edge of my table saw fence as a straight edge that’s not going to move. And use my square to line things up as close to 90* as I can.
I do that for the front and back, on both sides. With that, I’m left with a box.
My box probably needs a bottom though to actually STORE stuff in. I’m going to use 1/4" plywood for that. And I need the exact dimensions of my box. So, what am I going to do? Yup. I put the box up on the table saw. I line up the blade against the box, push my fence out to that distance, and I know the exact size of that dimension.
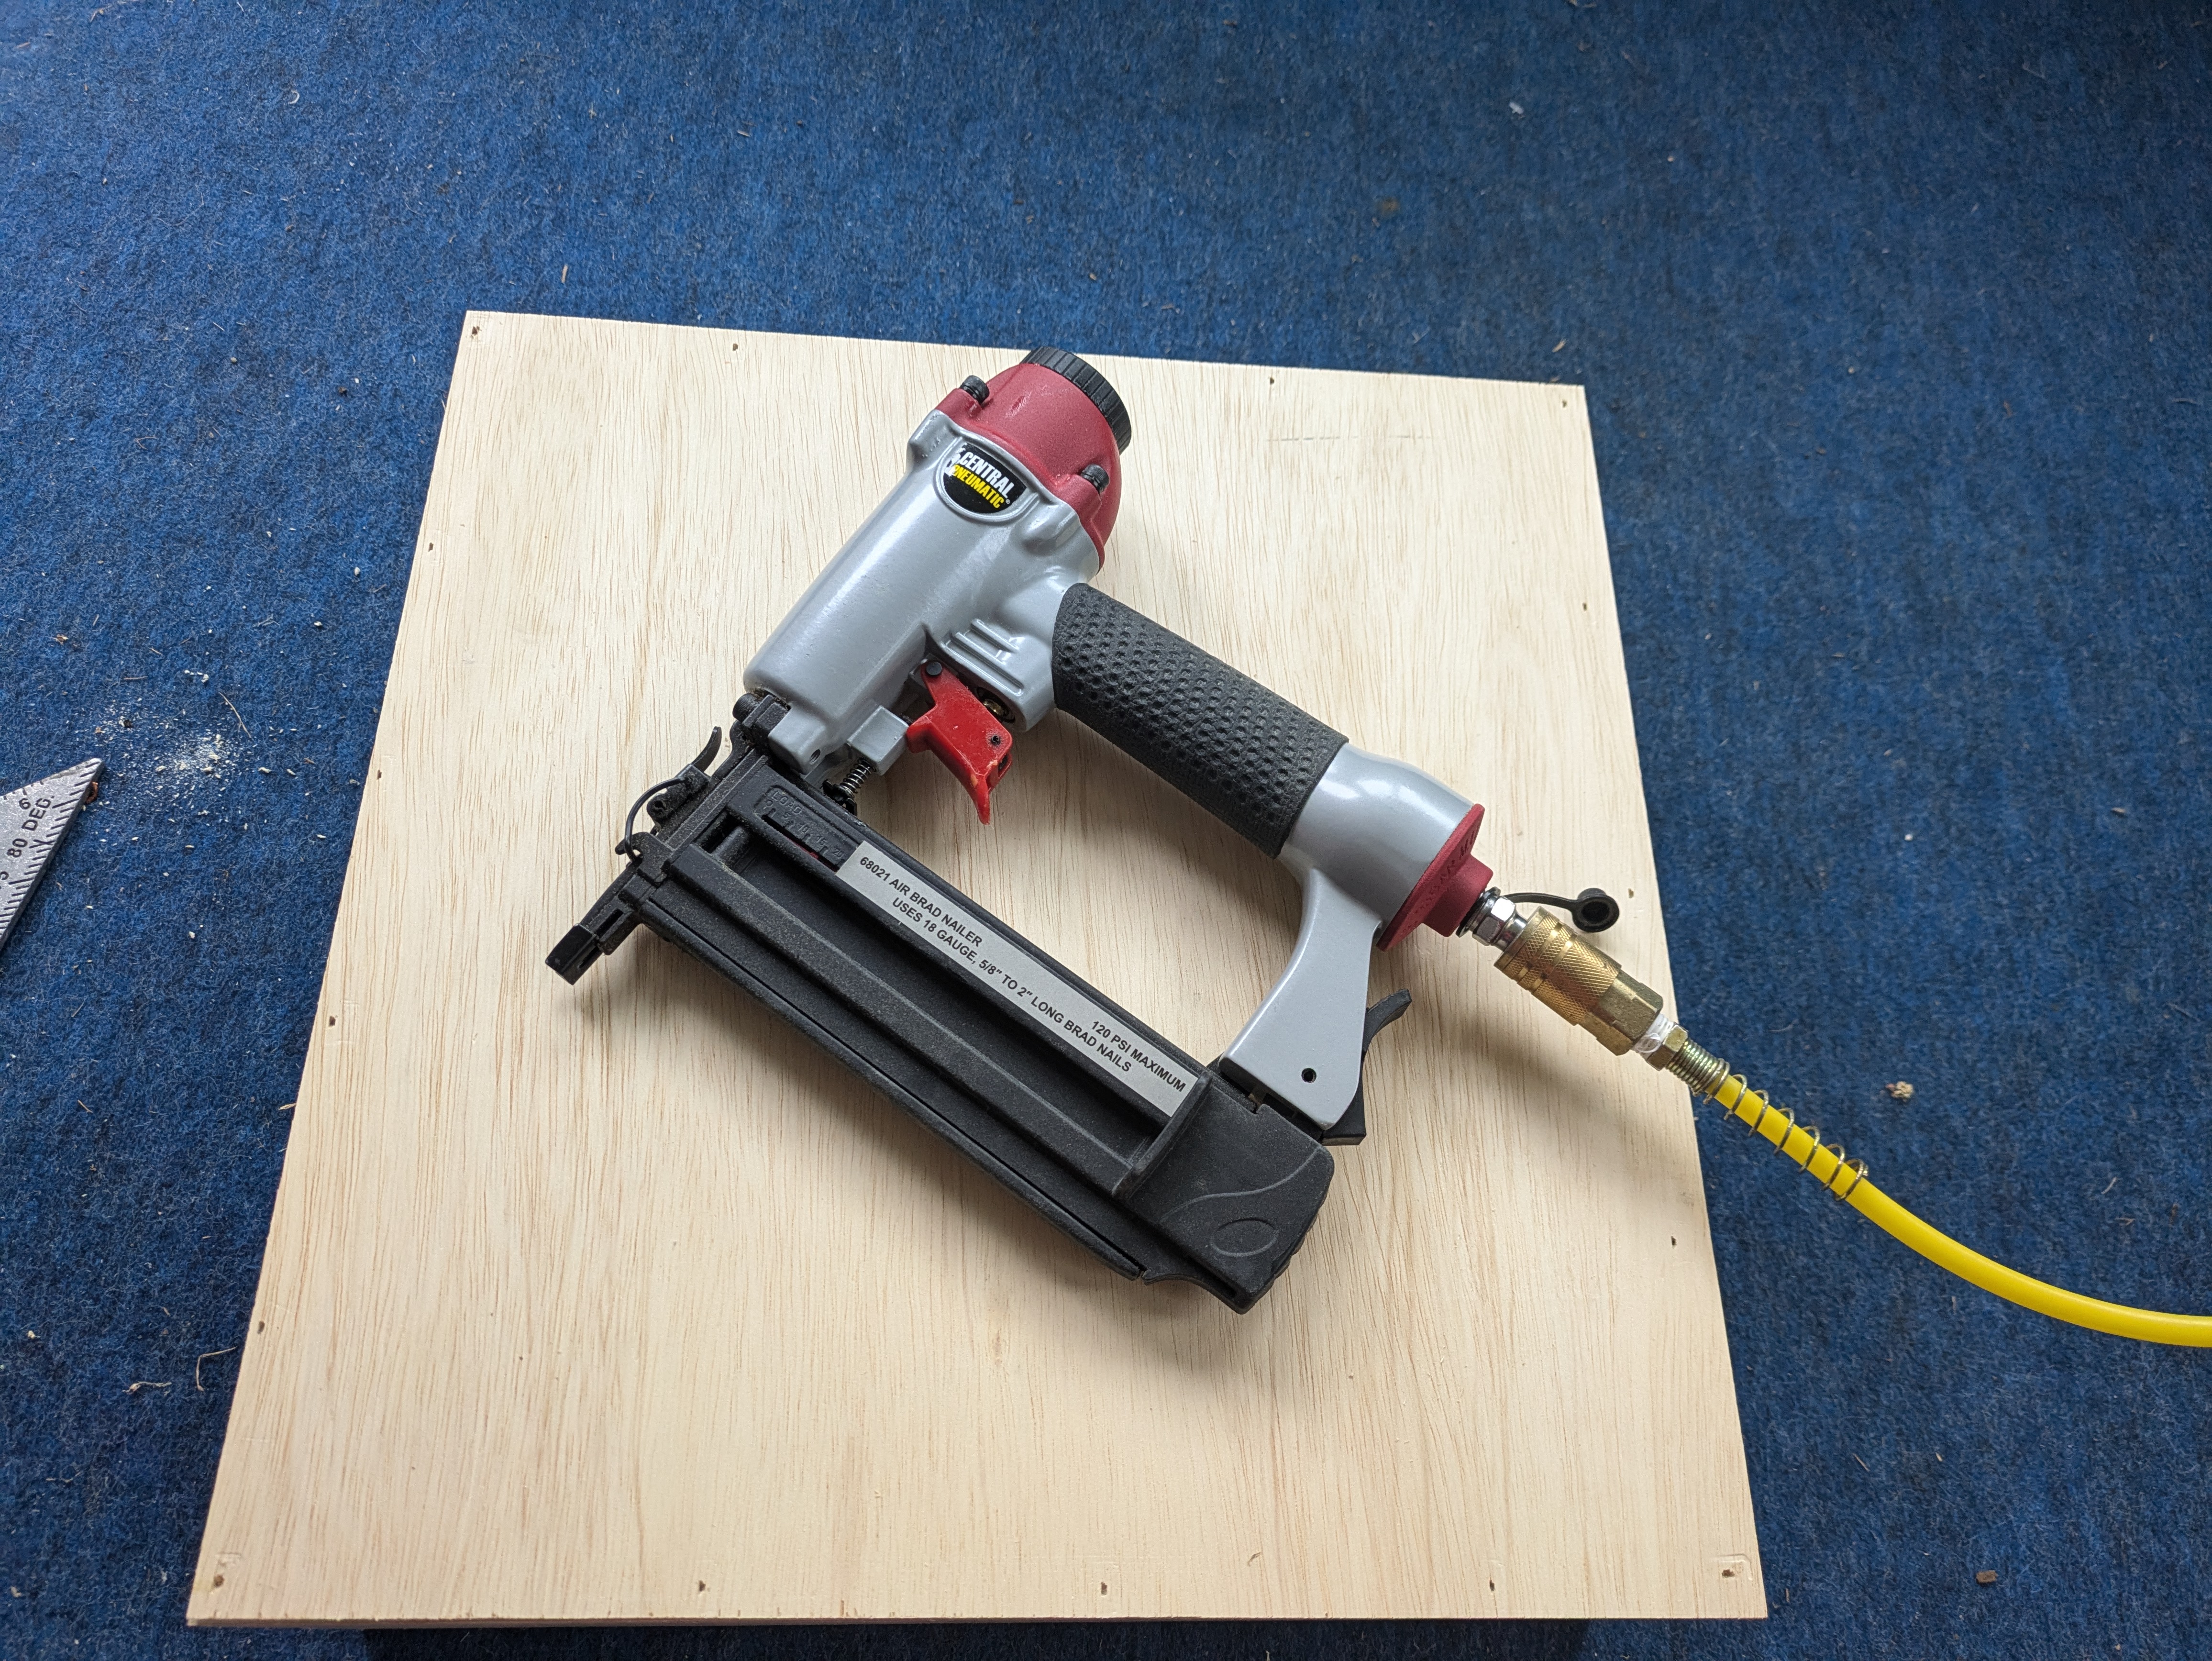
I could have been fancier and cut dados (1/4" grooves) on the inside of all the pieces of the box. With that, the 1/4" panel could float freely in there. I do not do that. Instead, I’m just nailing it in there. Which means I get to use my brad nailer.
Drawer Install 🔗
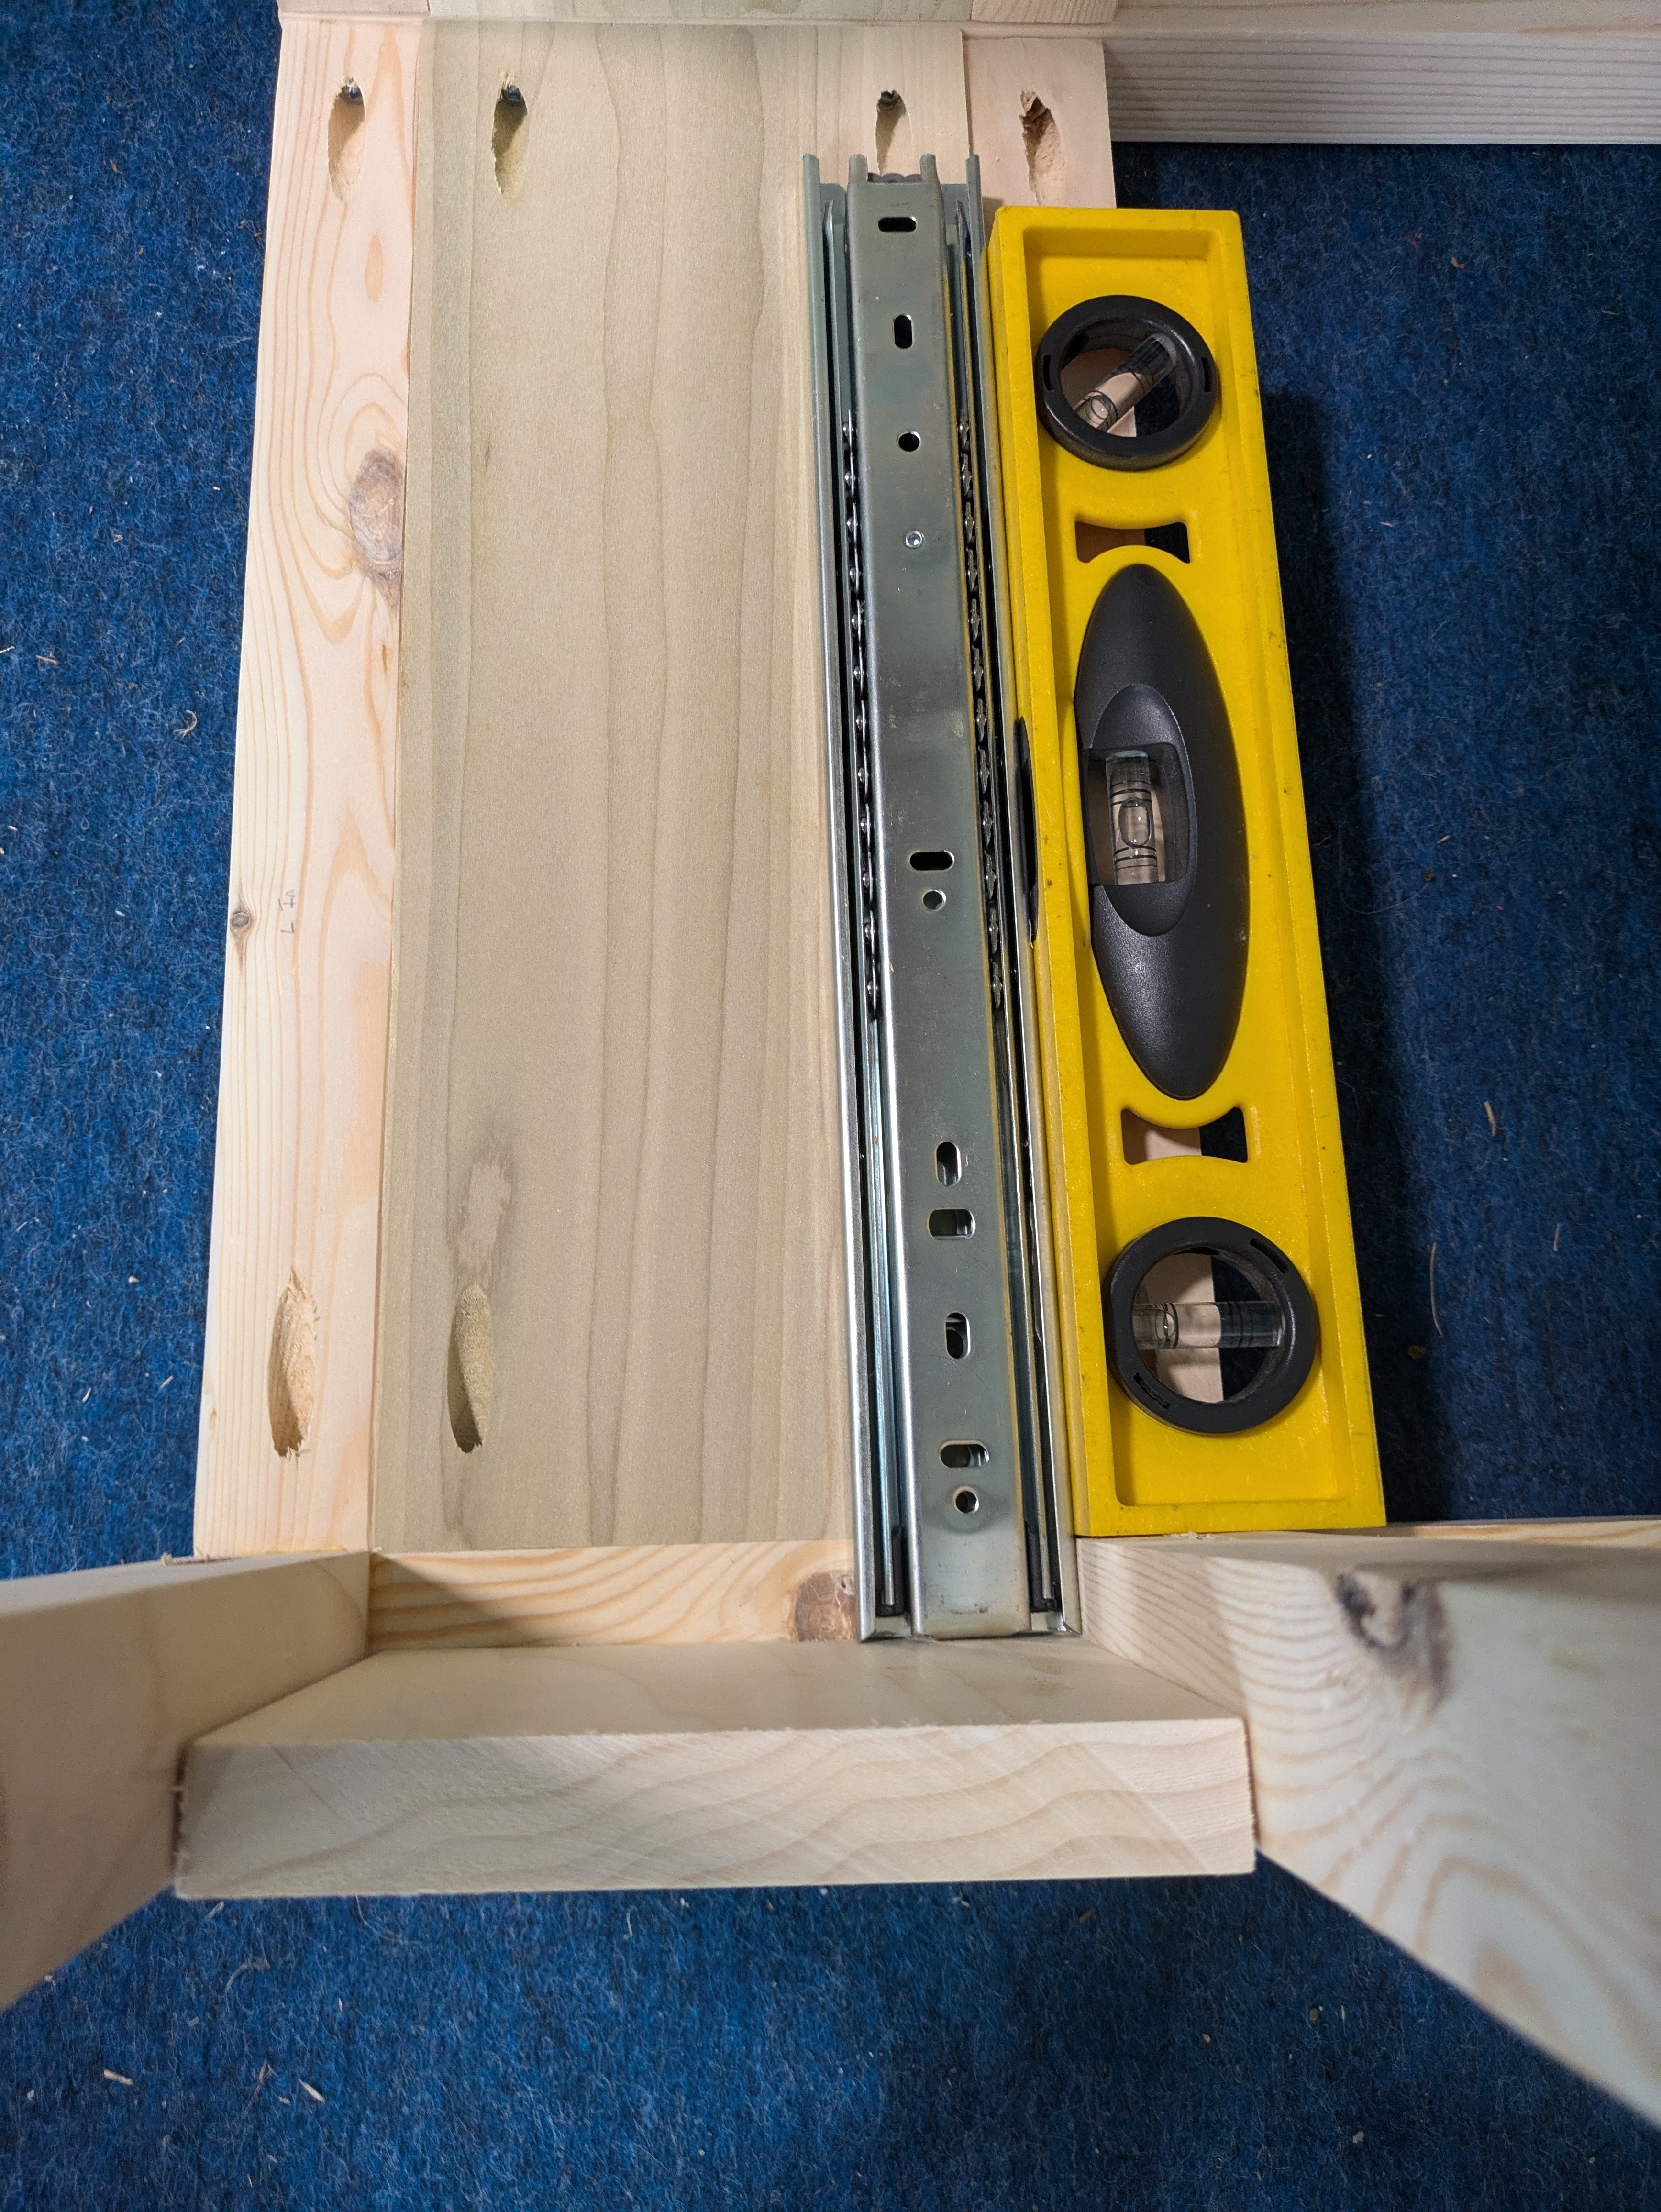
The next step is to install the drawer slides on the table carcass. I flip the table on its side. I take a piece of the poplar that’s the same thickness as the poplar that’ll be my drawer face. And I make sure the drawer slides are inset that far in. Now the drawer will line up with the outside of the table when the drawer face is on it. I try to make sure it is straight…and screw the slide in. Then I do the same thing on the other side.
Now it’s the moment of truth - attaching the drawer box to the slides. I use a piece of 1/4" plywood as a spacer against the bottom brace I have. Then the drawer won’t rub against the support every time you open and close it.
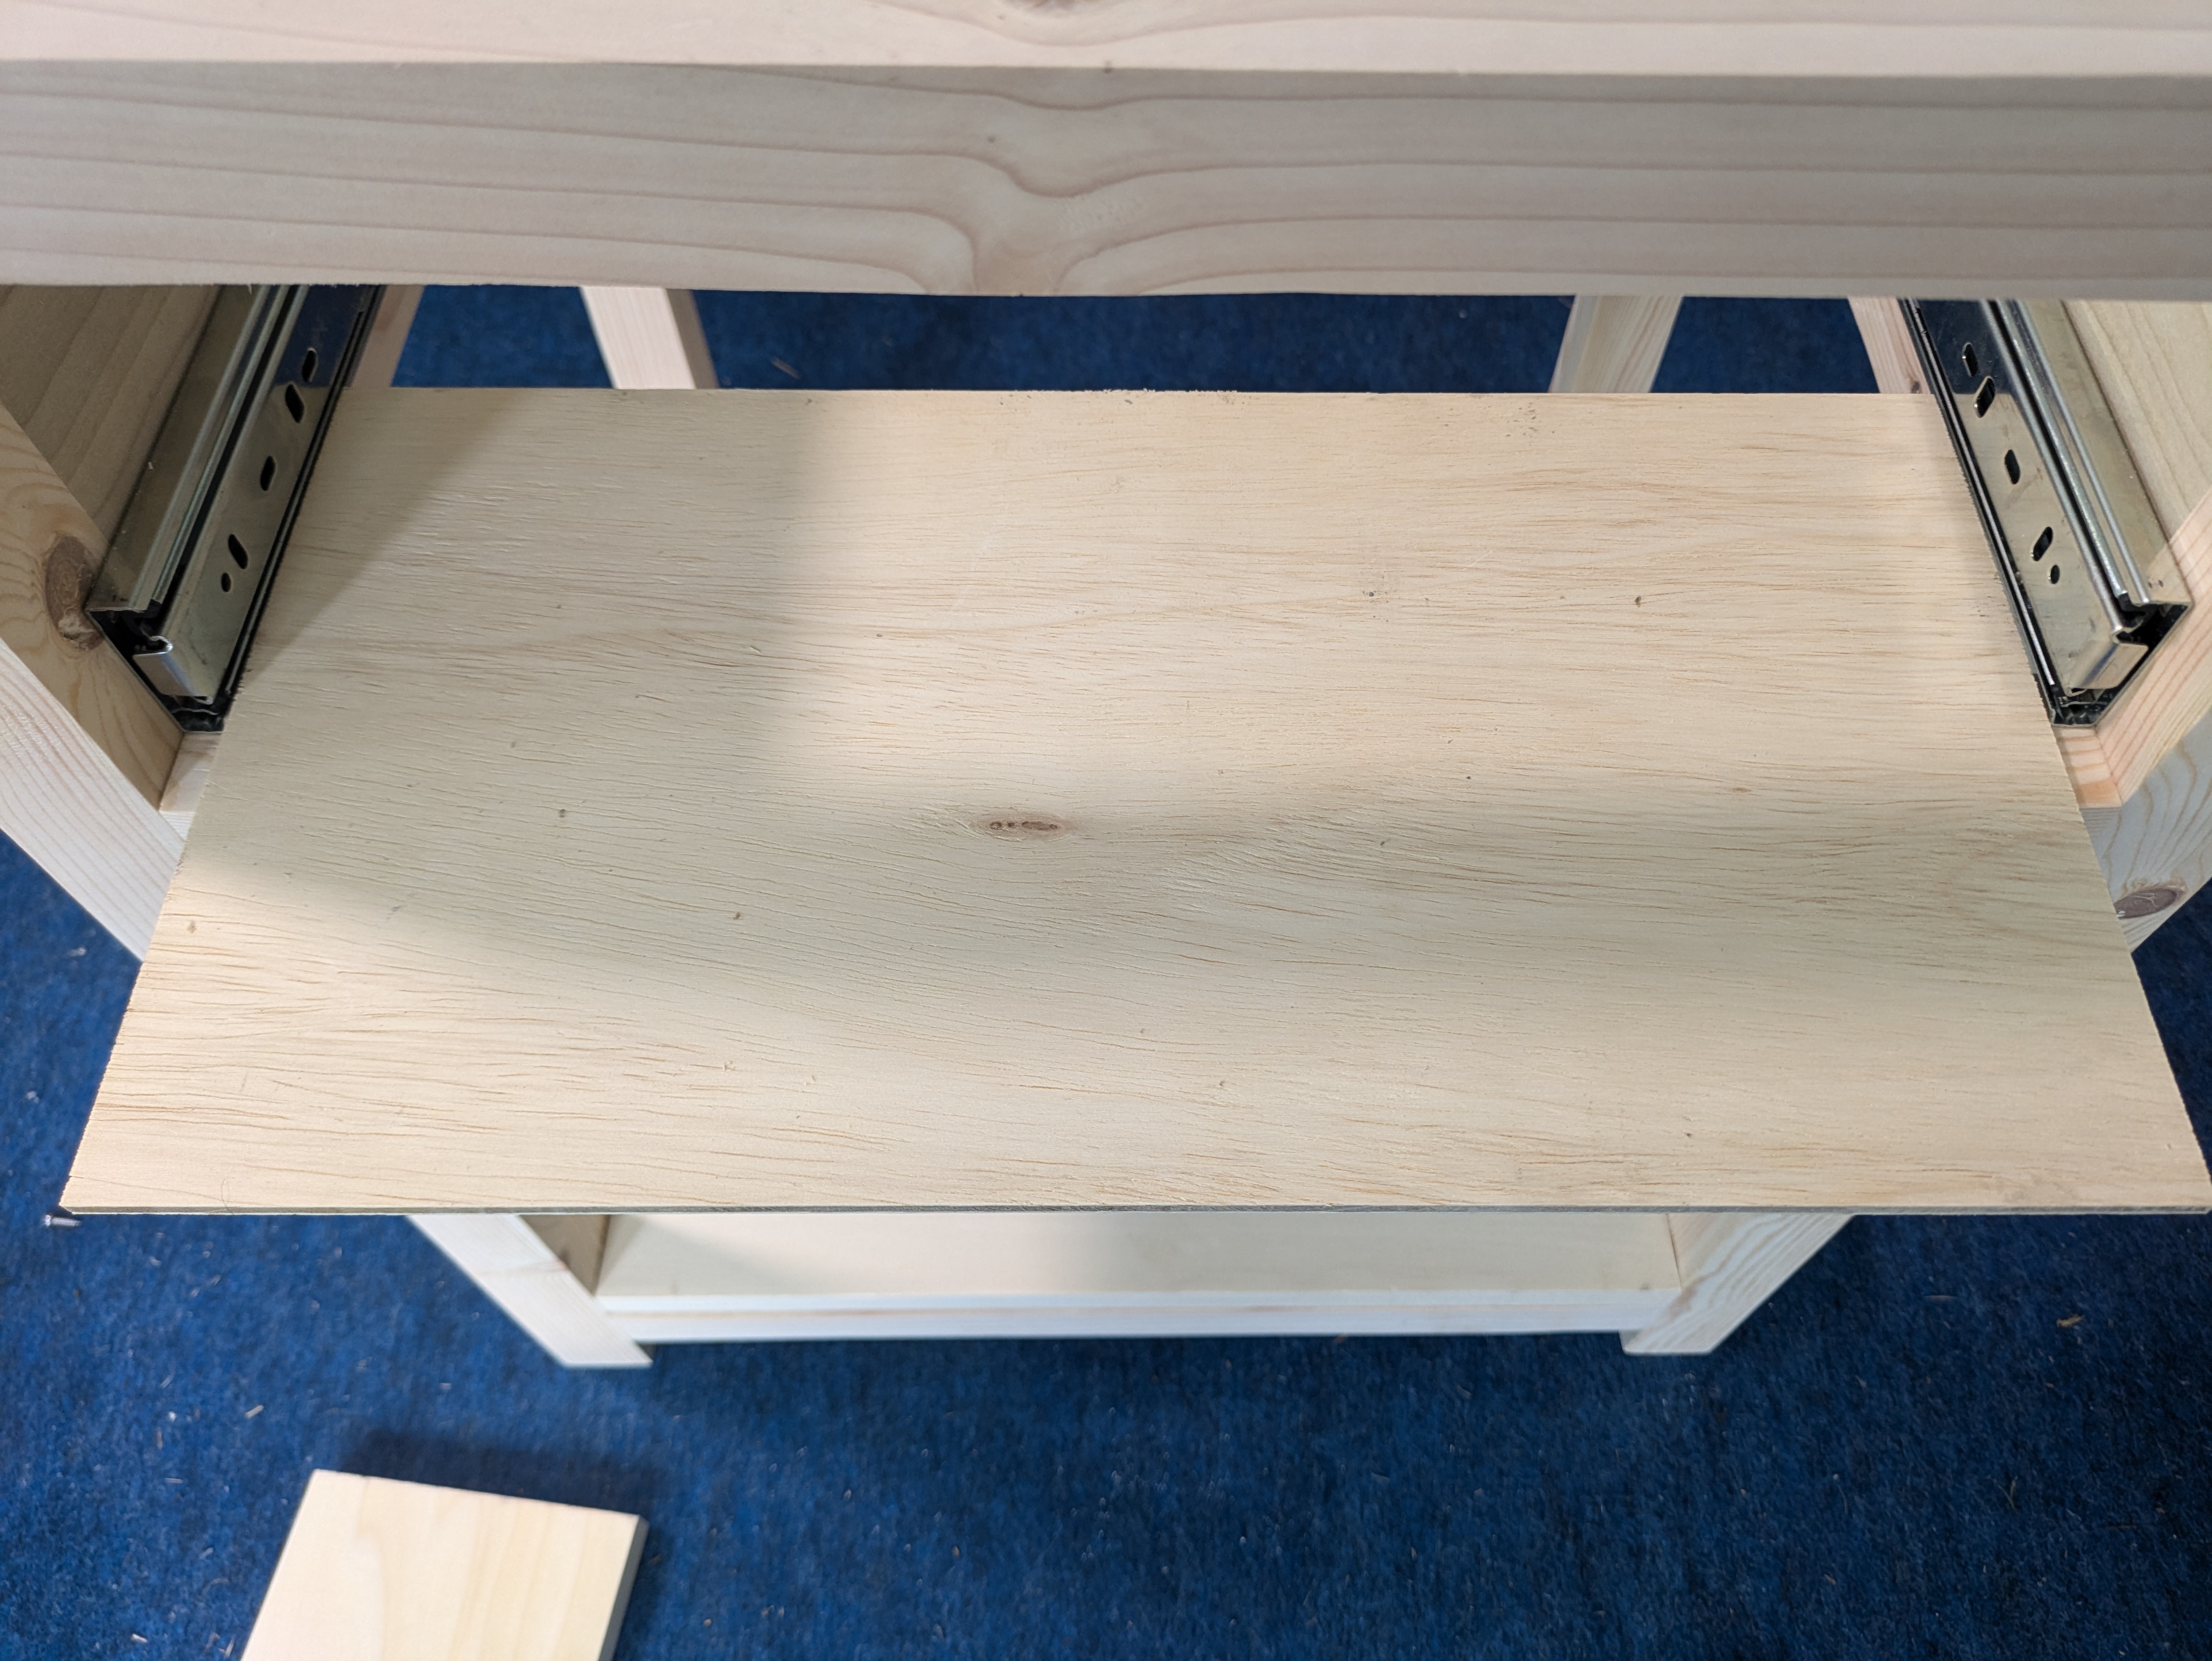
The drawer box rests on top of that. I pull out the drawer slides and screw them in. I pull the inside of the slides out and screw in the end pieces. No pictures of that. I need all my hands to do that.
Then I pop the slides back in and…hold my breath.
It’s alright. I think it’s annoyingly one of the better drawers I’ve made. It sticks a little on the left side (of that picture) about halfway in.
Drawer Face 🔗
Now, I need to work on the drawer face. That’s going to be a piece of poplar, like is used for the sides of the table. And that’s already been cut - but cut to EXACTLY fit in that slot. You don’t want it to be exact. Then it’ll rub against everything. So, very carefully, I trim not even a saw blade from the length and width.
I’m not going to attach any knobs or hardware to this. To pull it out, I’m going to cut out some of the drawer face as a pull. So, I get drawing on what’ll be the back of the drawer face.
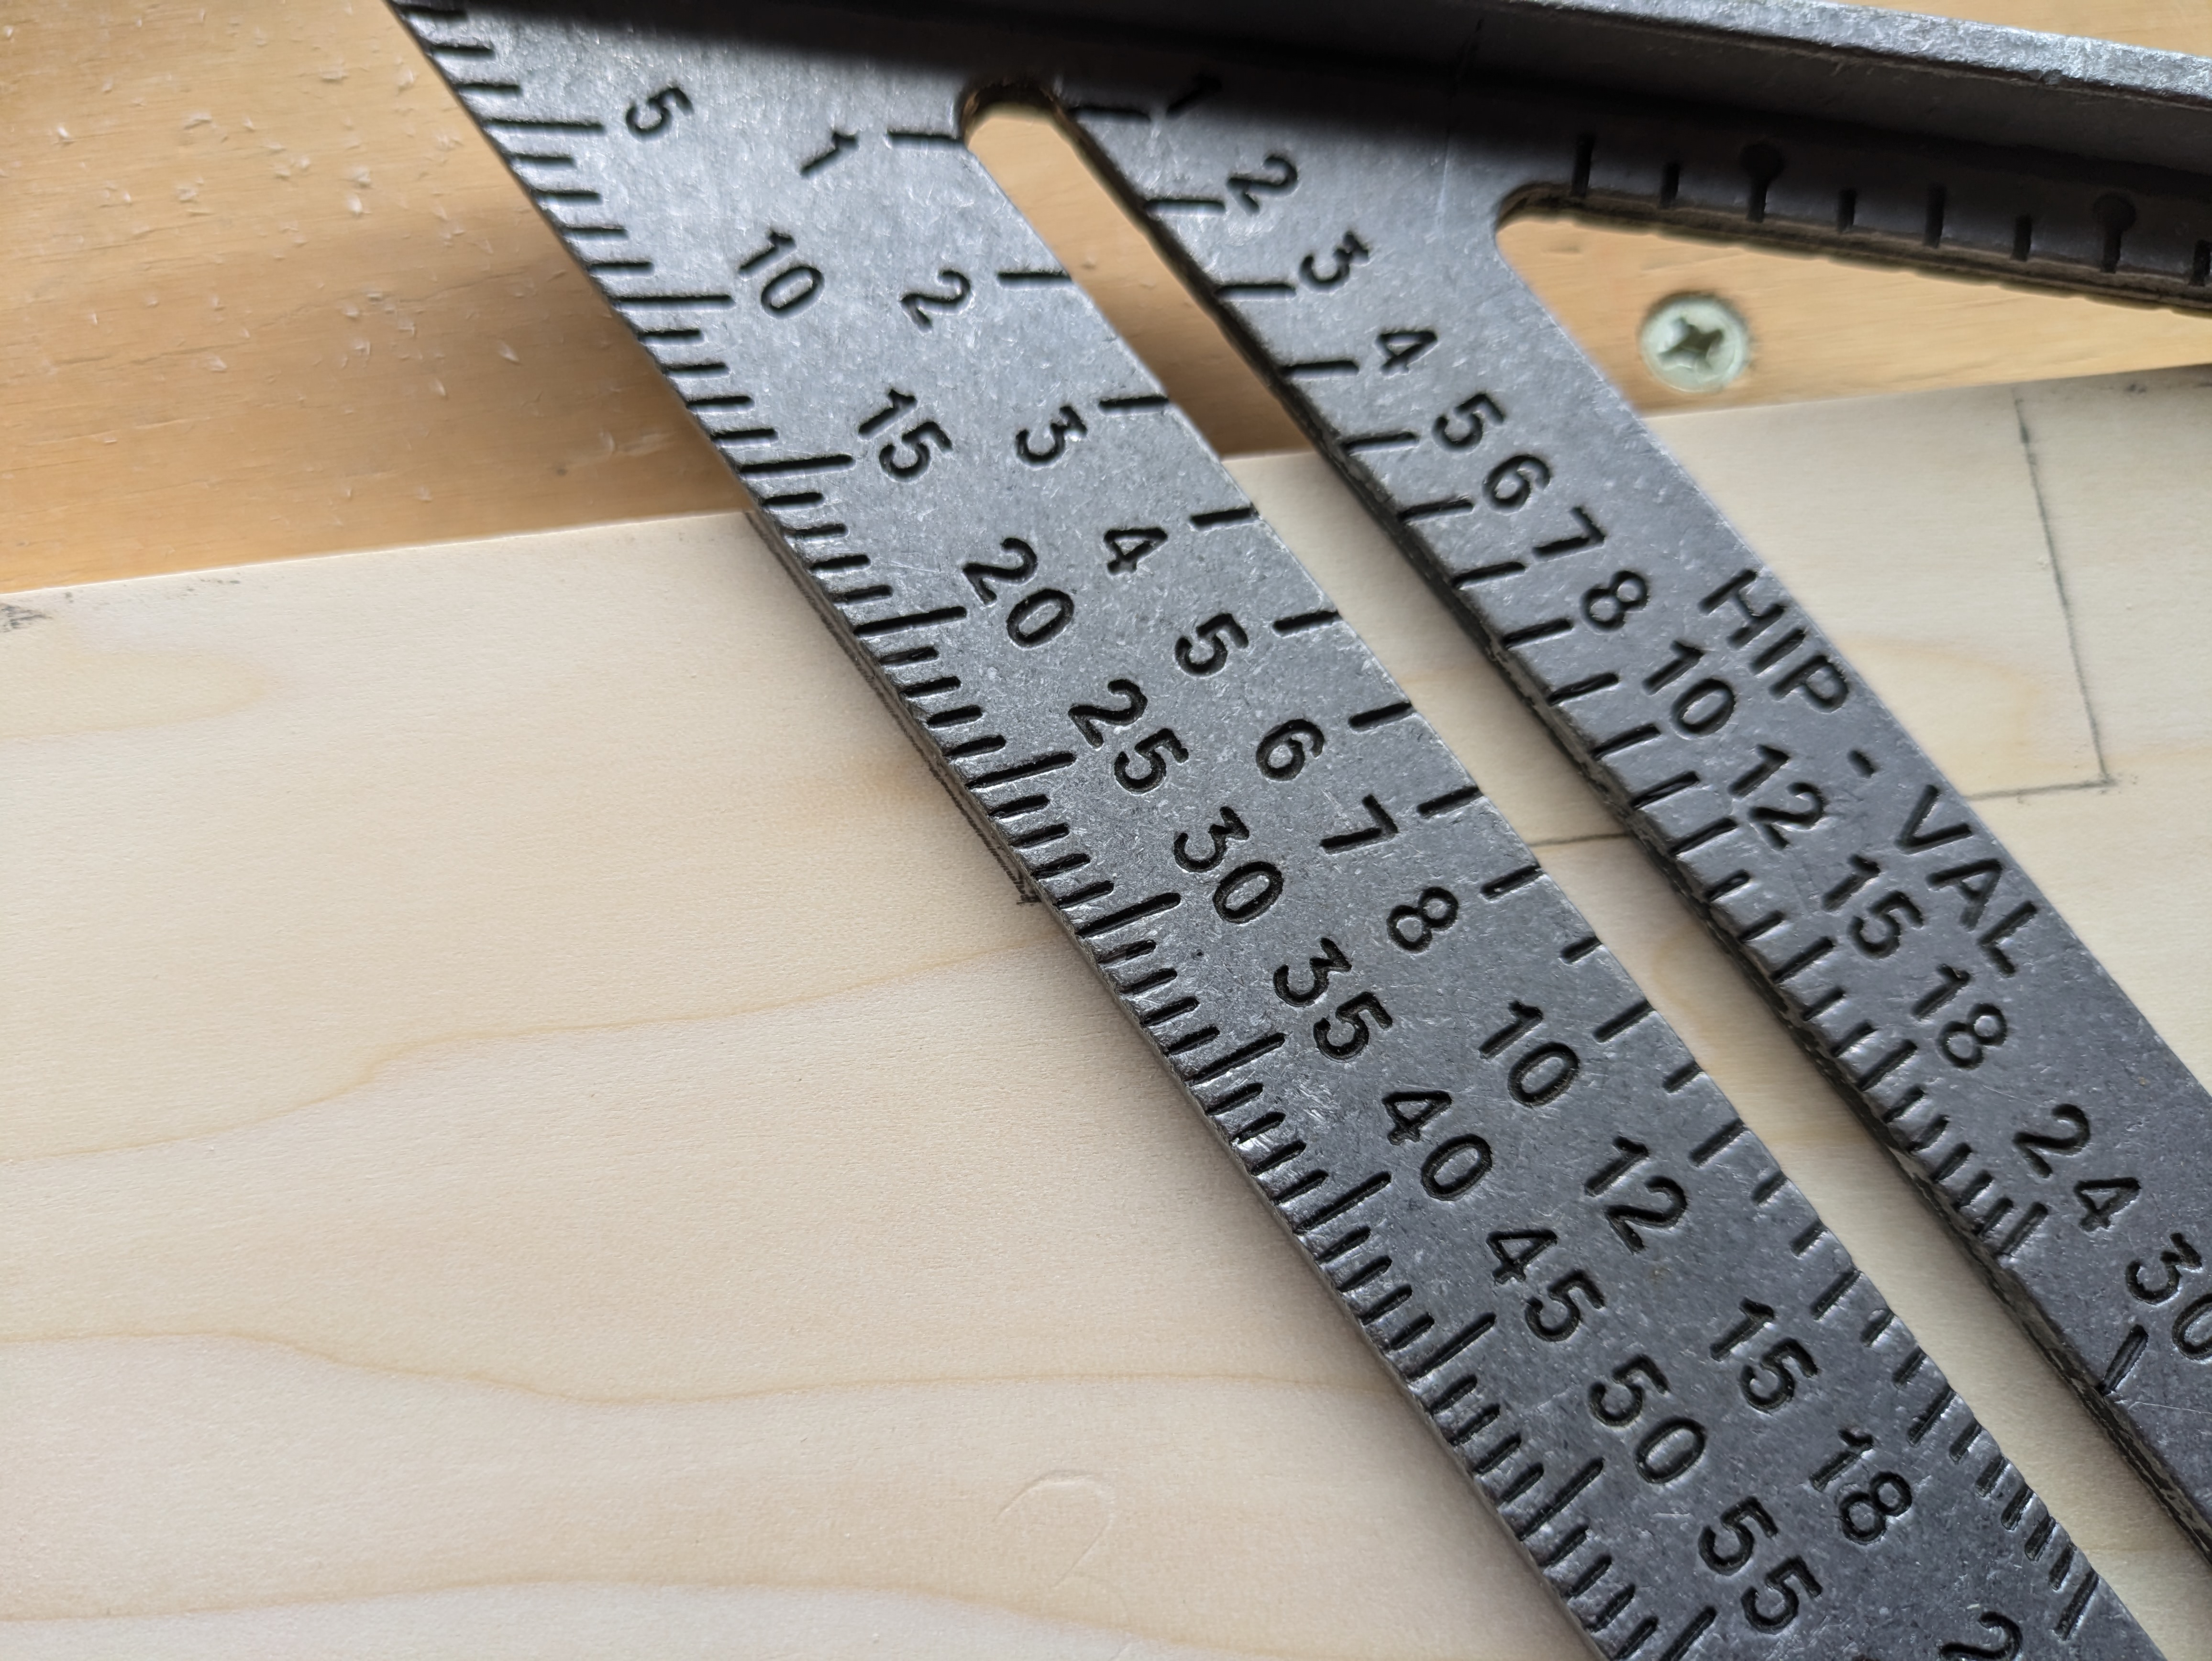
There’s going to be an angle. It’s not going to be square. But I can use my speed square to get that done still. I line it against the edge of the board, and use the markings to set my angle. I want a 30* angle. But from the direction the speed square is in the following picture, I’m really subtracting that from 45* . So I line the edge of my board with the 15* marker.
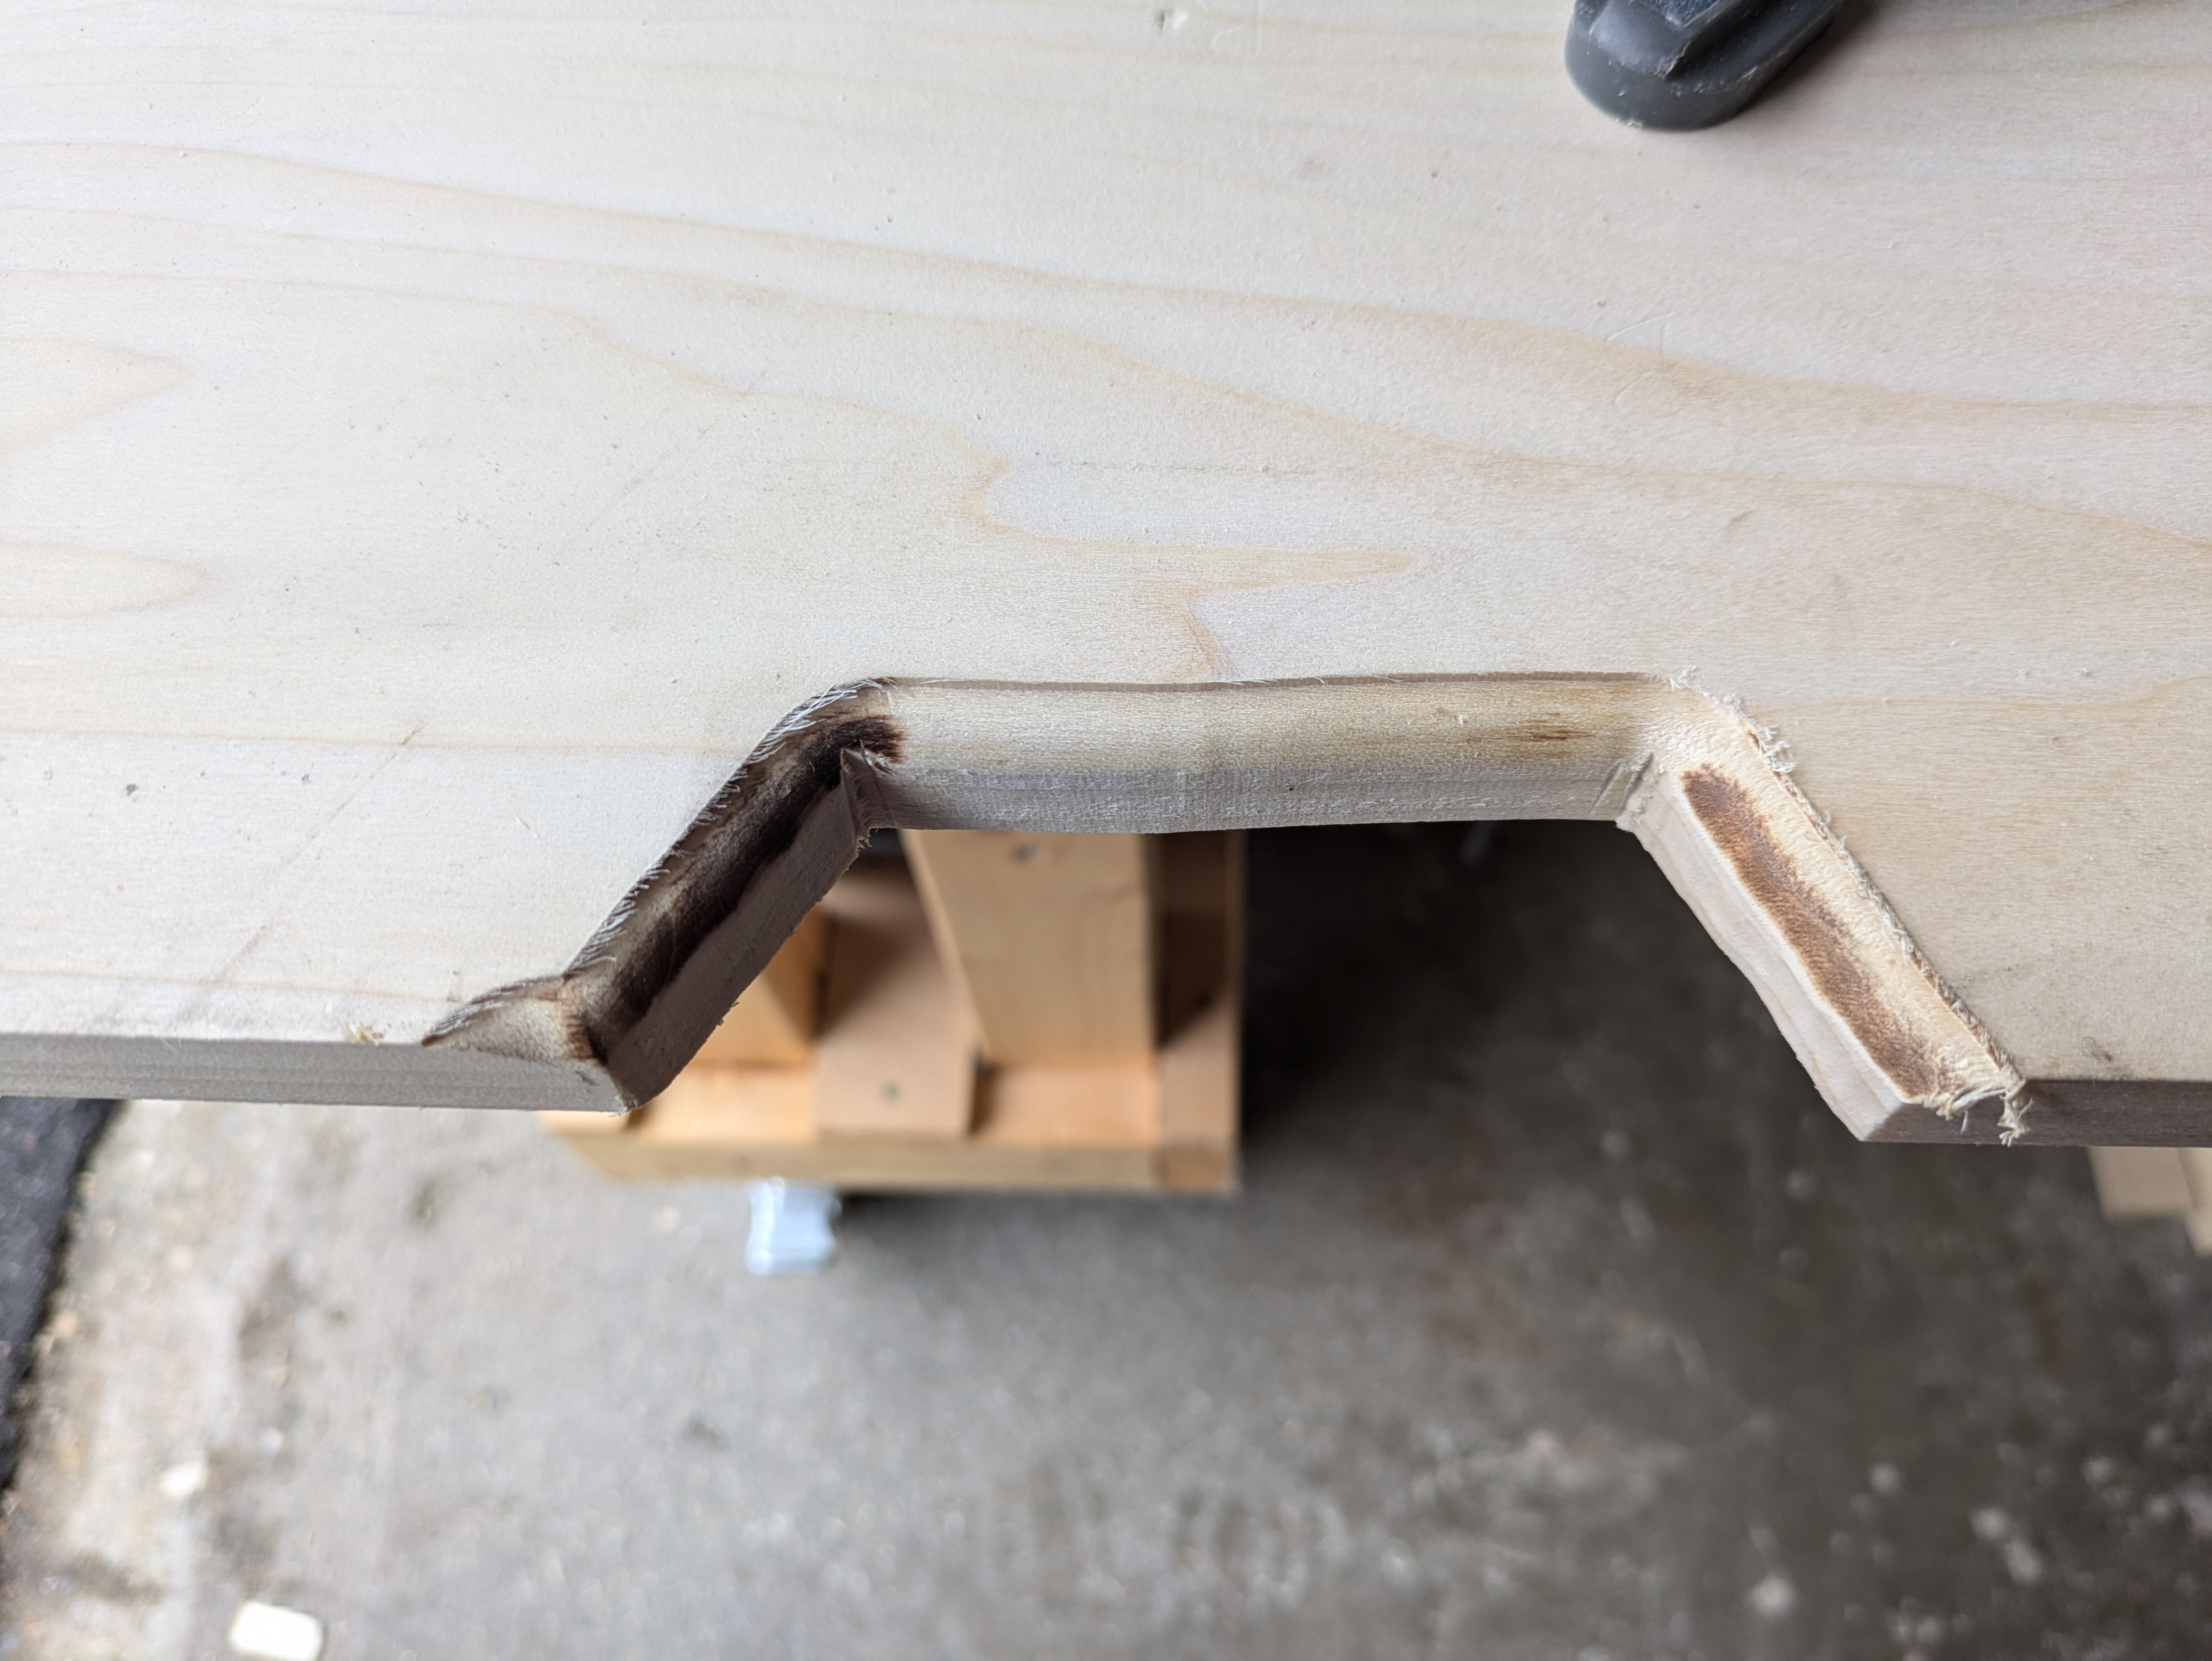
I use my jigsaw to cut that out. And after finishing that, it’s time to use what I think is the scariest tool - the router.
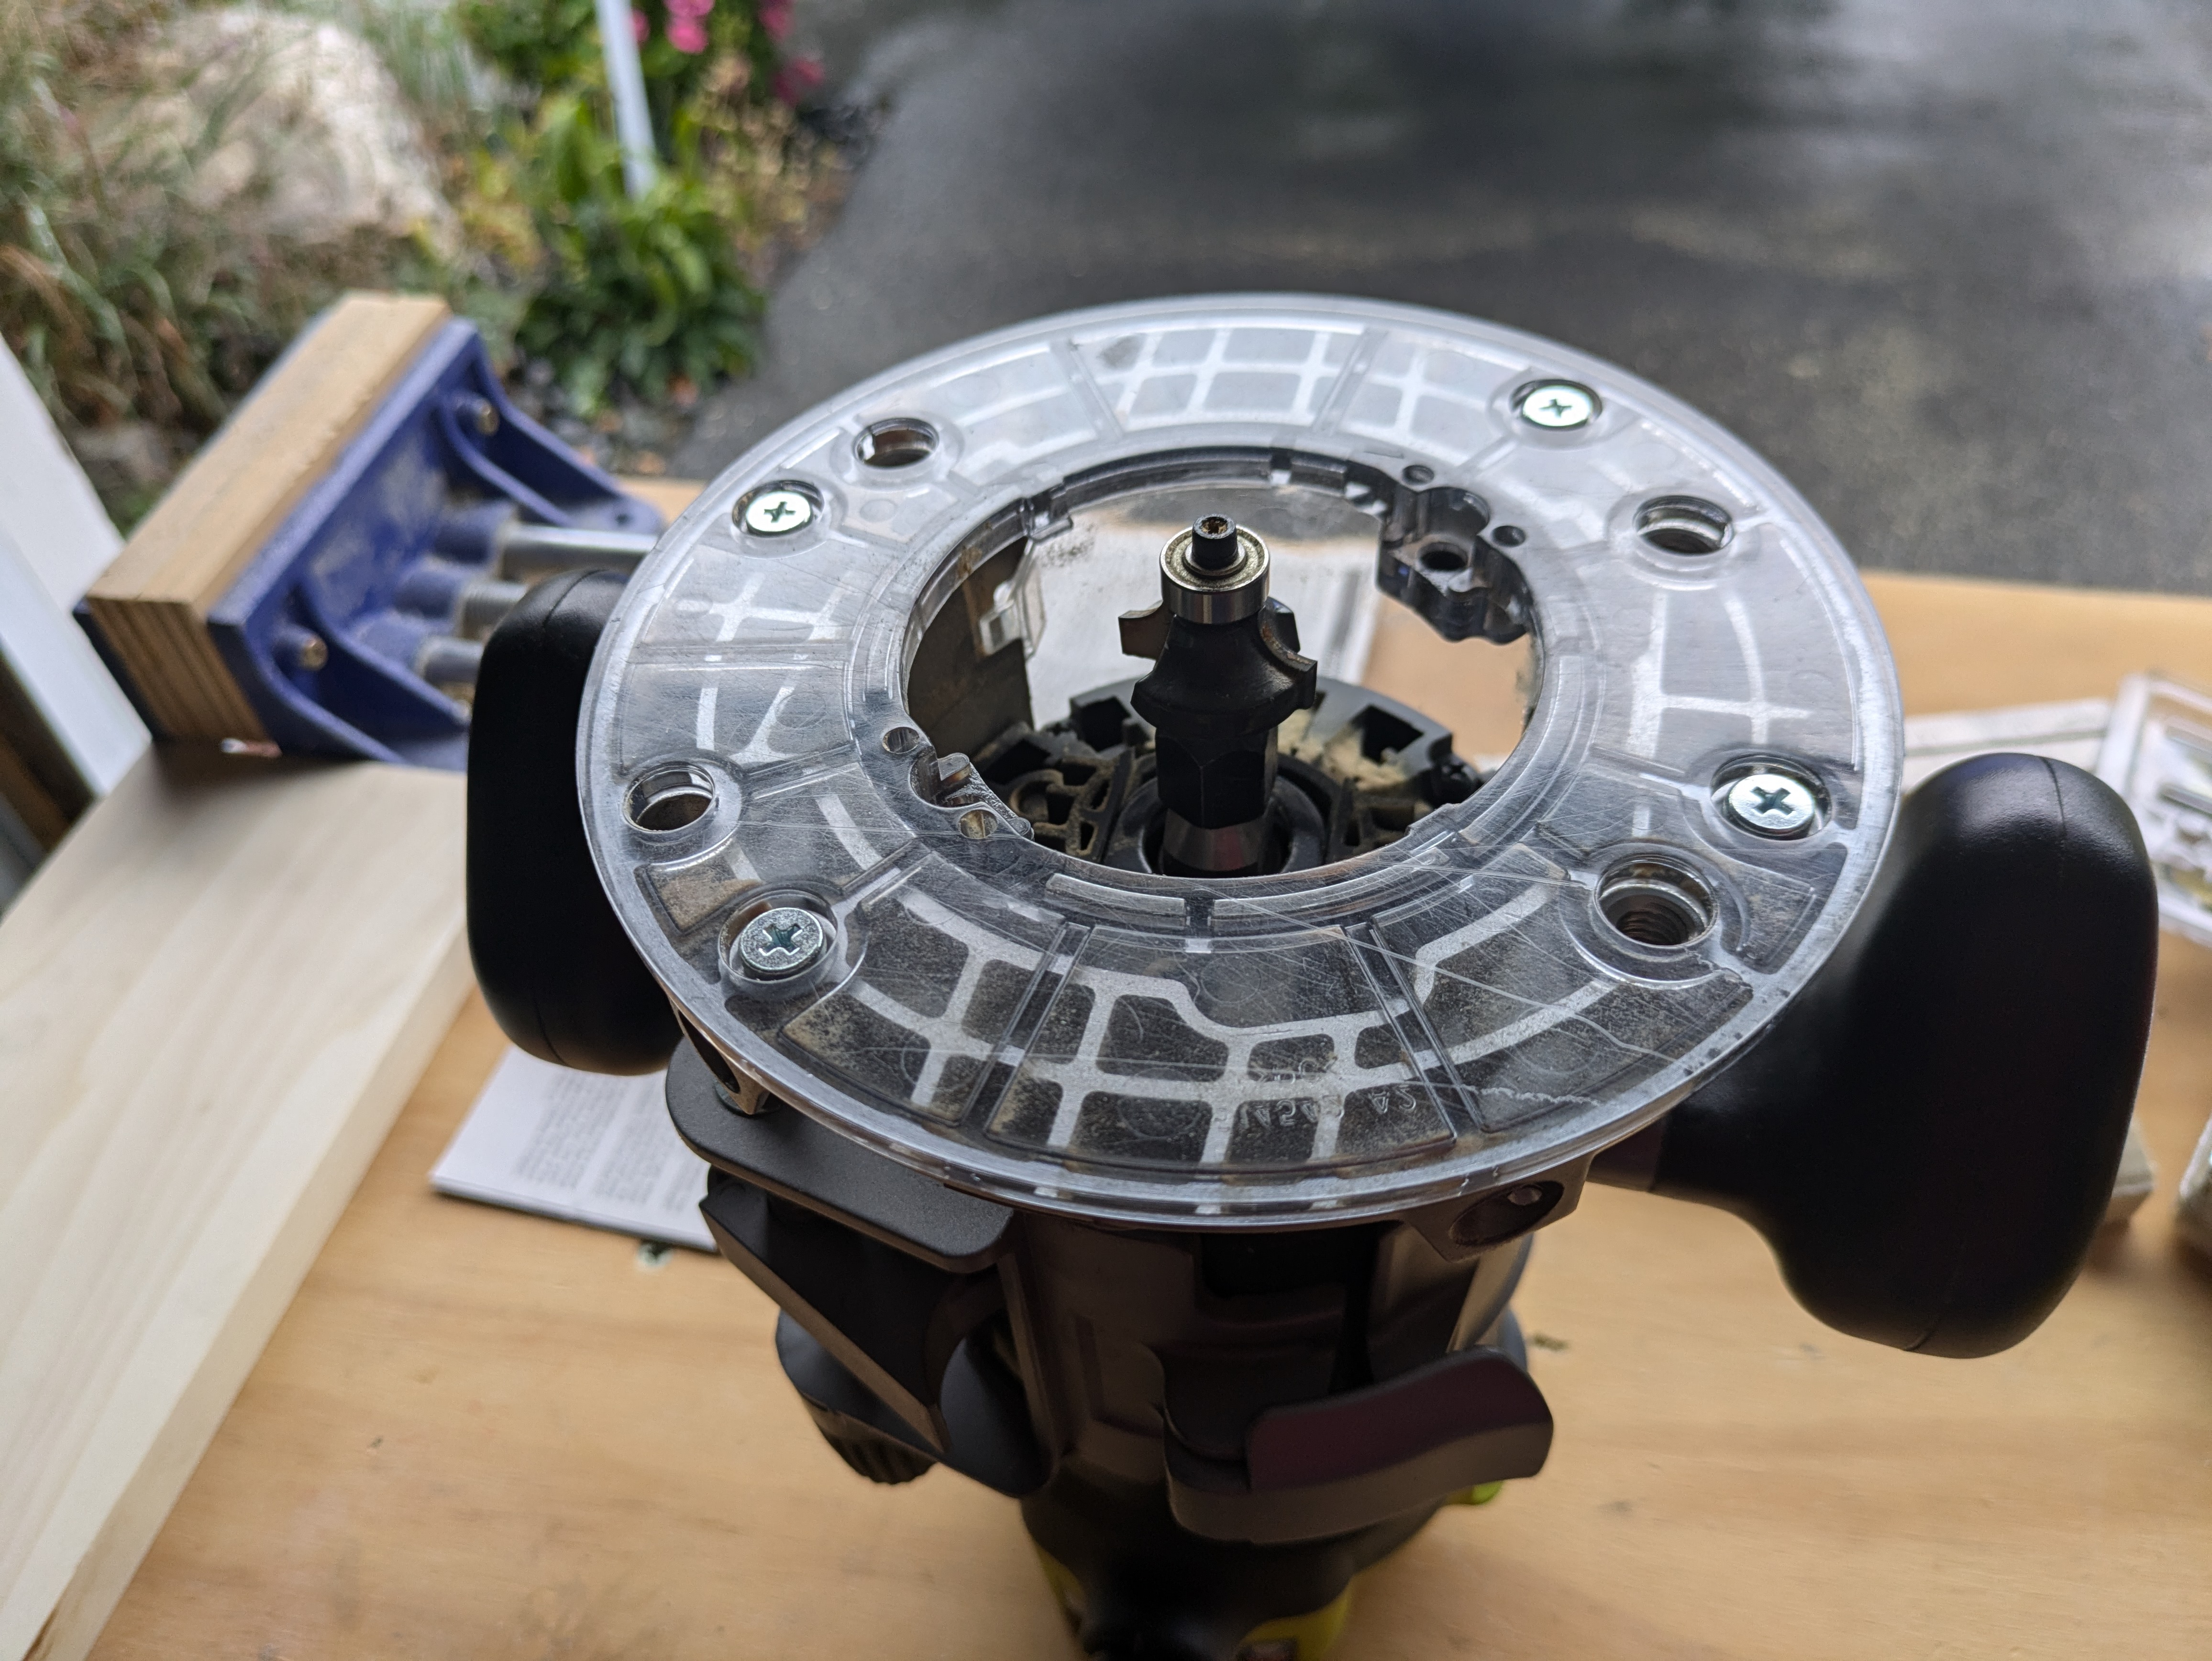
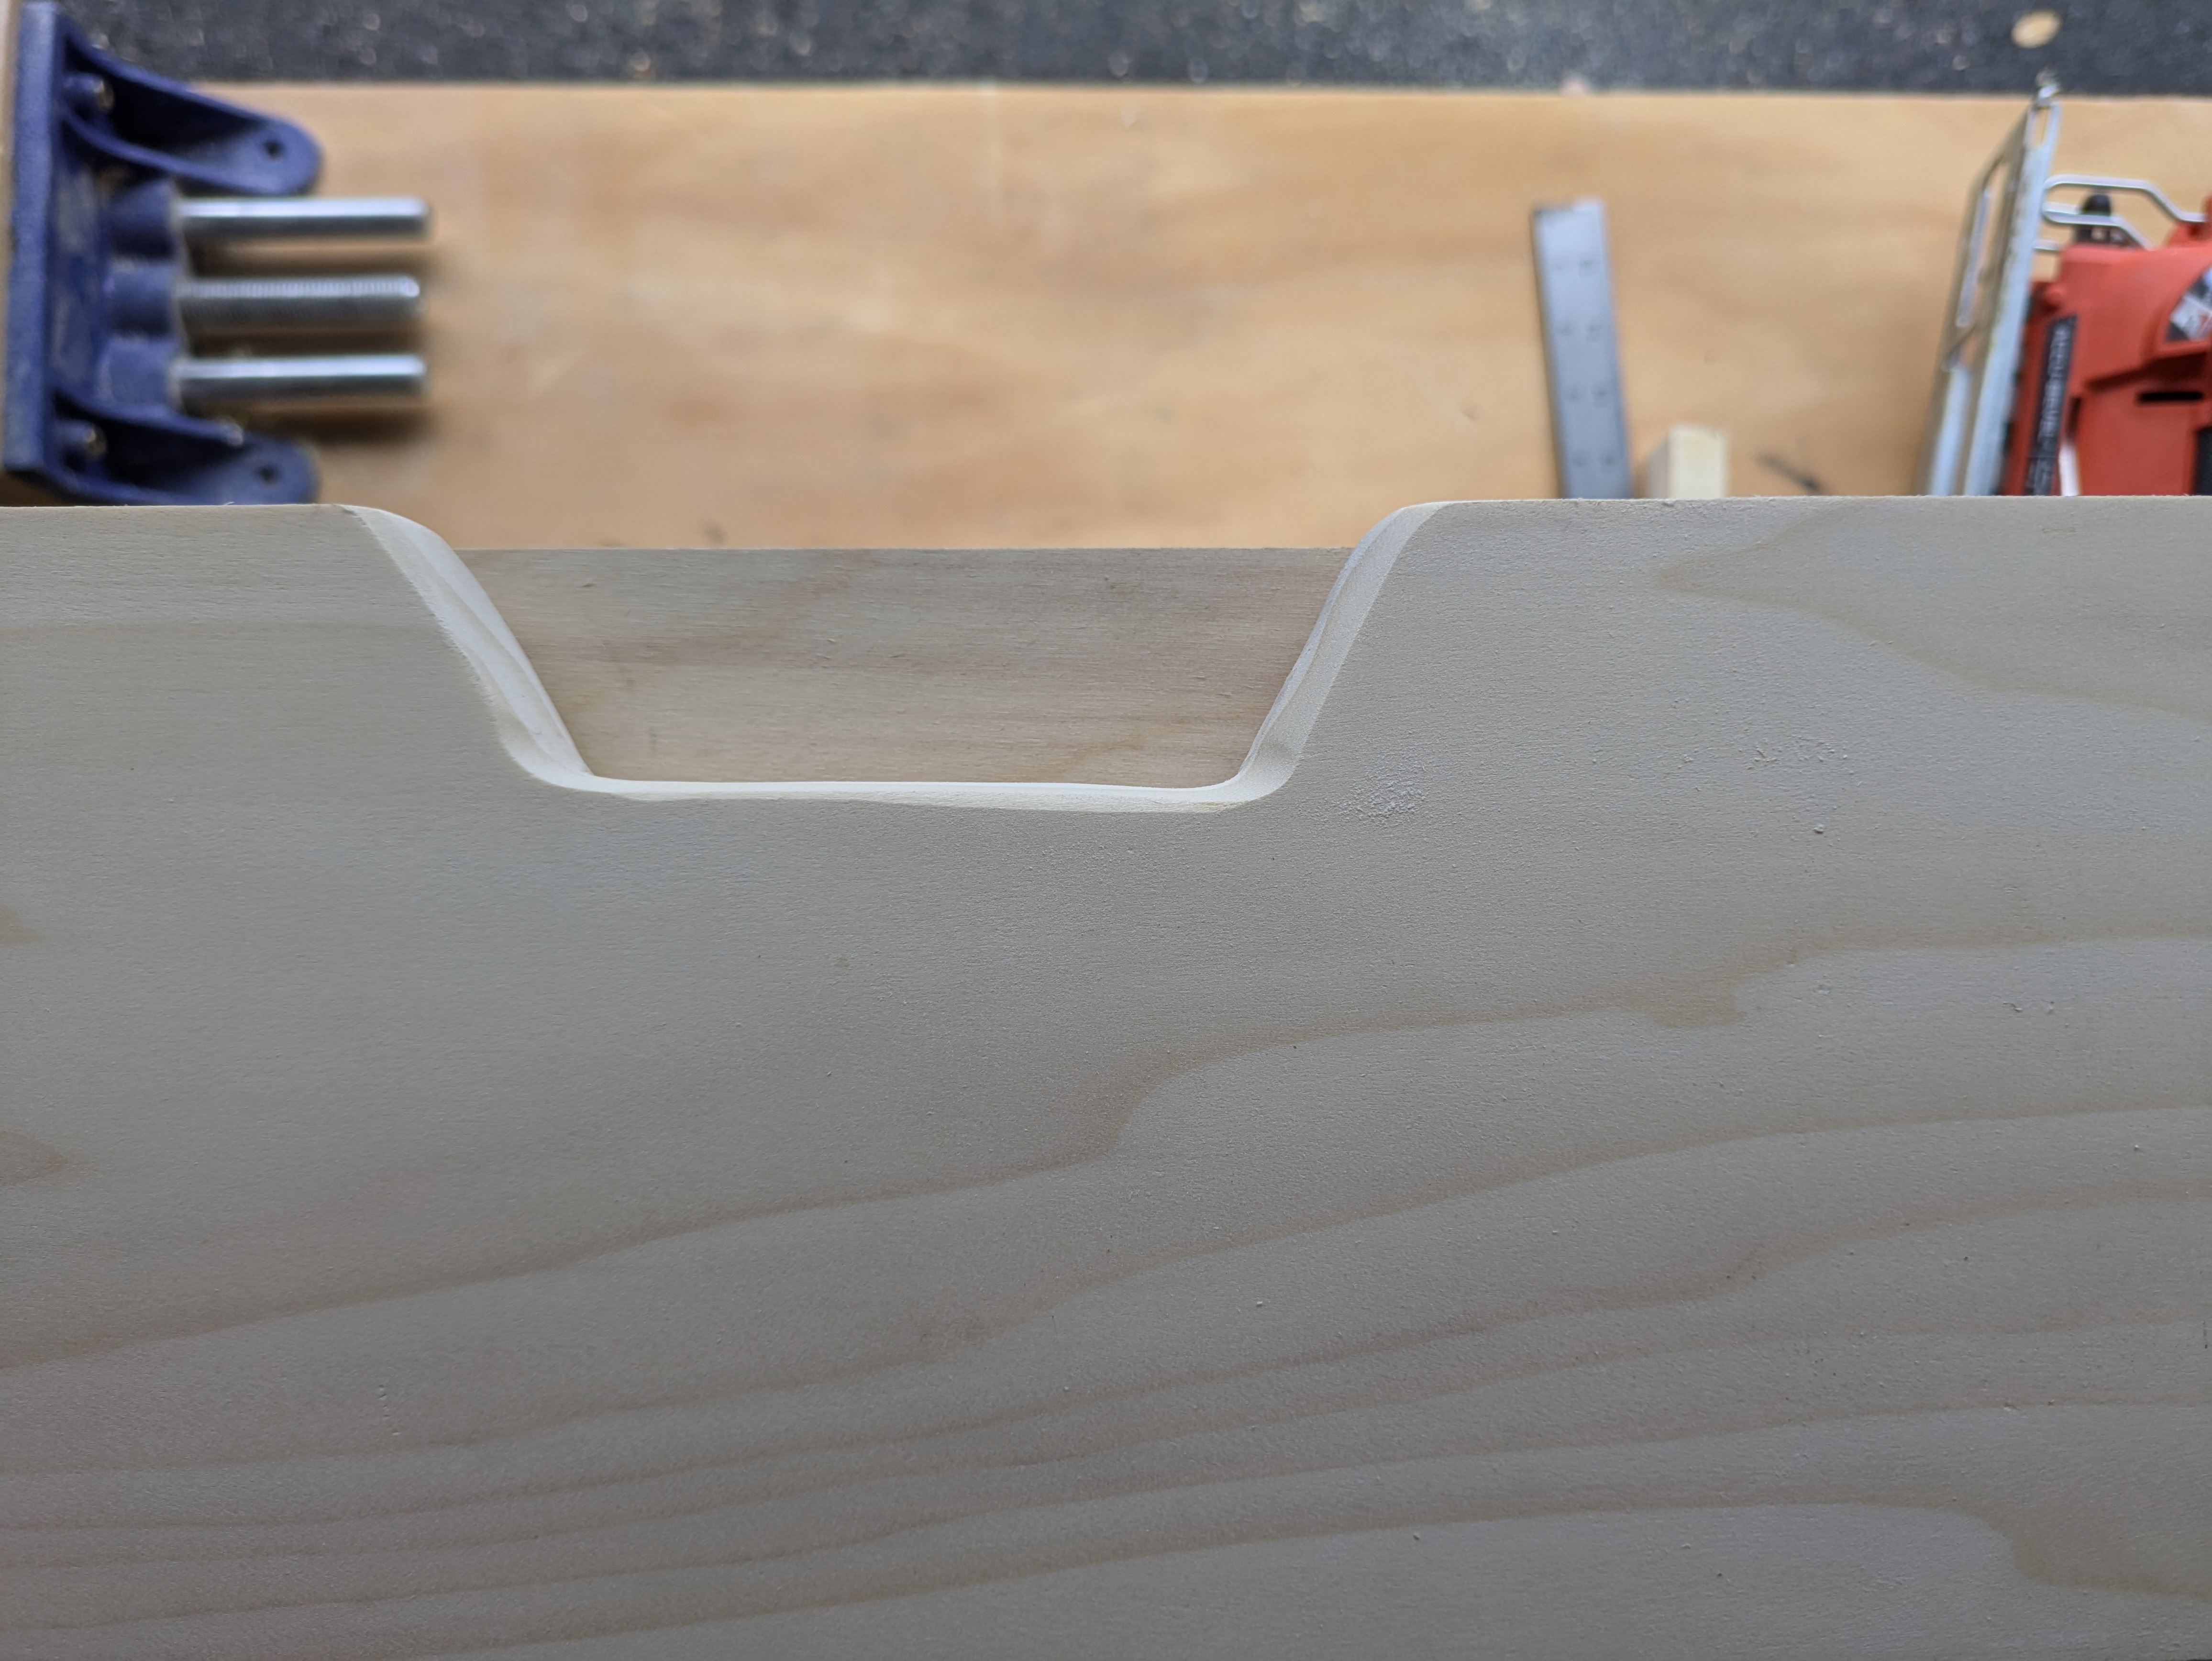
A spinning blade that chews up wood, needs to go in the right direction, and can generally ruin your day right at the end. I want to use this because I don’t want sharp edges that I’m reaching my hand into to open the drawer. So I’m going to use the router to round over the edges of the “pull”.
And my fear is justified - I set the depth a bit too far on the backside, so it cut into the face a bit. But, that’s why you do it on the back first. I raise the blade a little and do the same on the other side.
I sand that all down next. No picture. It’s sanding. You get it.
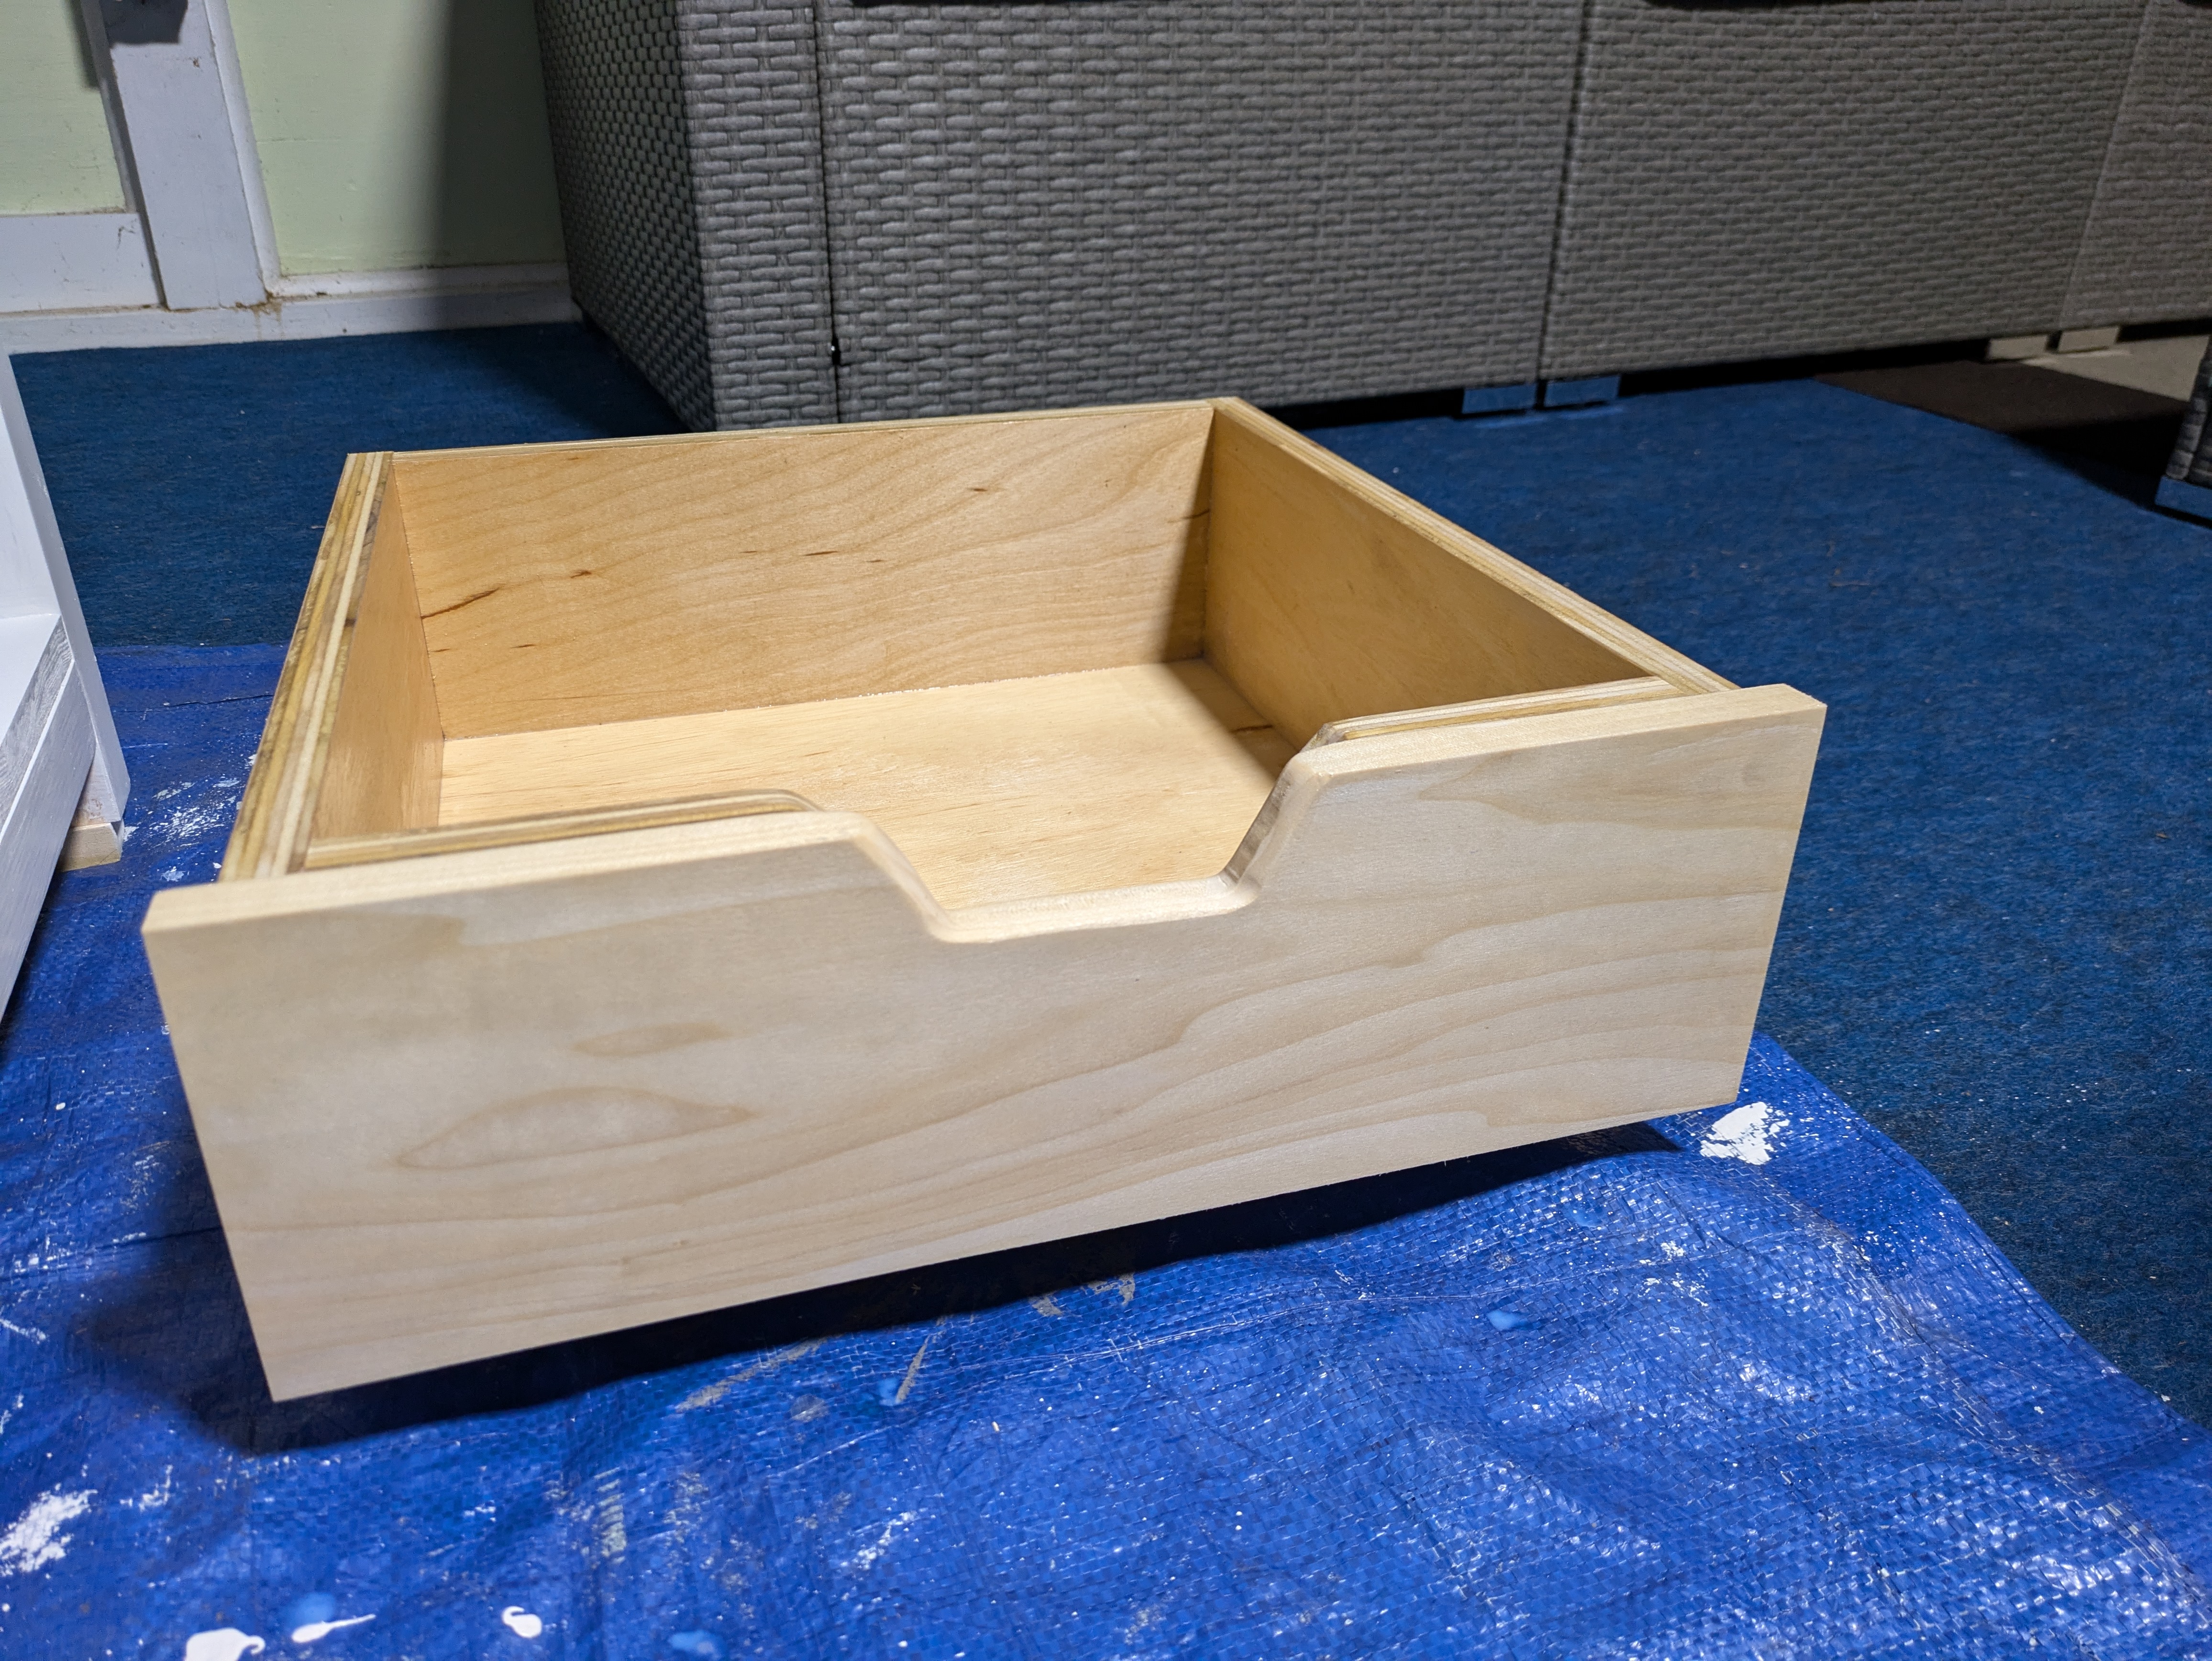
After that I need to get my drawer box back out. Because with that chunk taken out of the drawer face, I need to cut out a matching, but bigger, chunk of the drawer. Otherwise, you’ll just run into the wall of the drawer with your hand and not actually be able to grab anything to open it.
I cut that out on the jigsaw as well and end up with something like this.
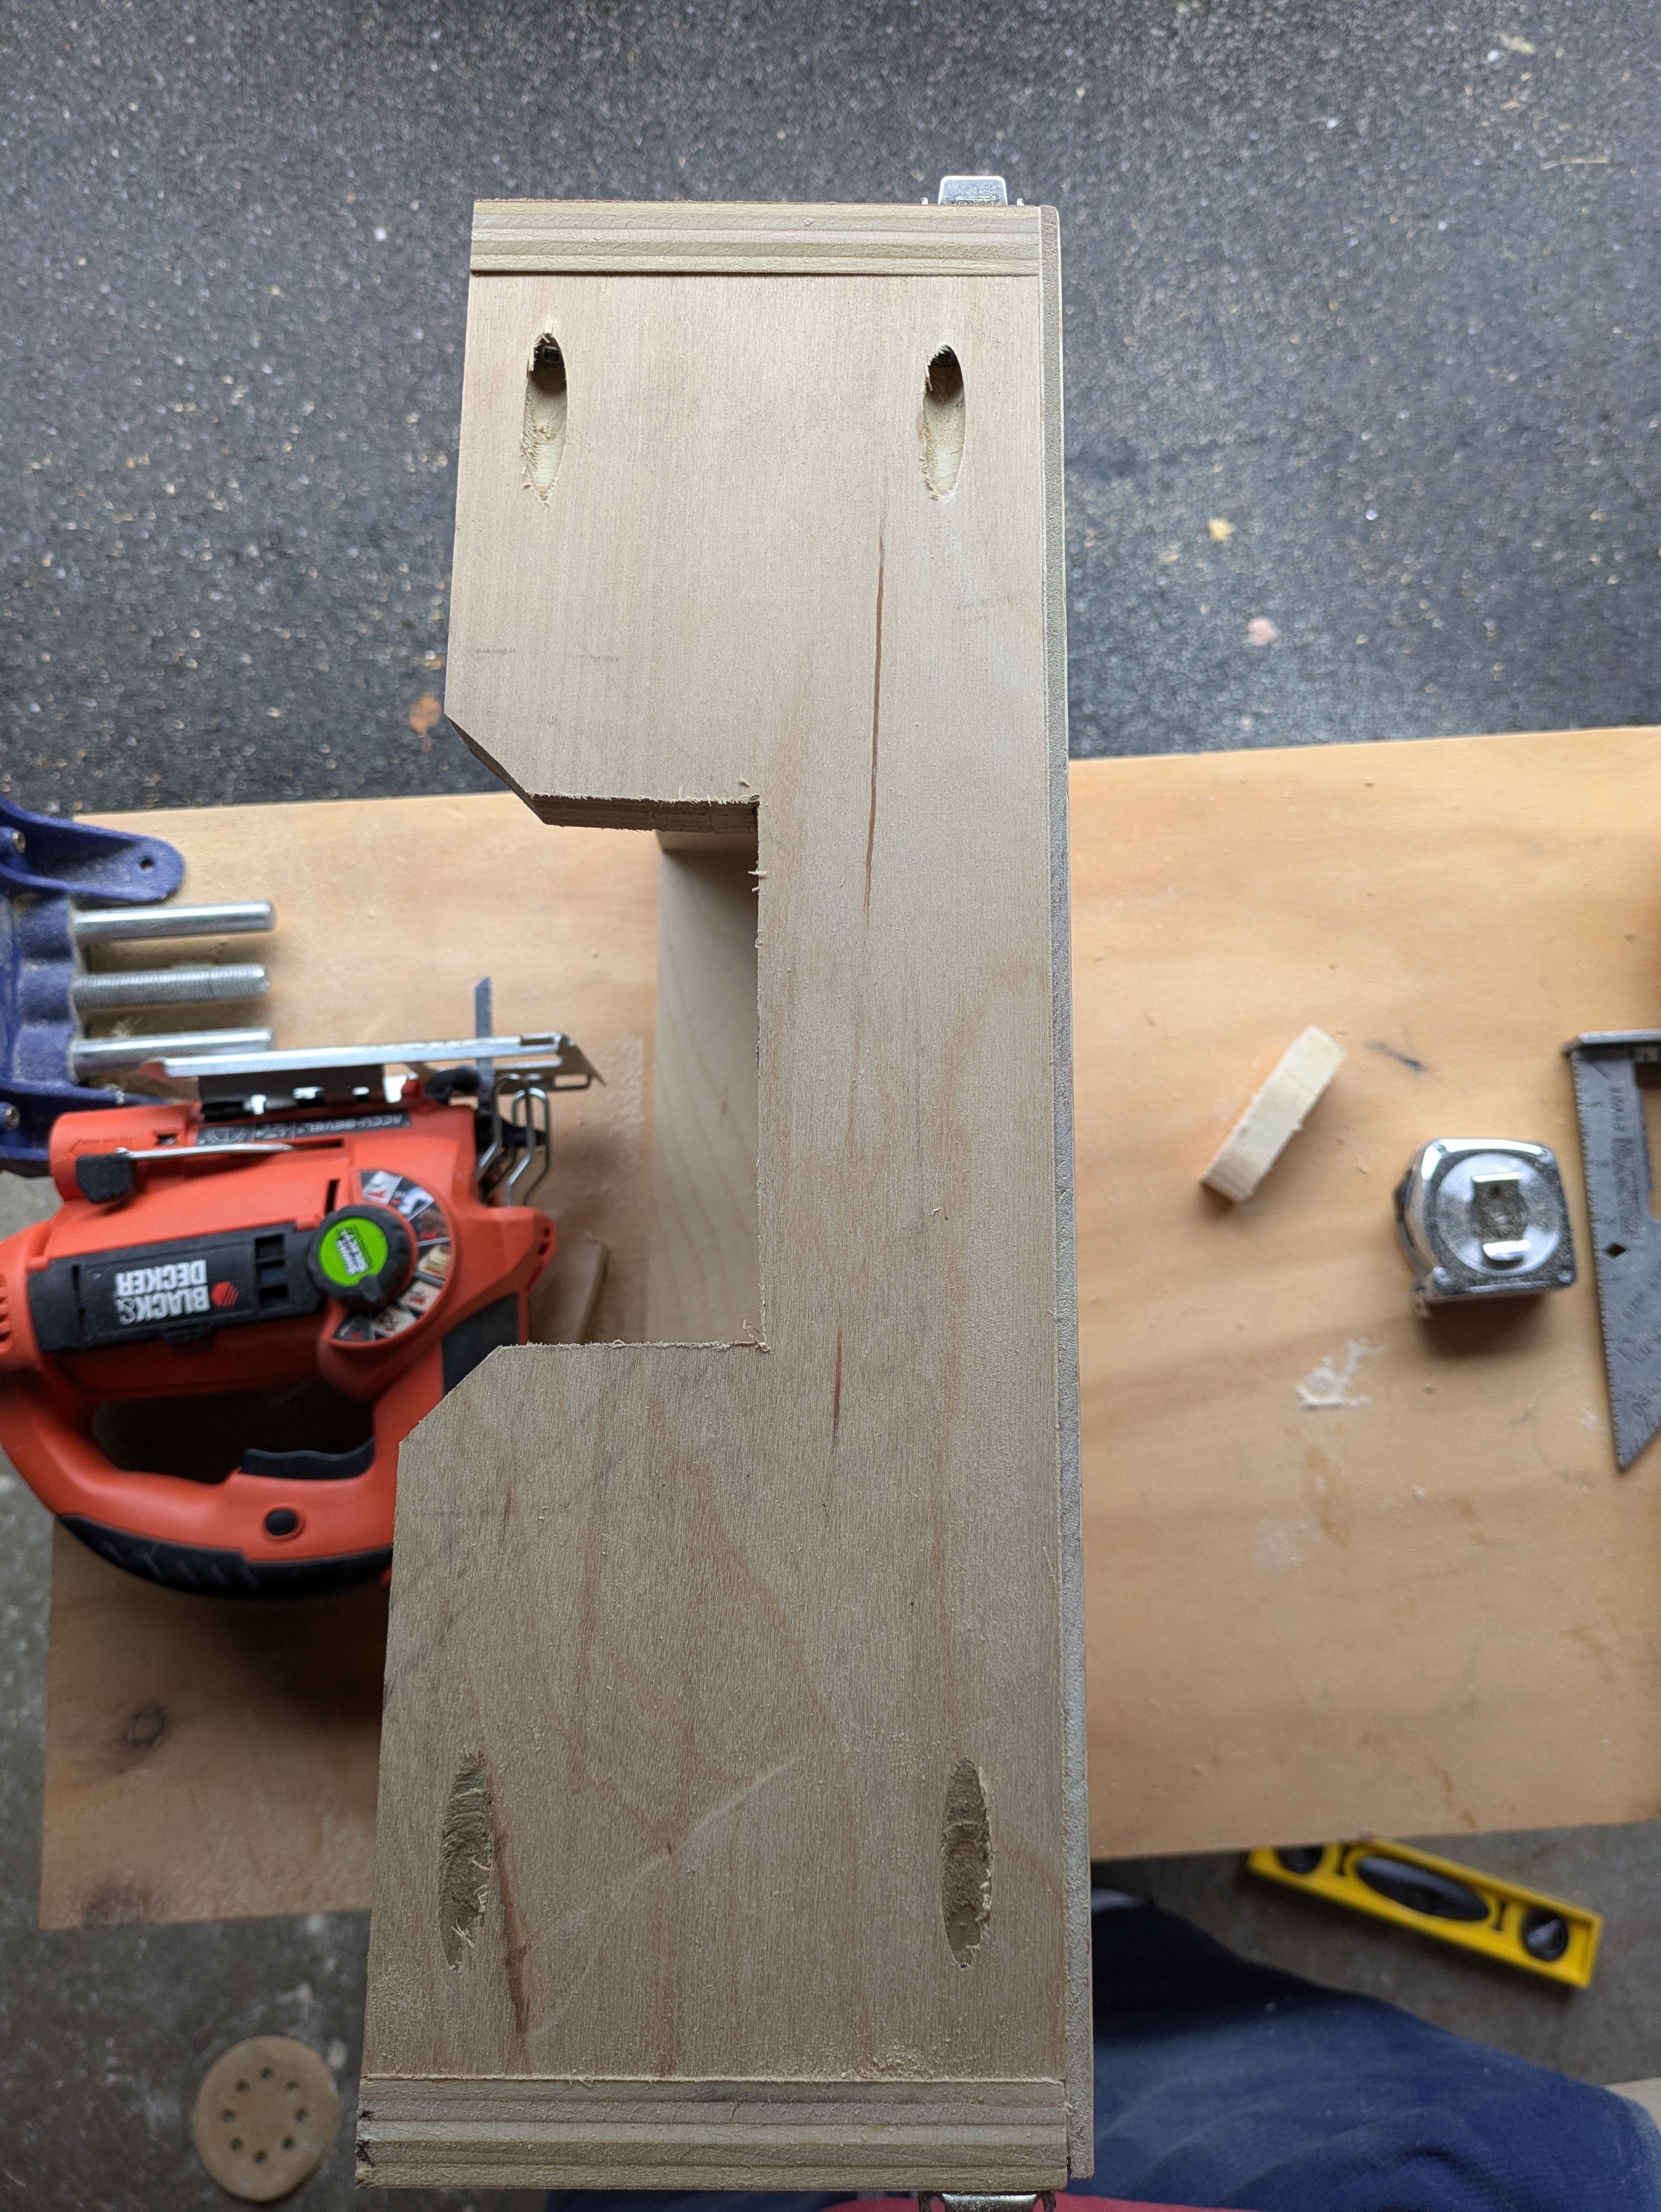
I sanded the edges of that down. It’s not pretty, but it doesn’t really matter. What it does mean is that I won’t edge band the inside of the plywood that’s facing up. That’s a nice touch that just looks a little better, rather than seeing the plys of the plywood, but…it’ll be fine.
Now I need to attach the drawer face to the drawer. I’m going to screw from the inside of the drawer into the drawer face. This way the screws are on the inside of the drawer and not seen. I want the drawer face to have space around all the edges so it doesn’t rub against the table. And ideally have it be centered. I use a deck of cards for that. I shove cards around all the edges, and make sure it’s the same number of cards for the top/bottom, and the same for each side.
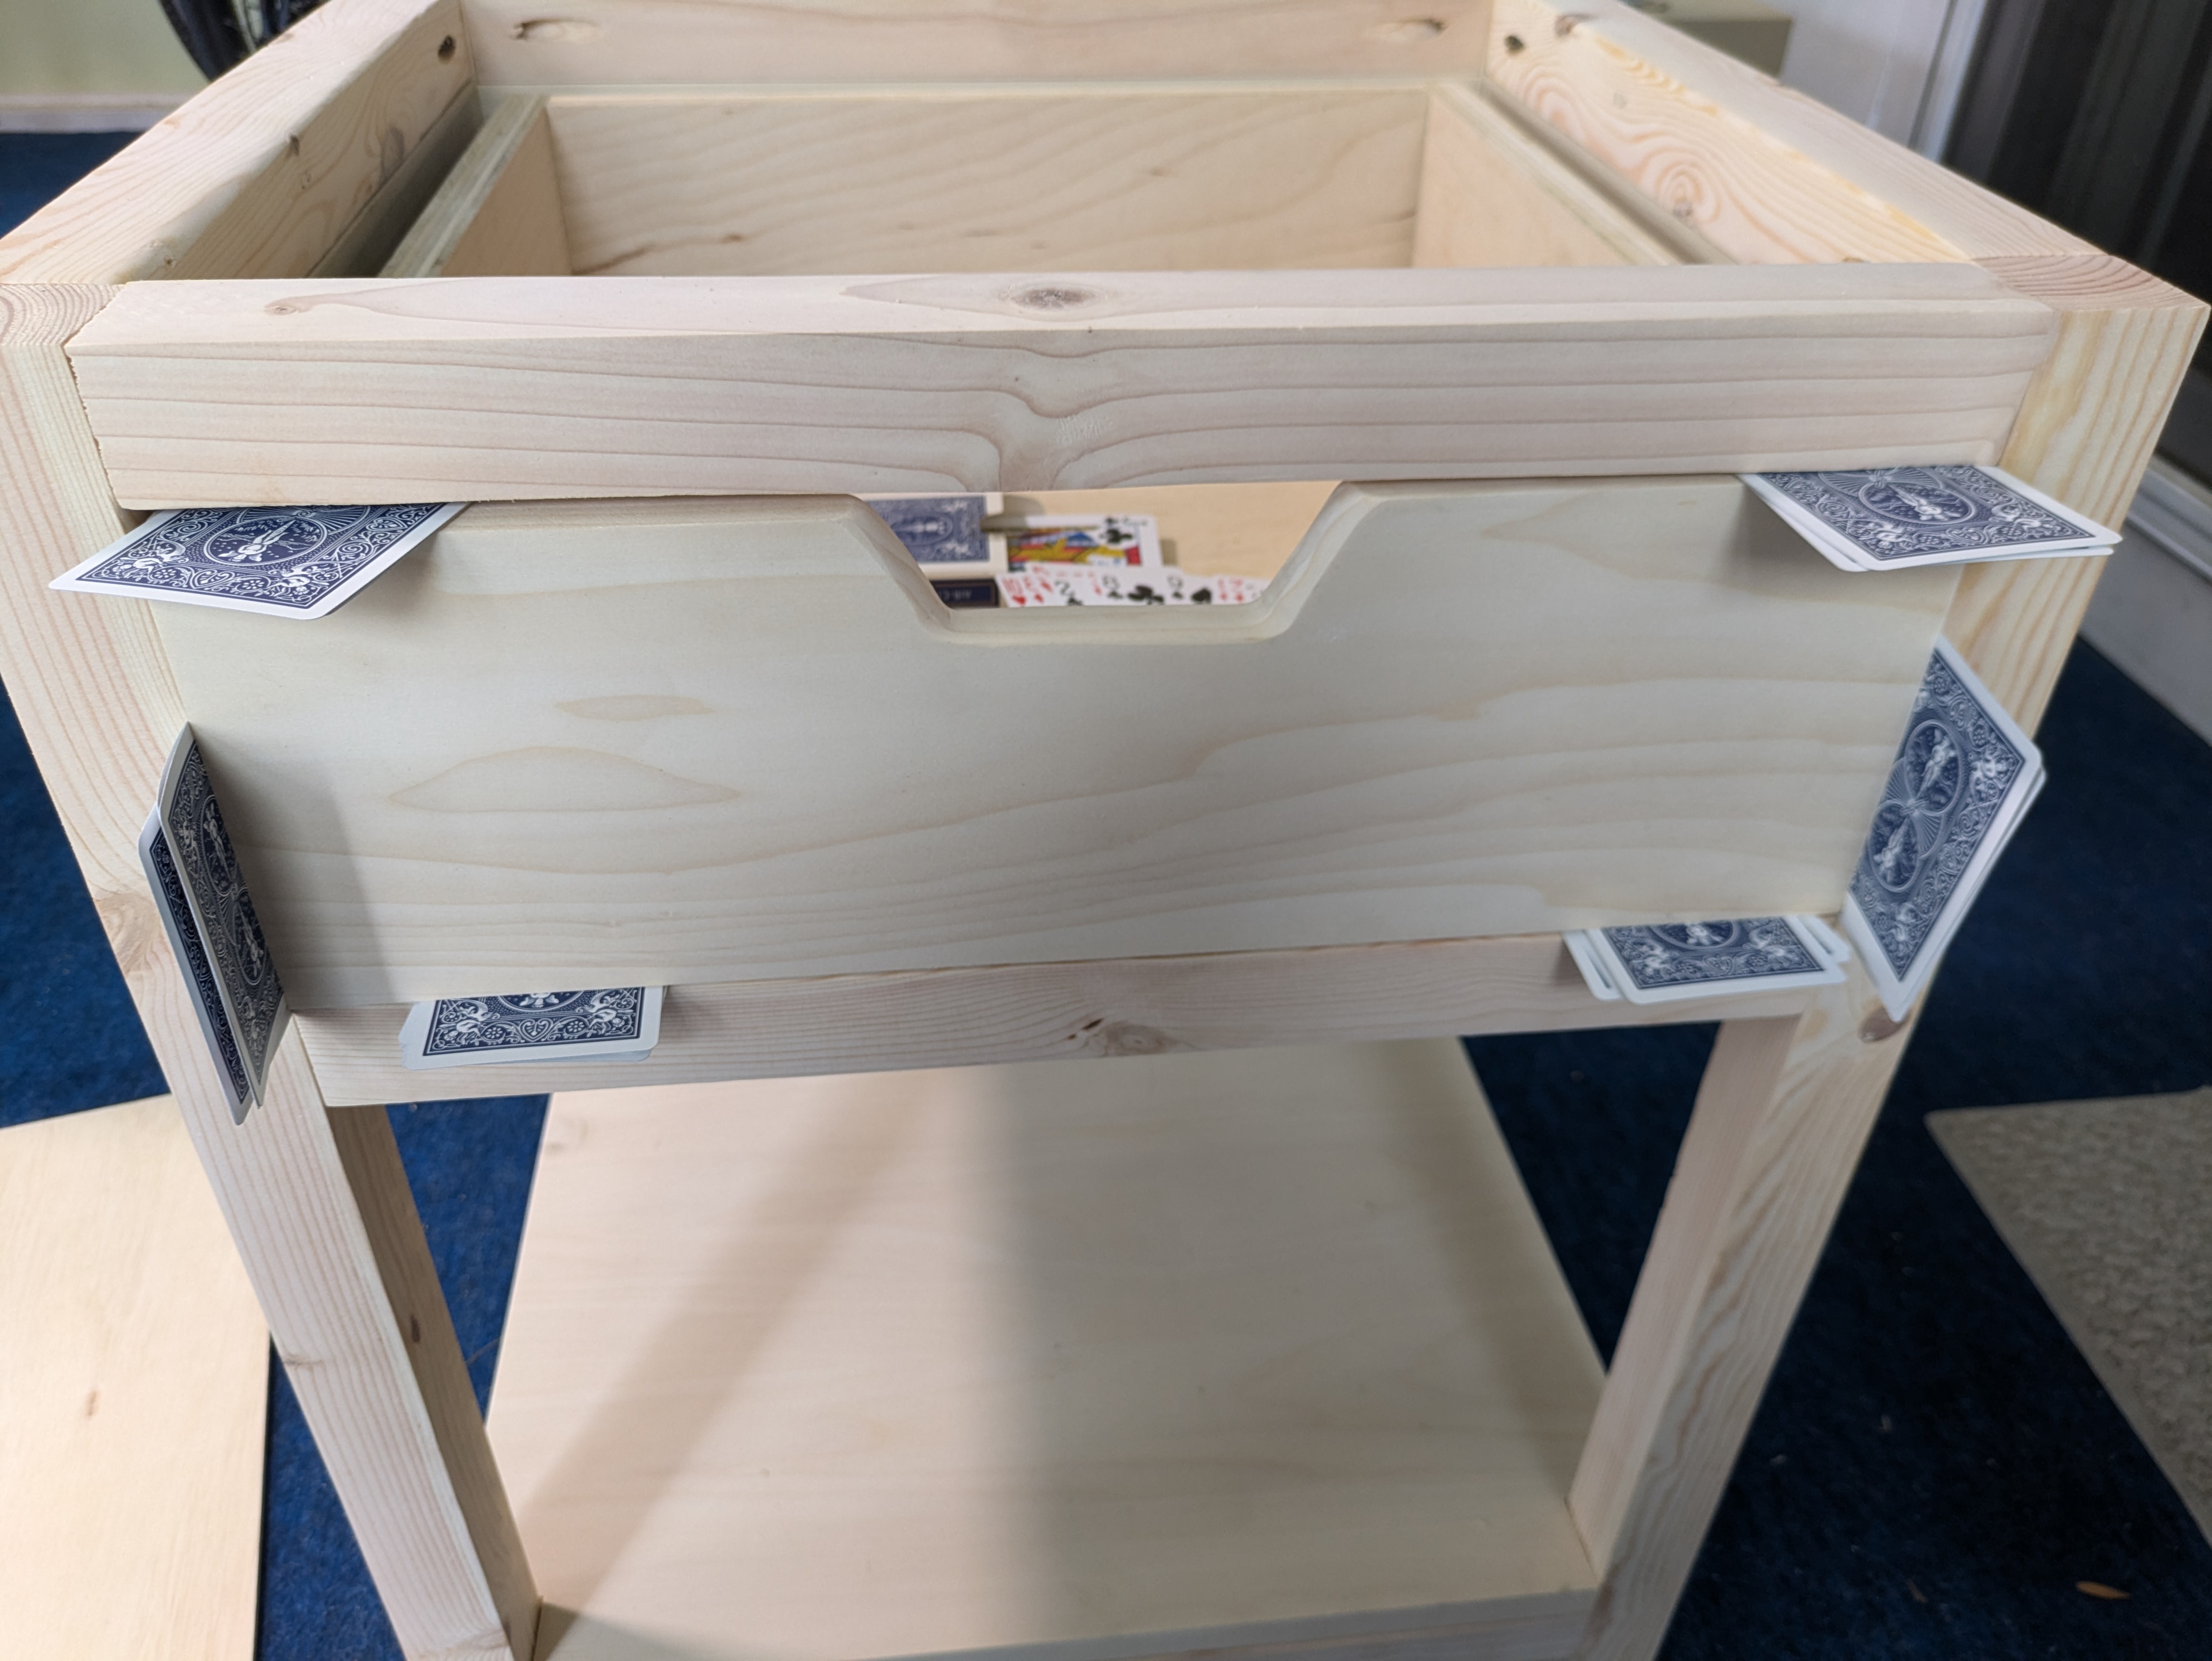
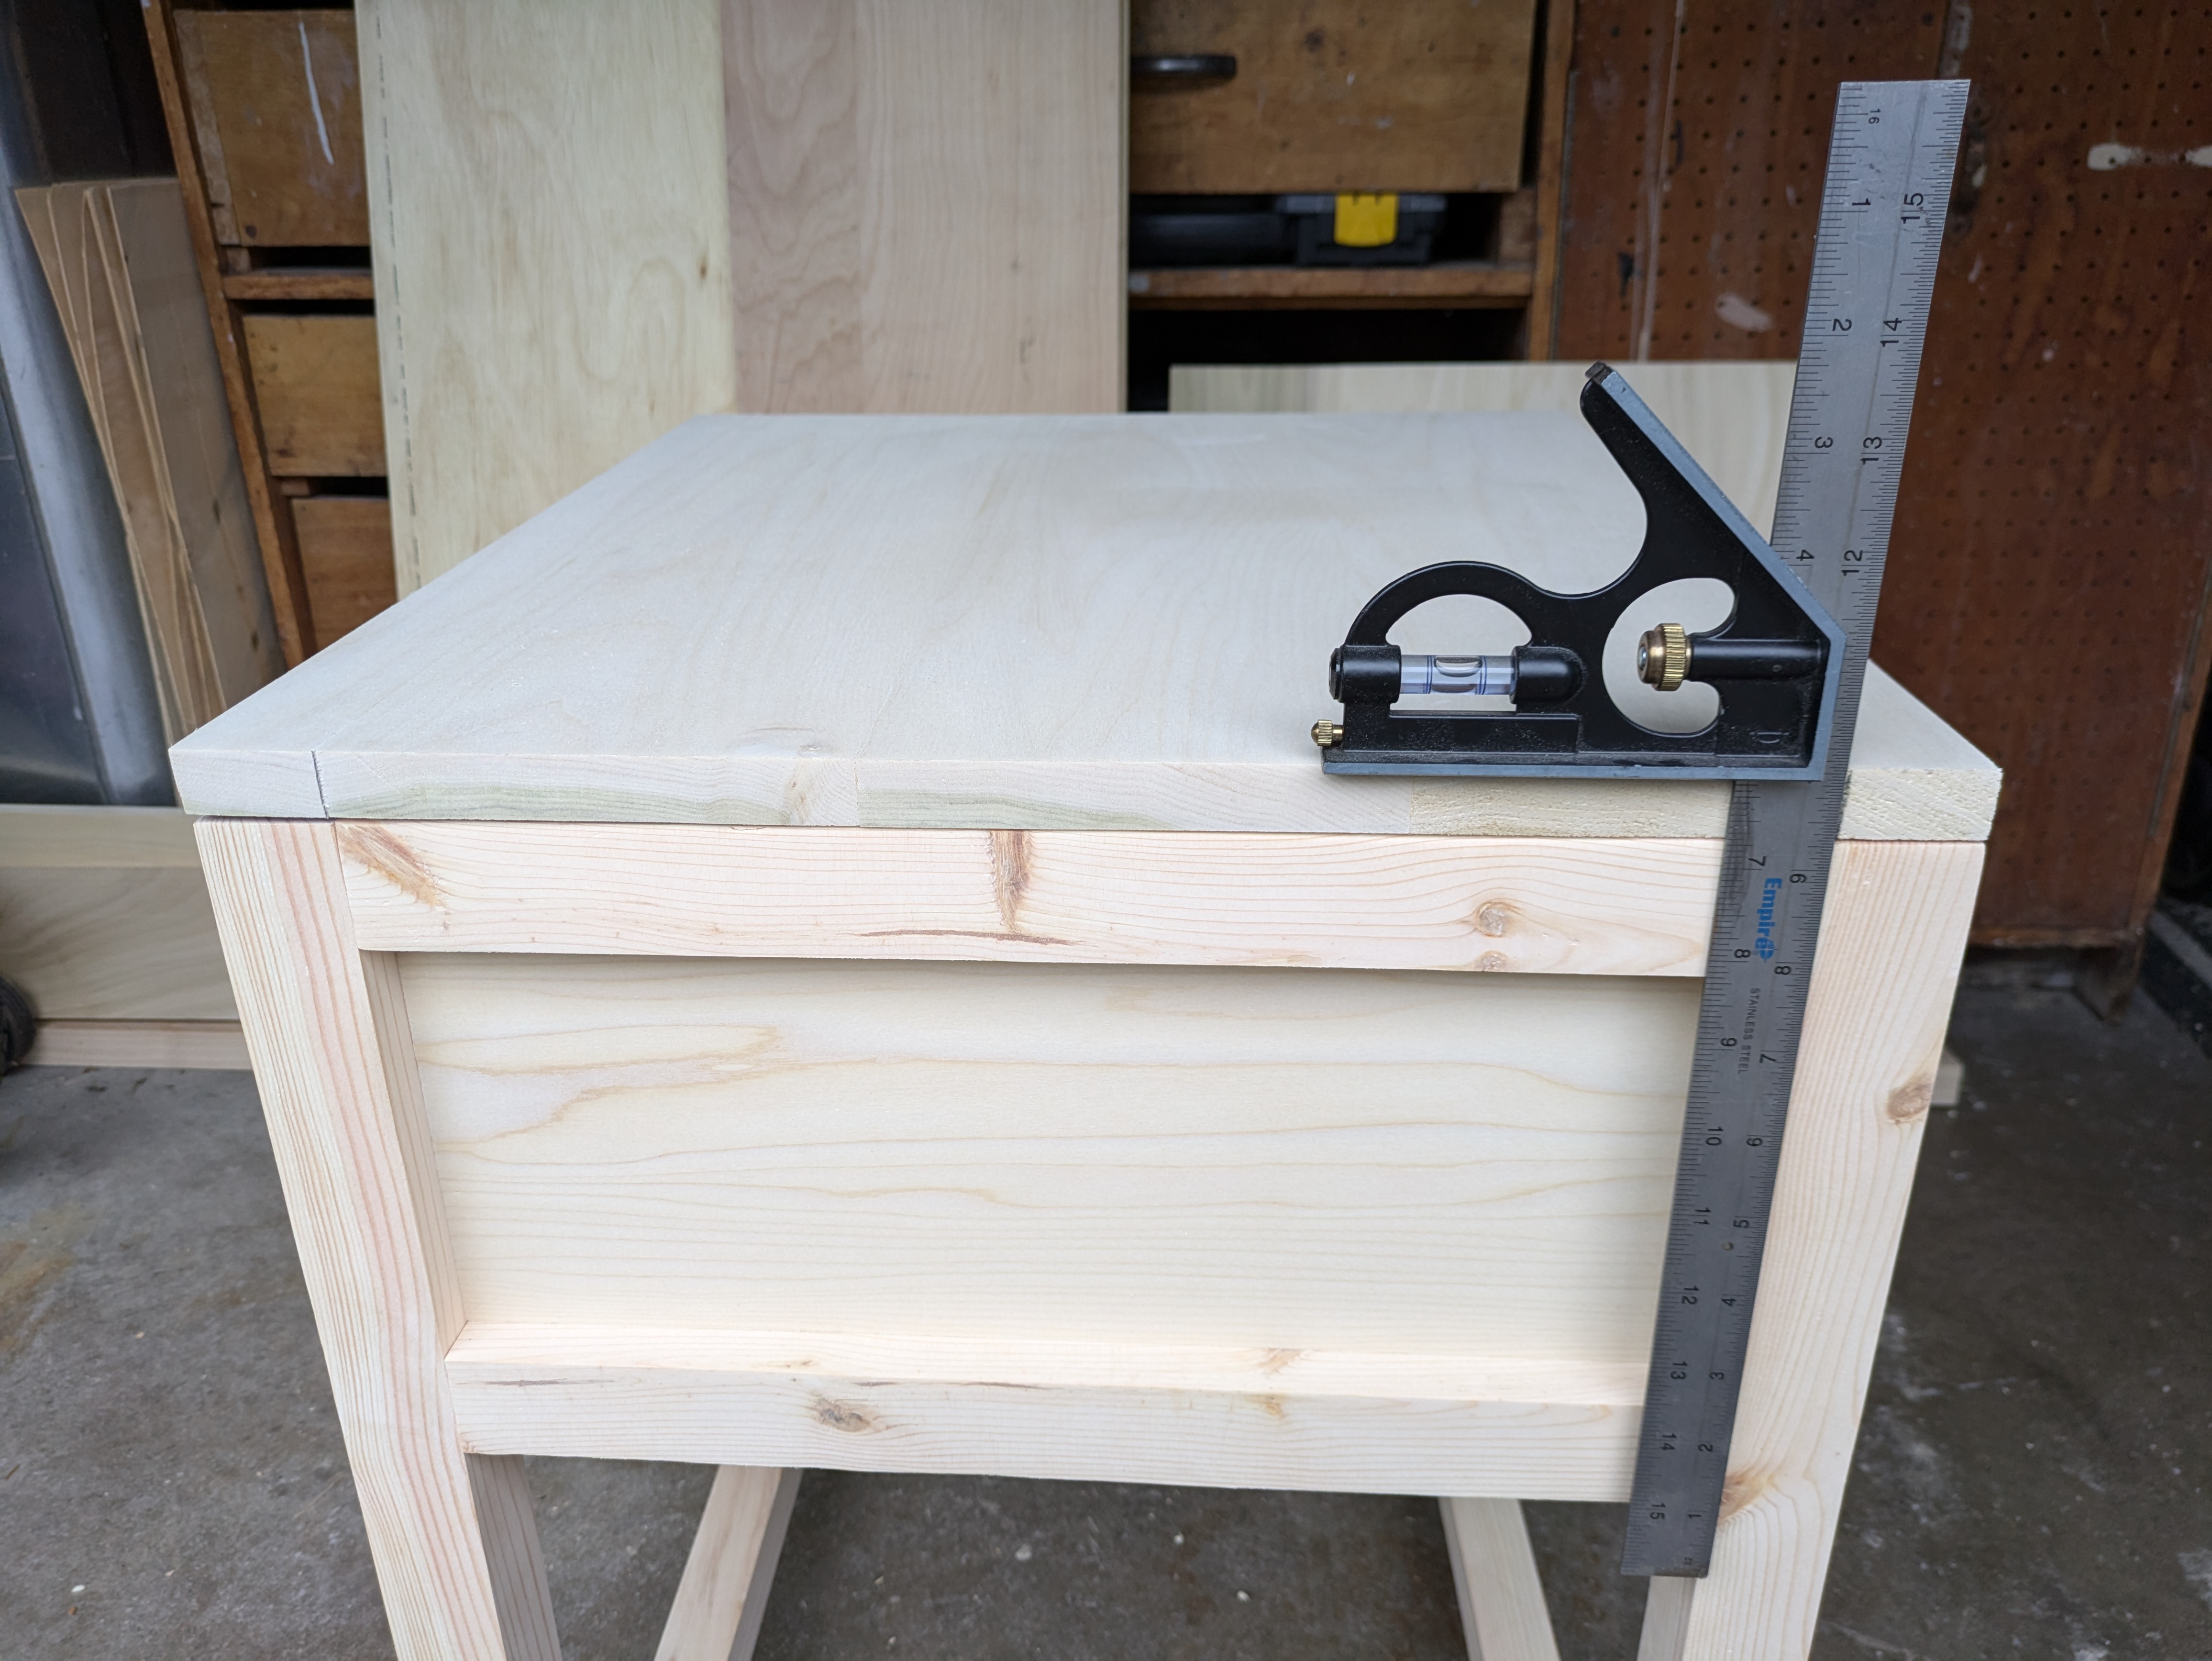
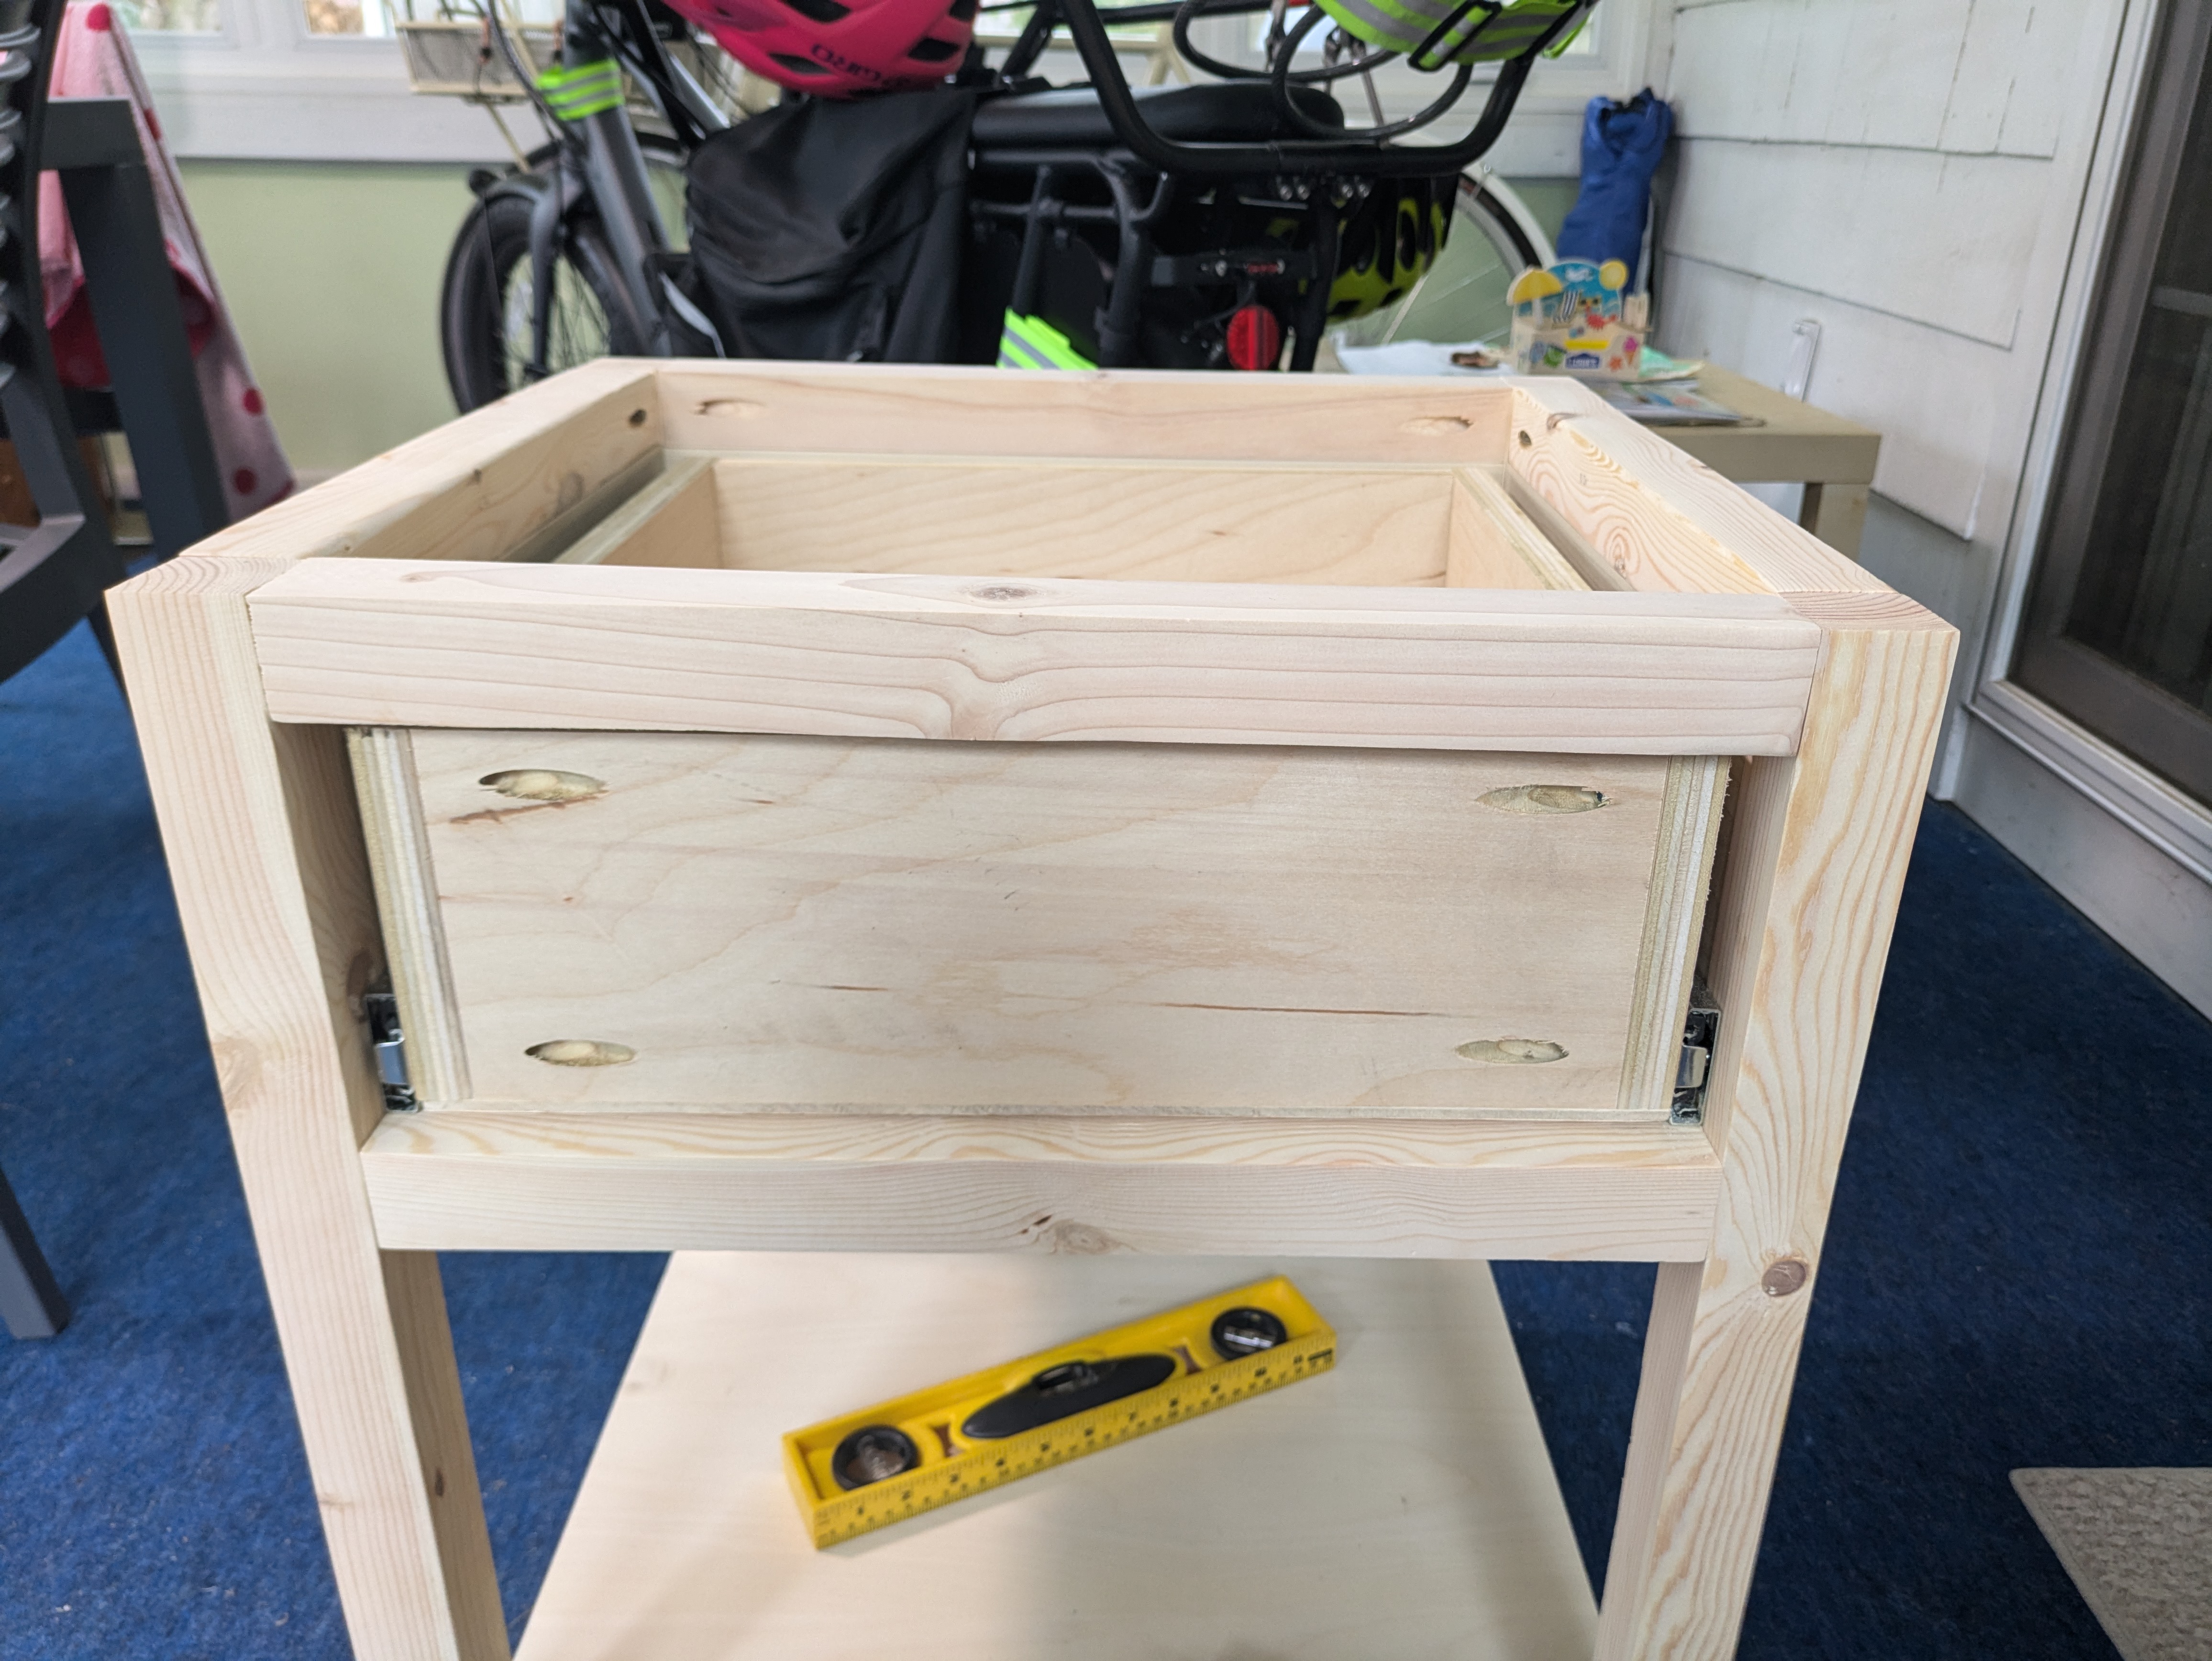
Table Top Install 🔗
I have these figure 8 desktop connectors. It allows for some wood movement, but also just…gives you a way to connect them. I need to bury them inside the supports so everything is flush. So I grab a forstner bit in my drill and drill out a hole for them.
I screw them in so they’re ready for the top to go on them. I want a consistent “reveal” (distance from the edge of the table top to the body of the table) so I measure that across all dimensions. Then I realize it’s going to be a lot easier to screw everything in if I flip it over, so I do it again, and then screw the top in.
With that, we’re done building. Of course, I’m still not done. But, we’ve done the fun part.
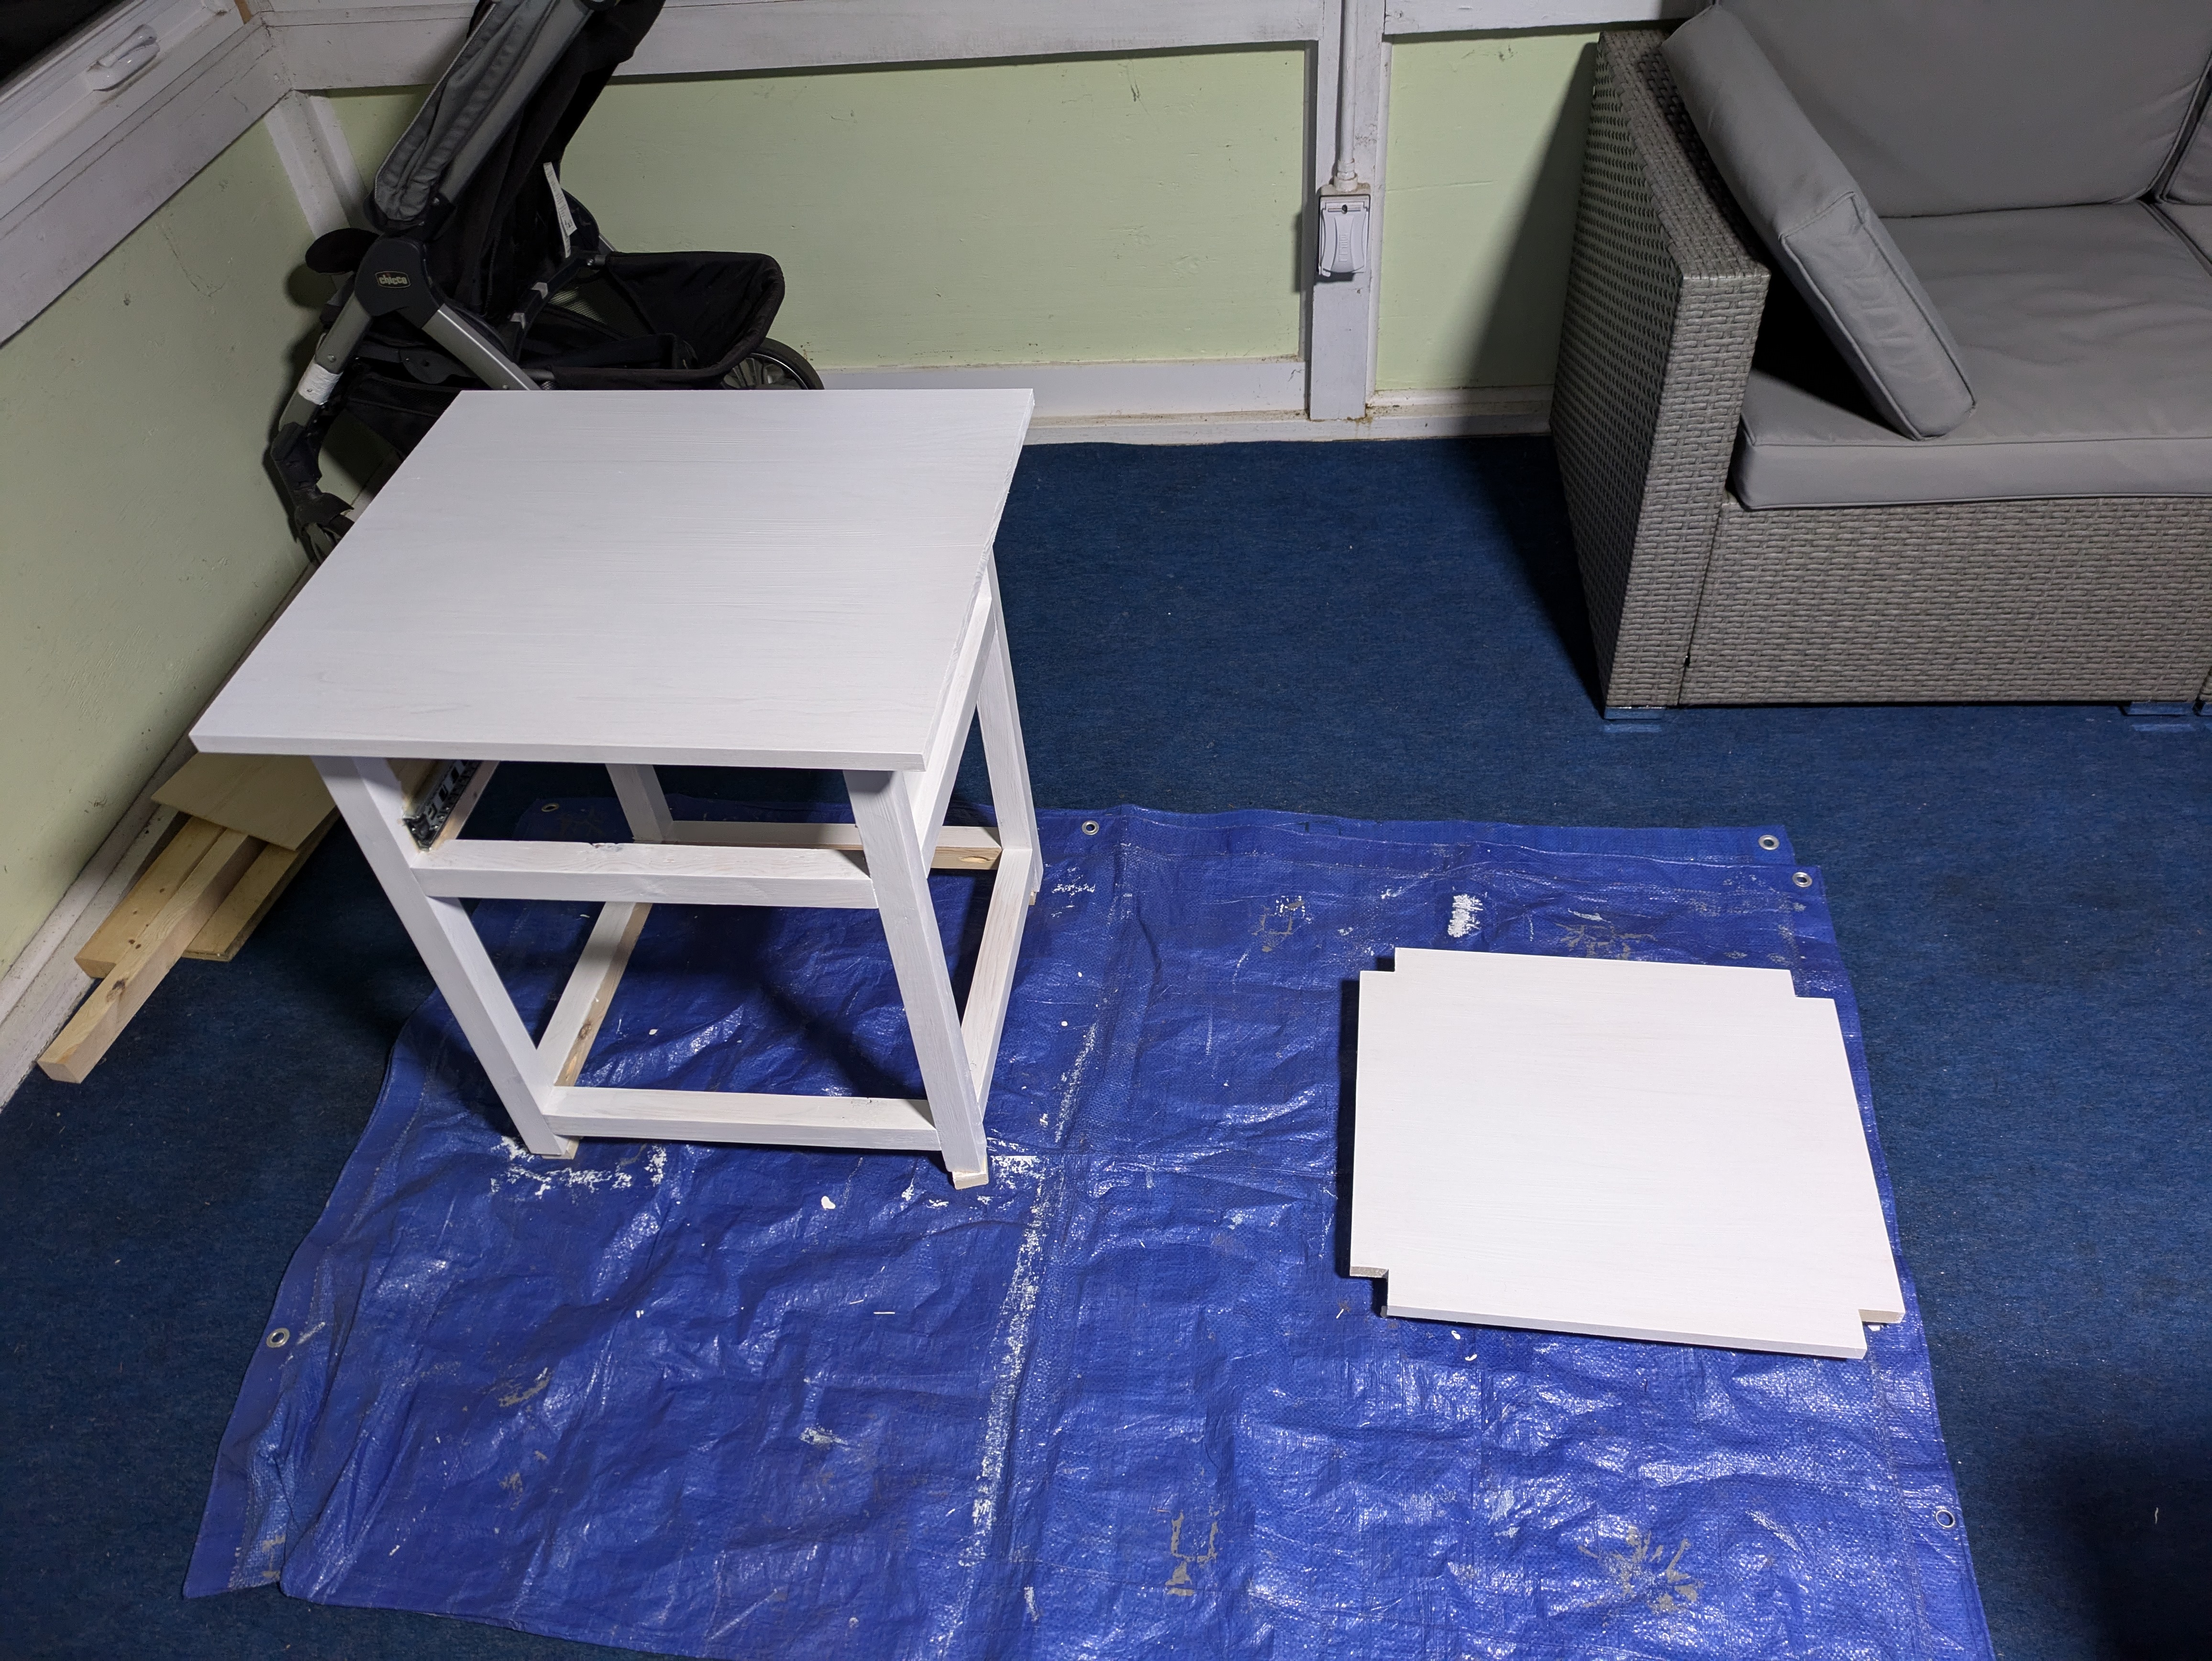
Paint and Finish 🔗
I hate painting. It’s detail work I don’t have the patience for and I’m also just not good at it. I apply two coats of white paint and primer to all surfaces and one more coat of paint just on the top. My design consultant (my daughter) is not pleased with this color choice. She wants to go with “rainbow”. But, we have a gallon of spare white paint and have zero “rainbow” paint hanging around. So, white it is.
I use polycrilic to finish the drawer face and the drawer itself. I also apply that to the table top after the paint is dry for more protection.
Deployment 🔗
There’s only one thing that’s left to do - place it in my office.
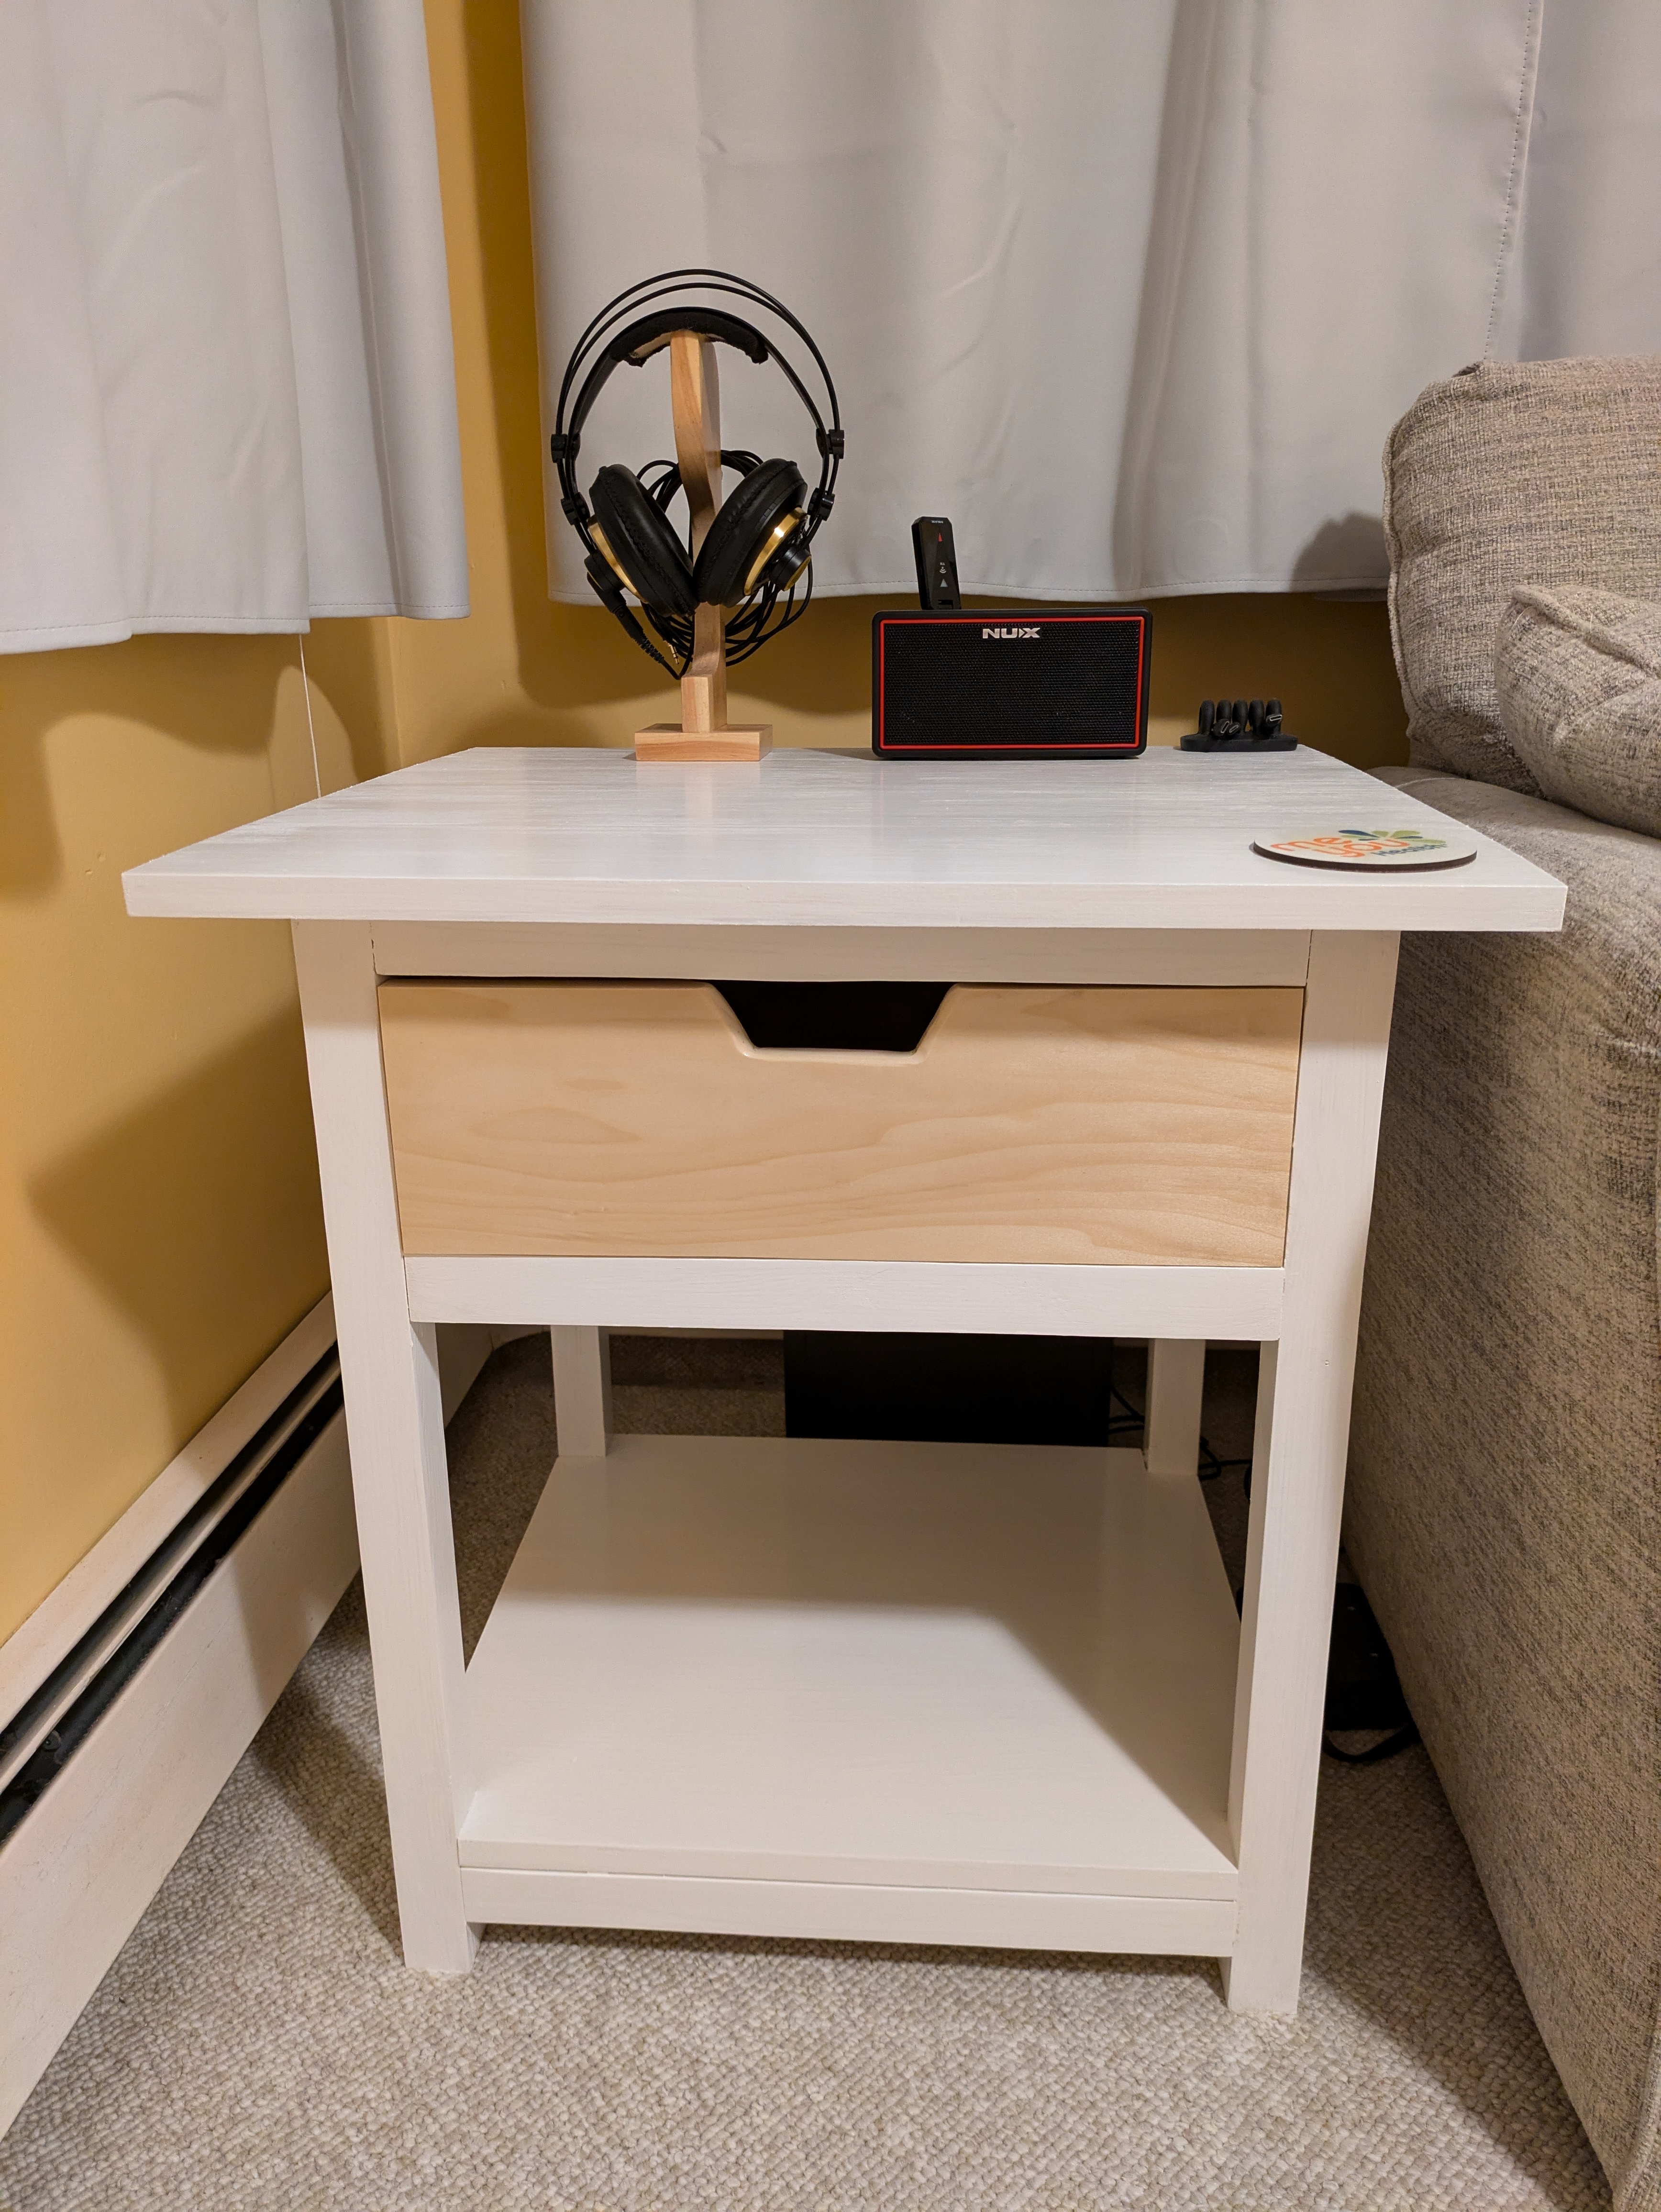
It’s not perfect, and neither am I. If we’re on a video call in the near future and the table catches your eye, now you know where it came from. In extreme detail. Just in case you’ve ever wanted to know all the steps I’ve taken to build something.